
September 21, 2025 - Ts vs Humpbacks, and Fader's rescue
As our two vessels left the Nanaimo Harbour on the morning of September 21st, we had no idea what was in store for us, but boy, did it turn into an interesting day! It started with our vessels heading into the Strait of Georgia, the body of water that separates the mainland of BC from the Southern portion of Vancouver Island and the Southern Gulf Islands. We headed north in the Strait, towards a group of Islands off of Nanoose Bay that we’ve had lots of success with sightings at this year. Today was no different as we spotted some splashing and blows off in the distance. We had found whales!
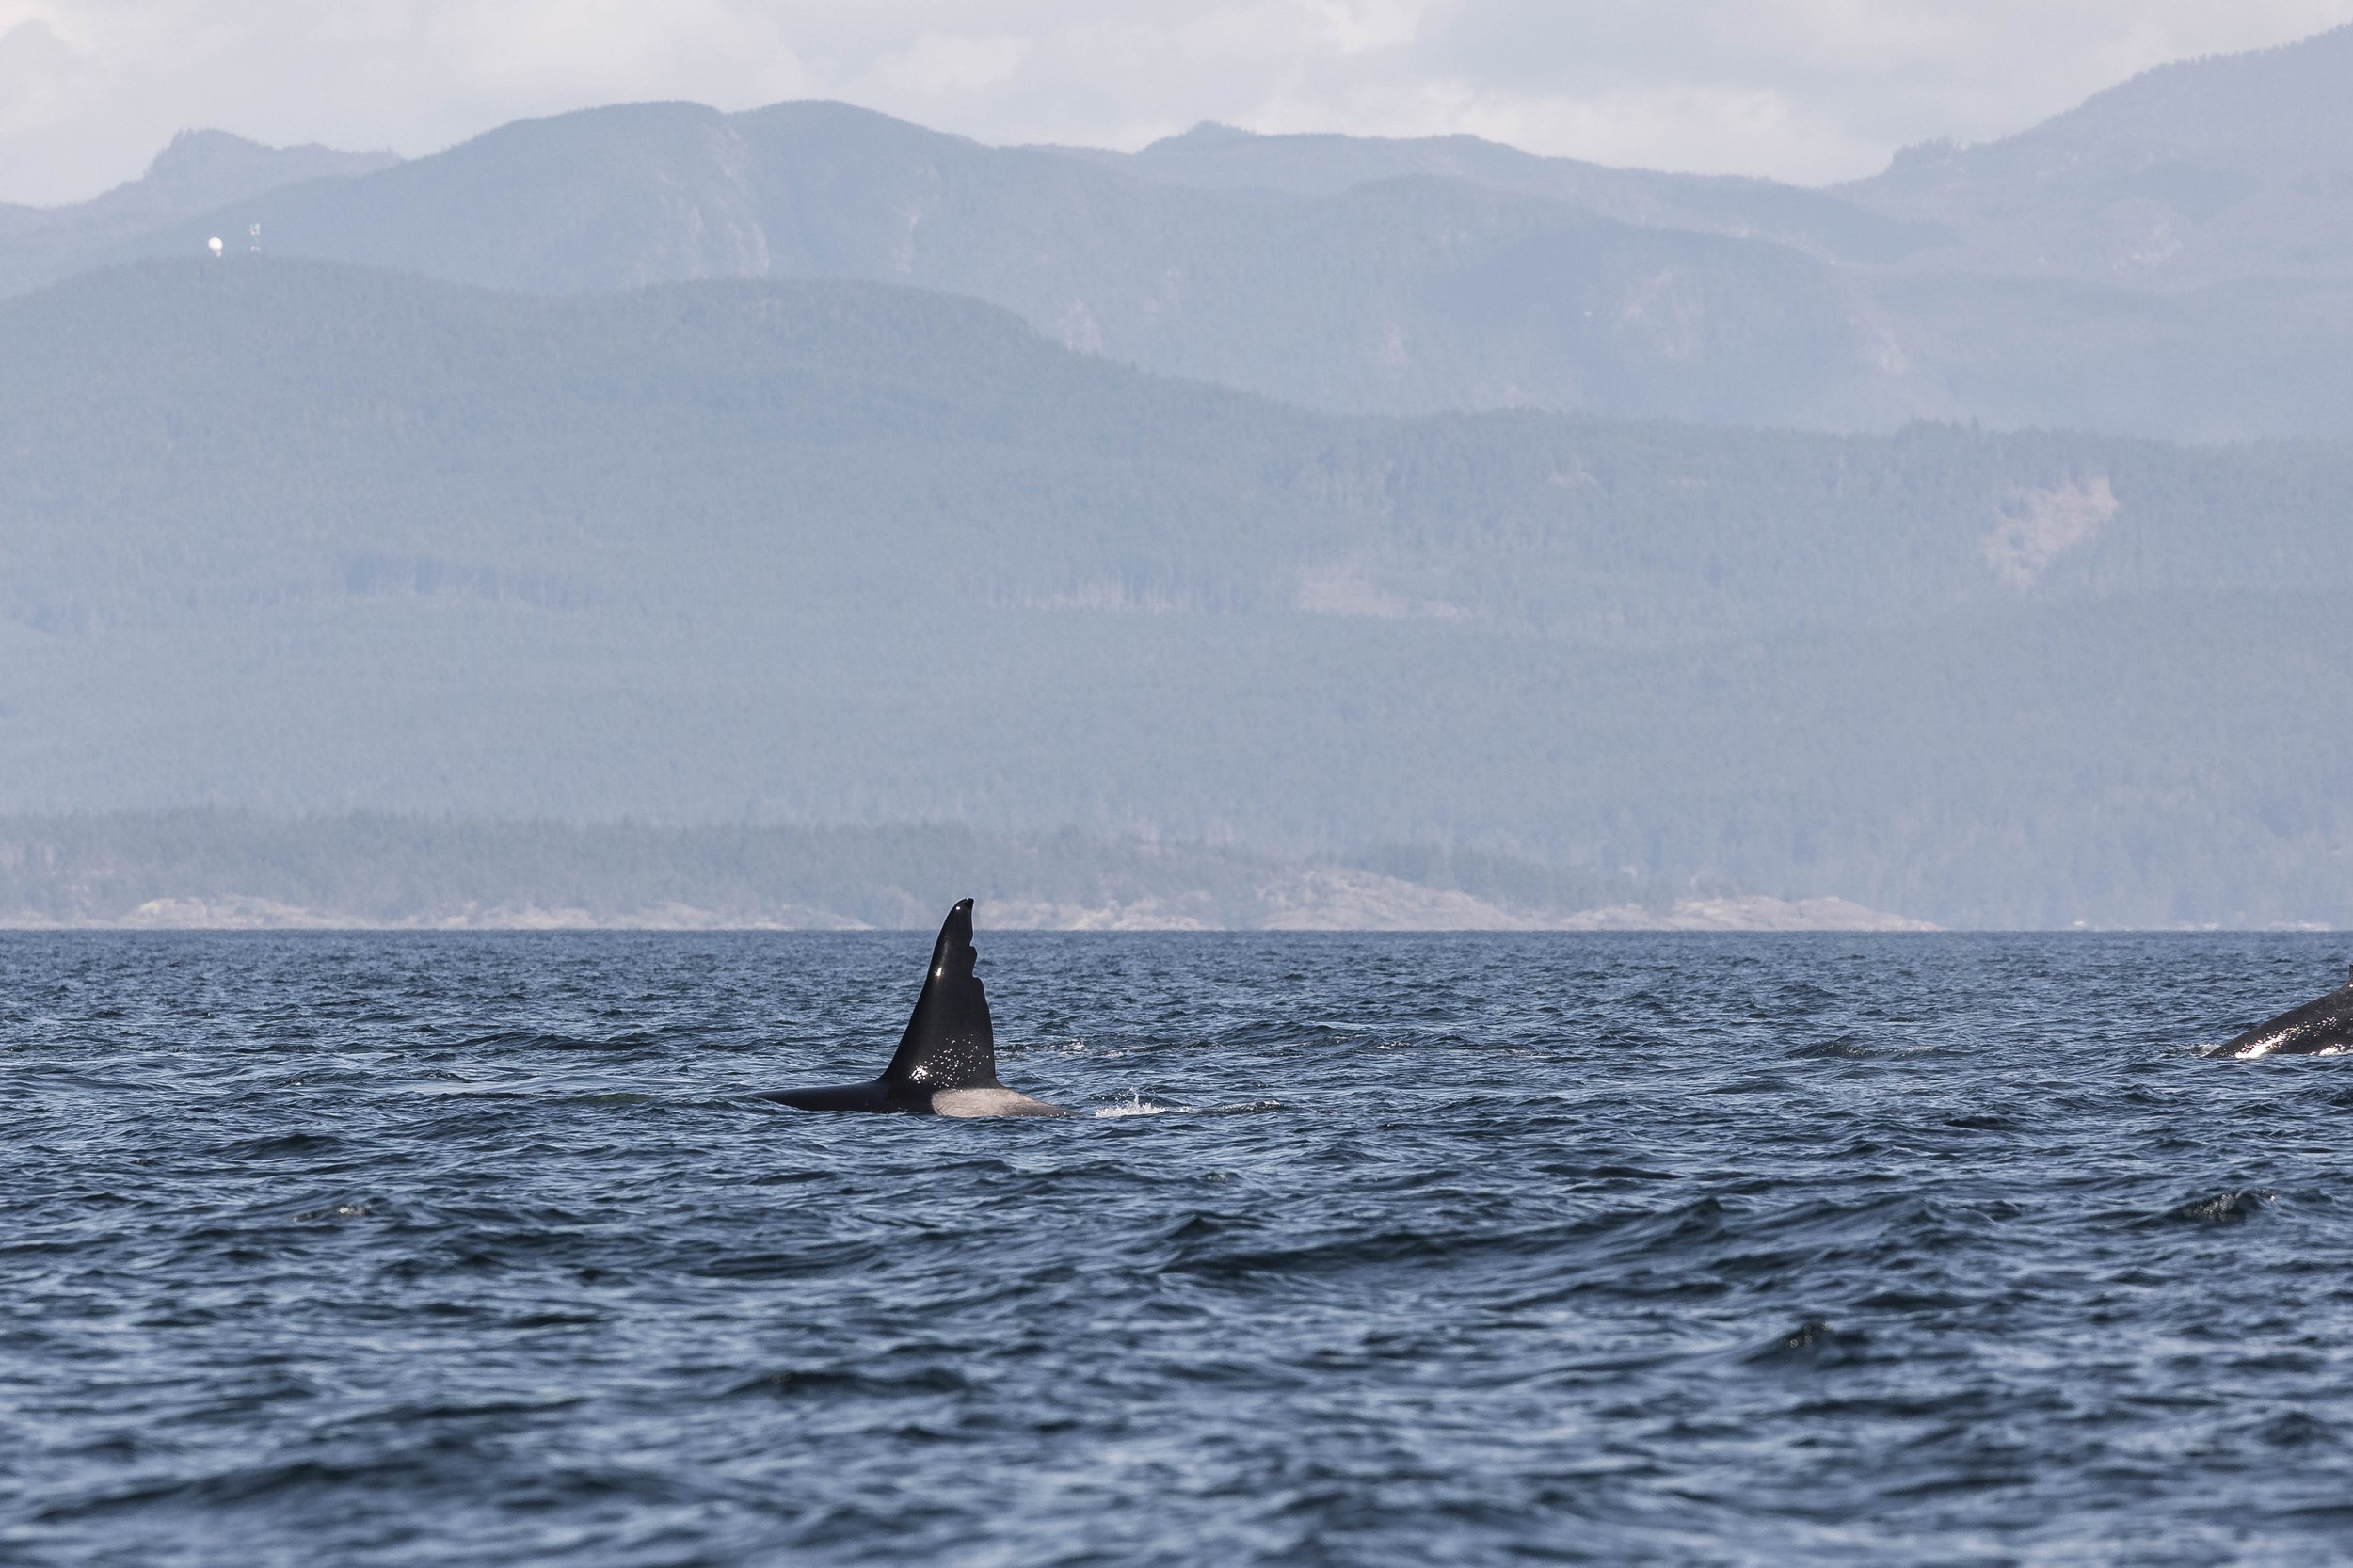
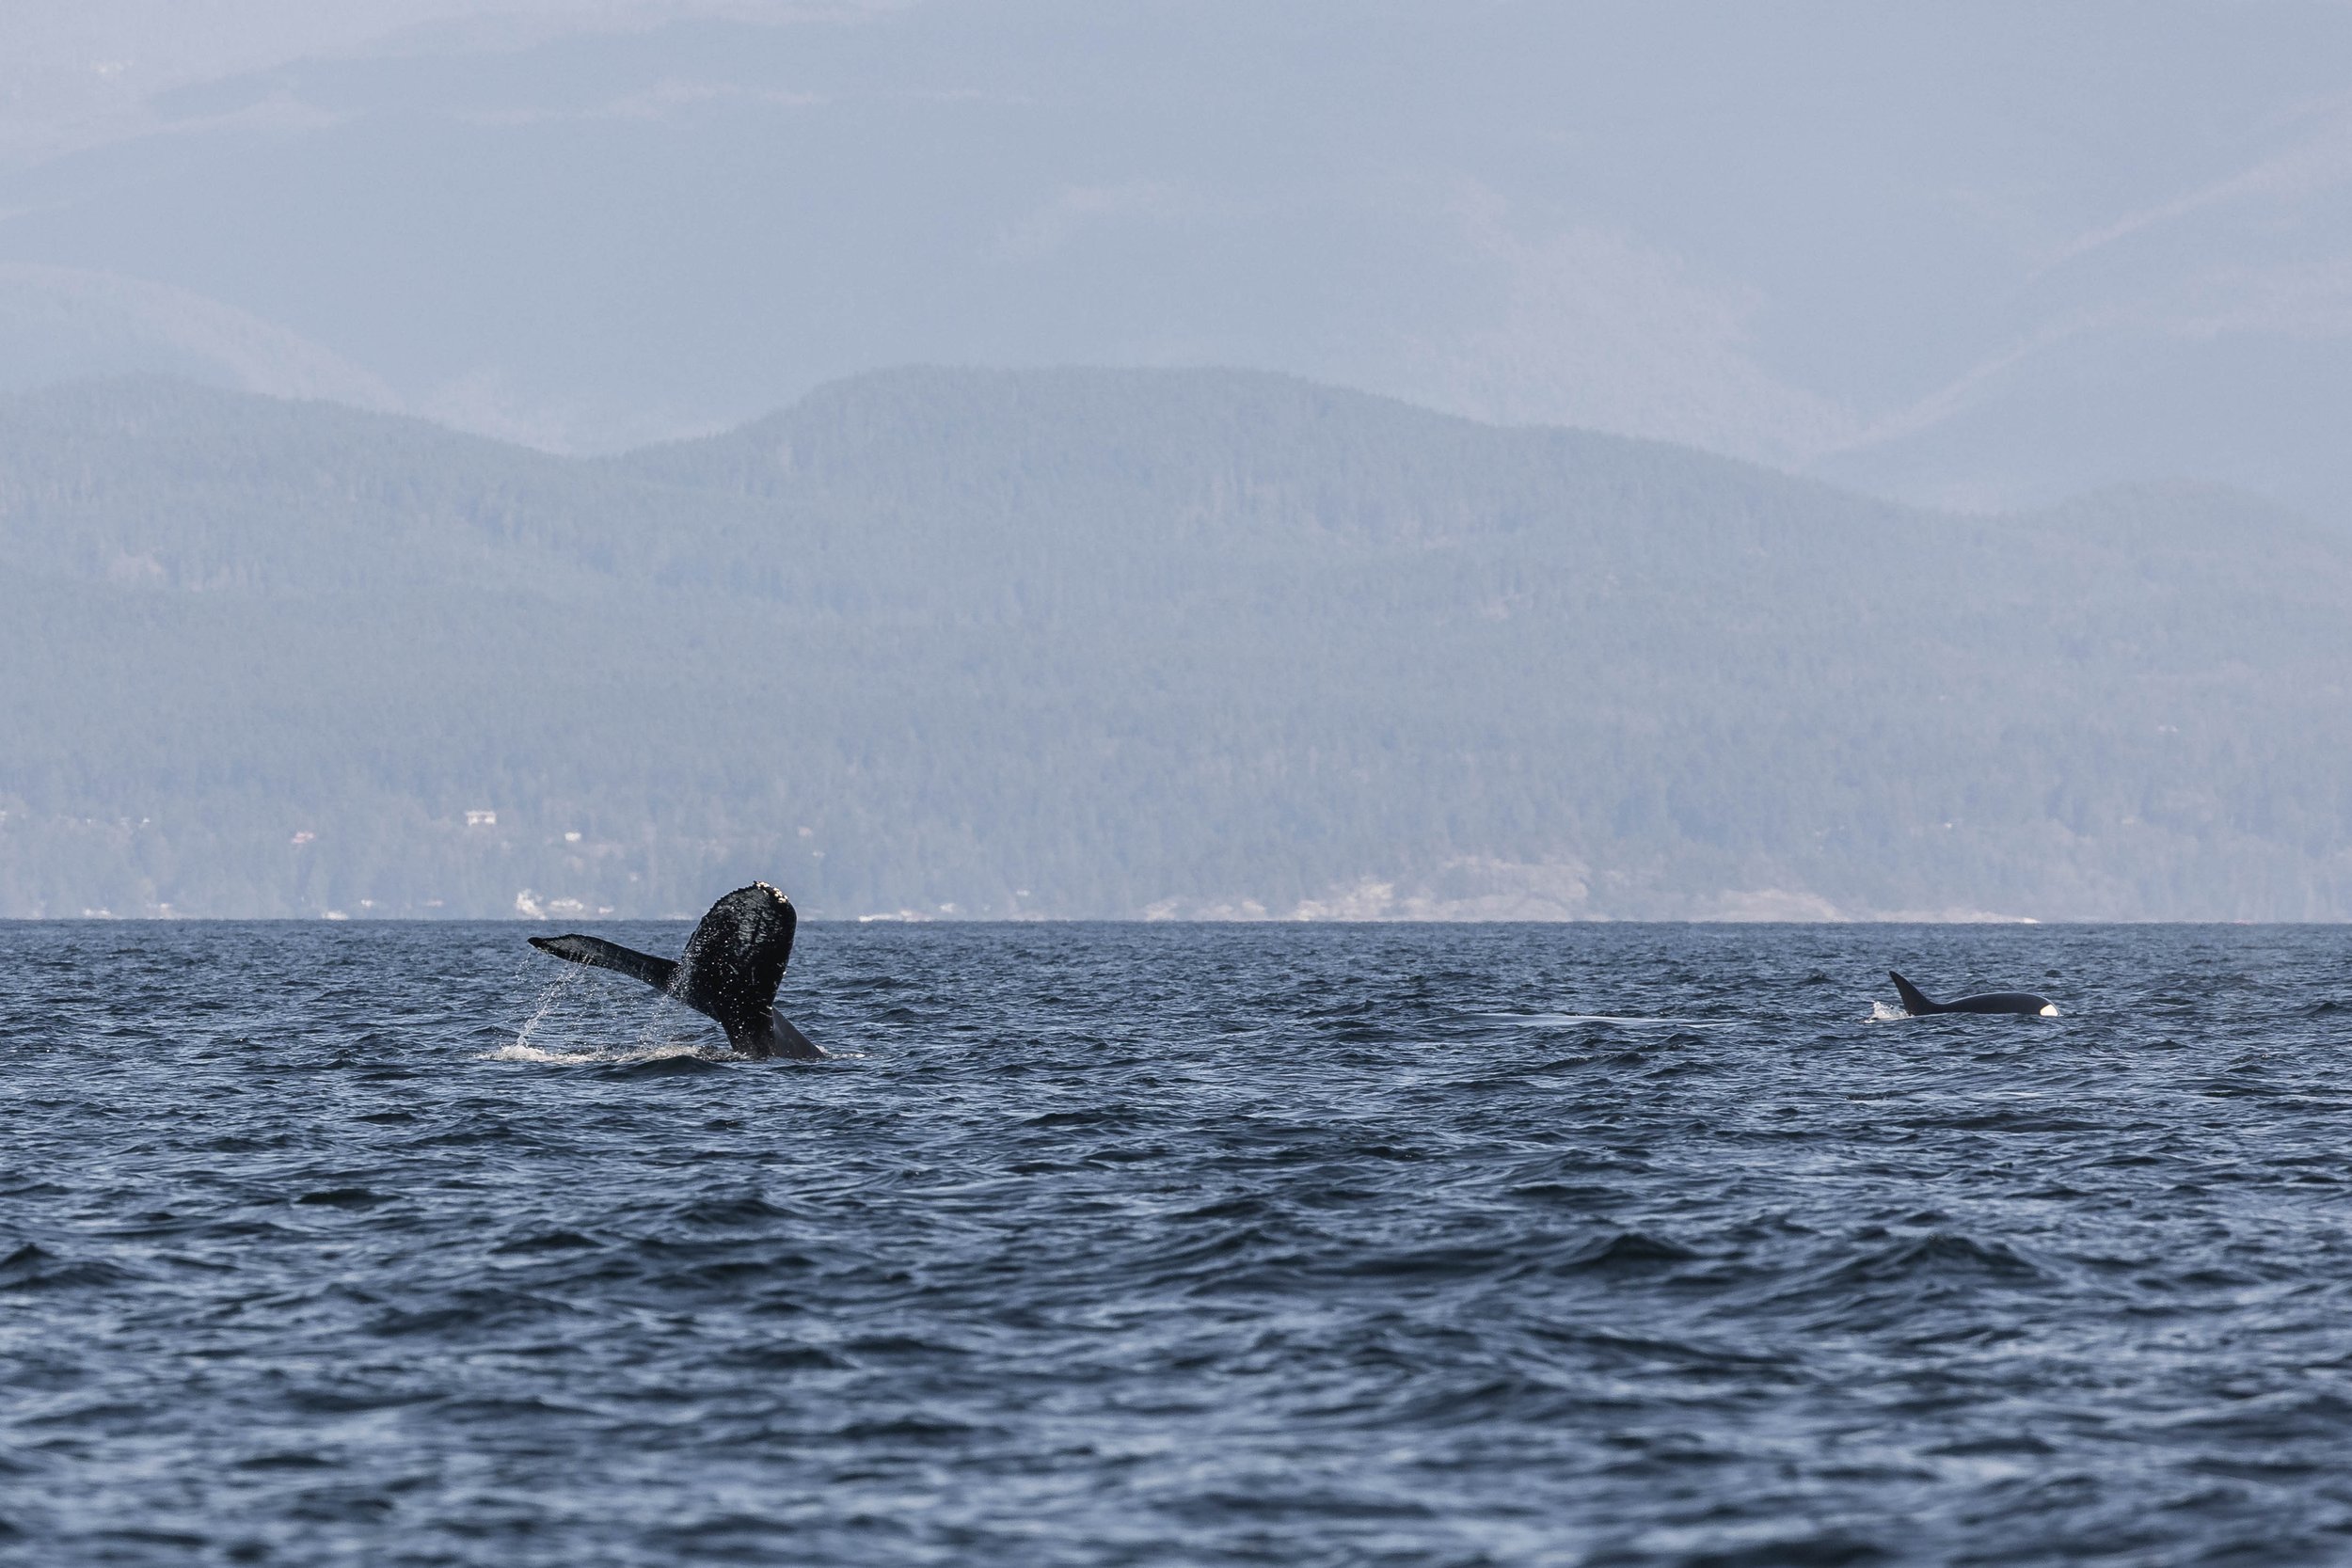
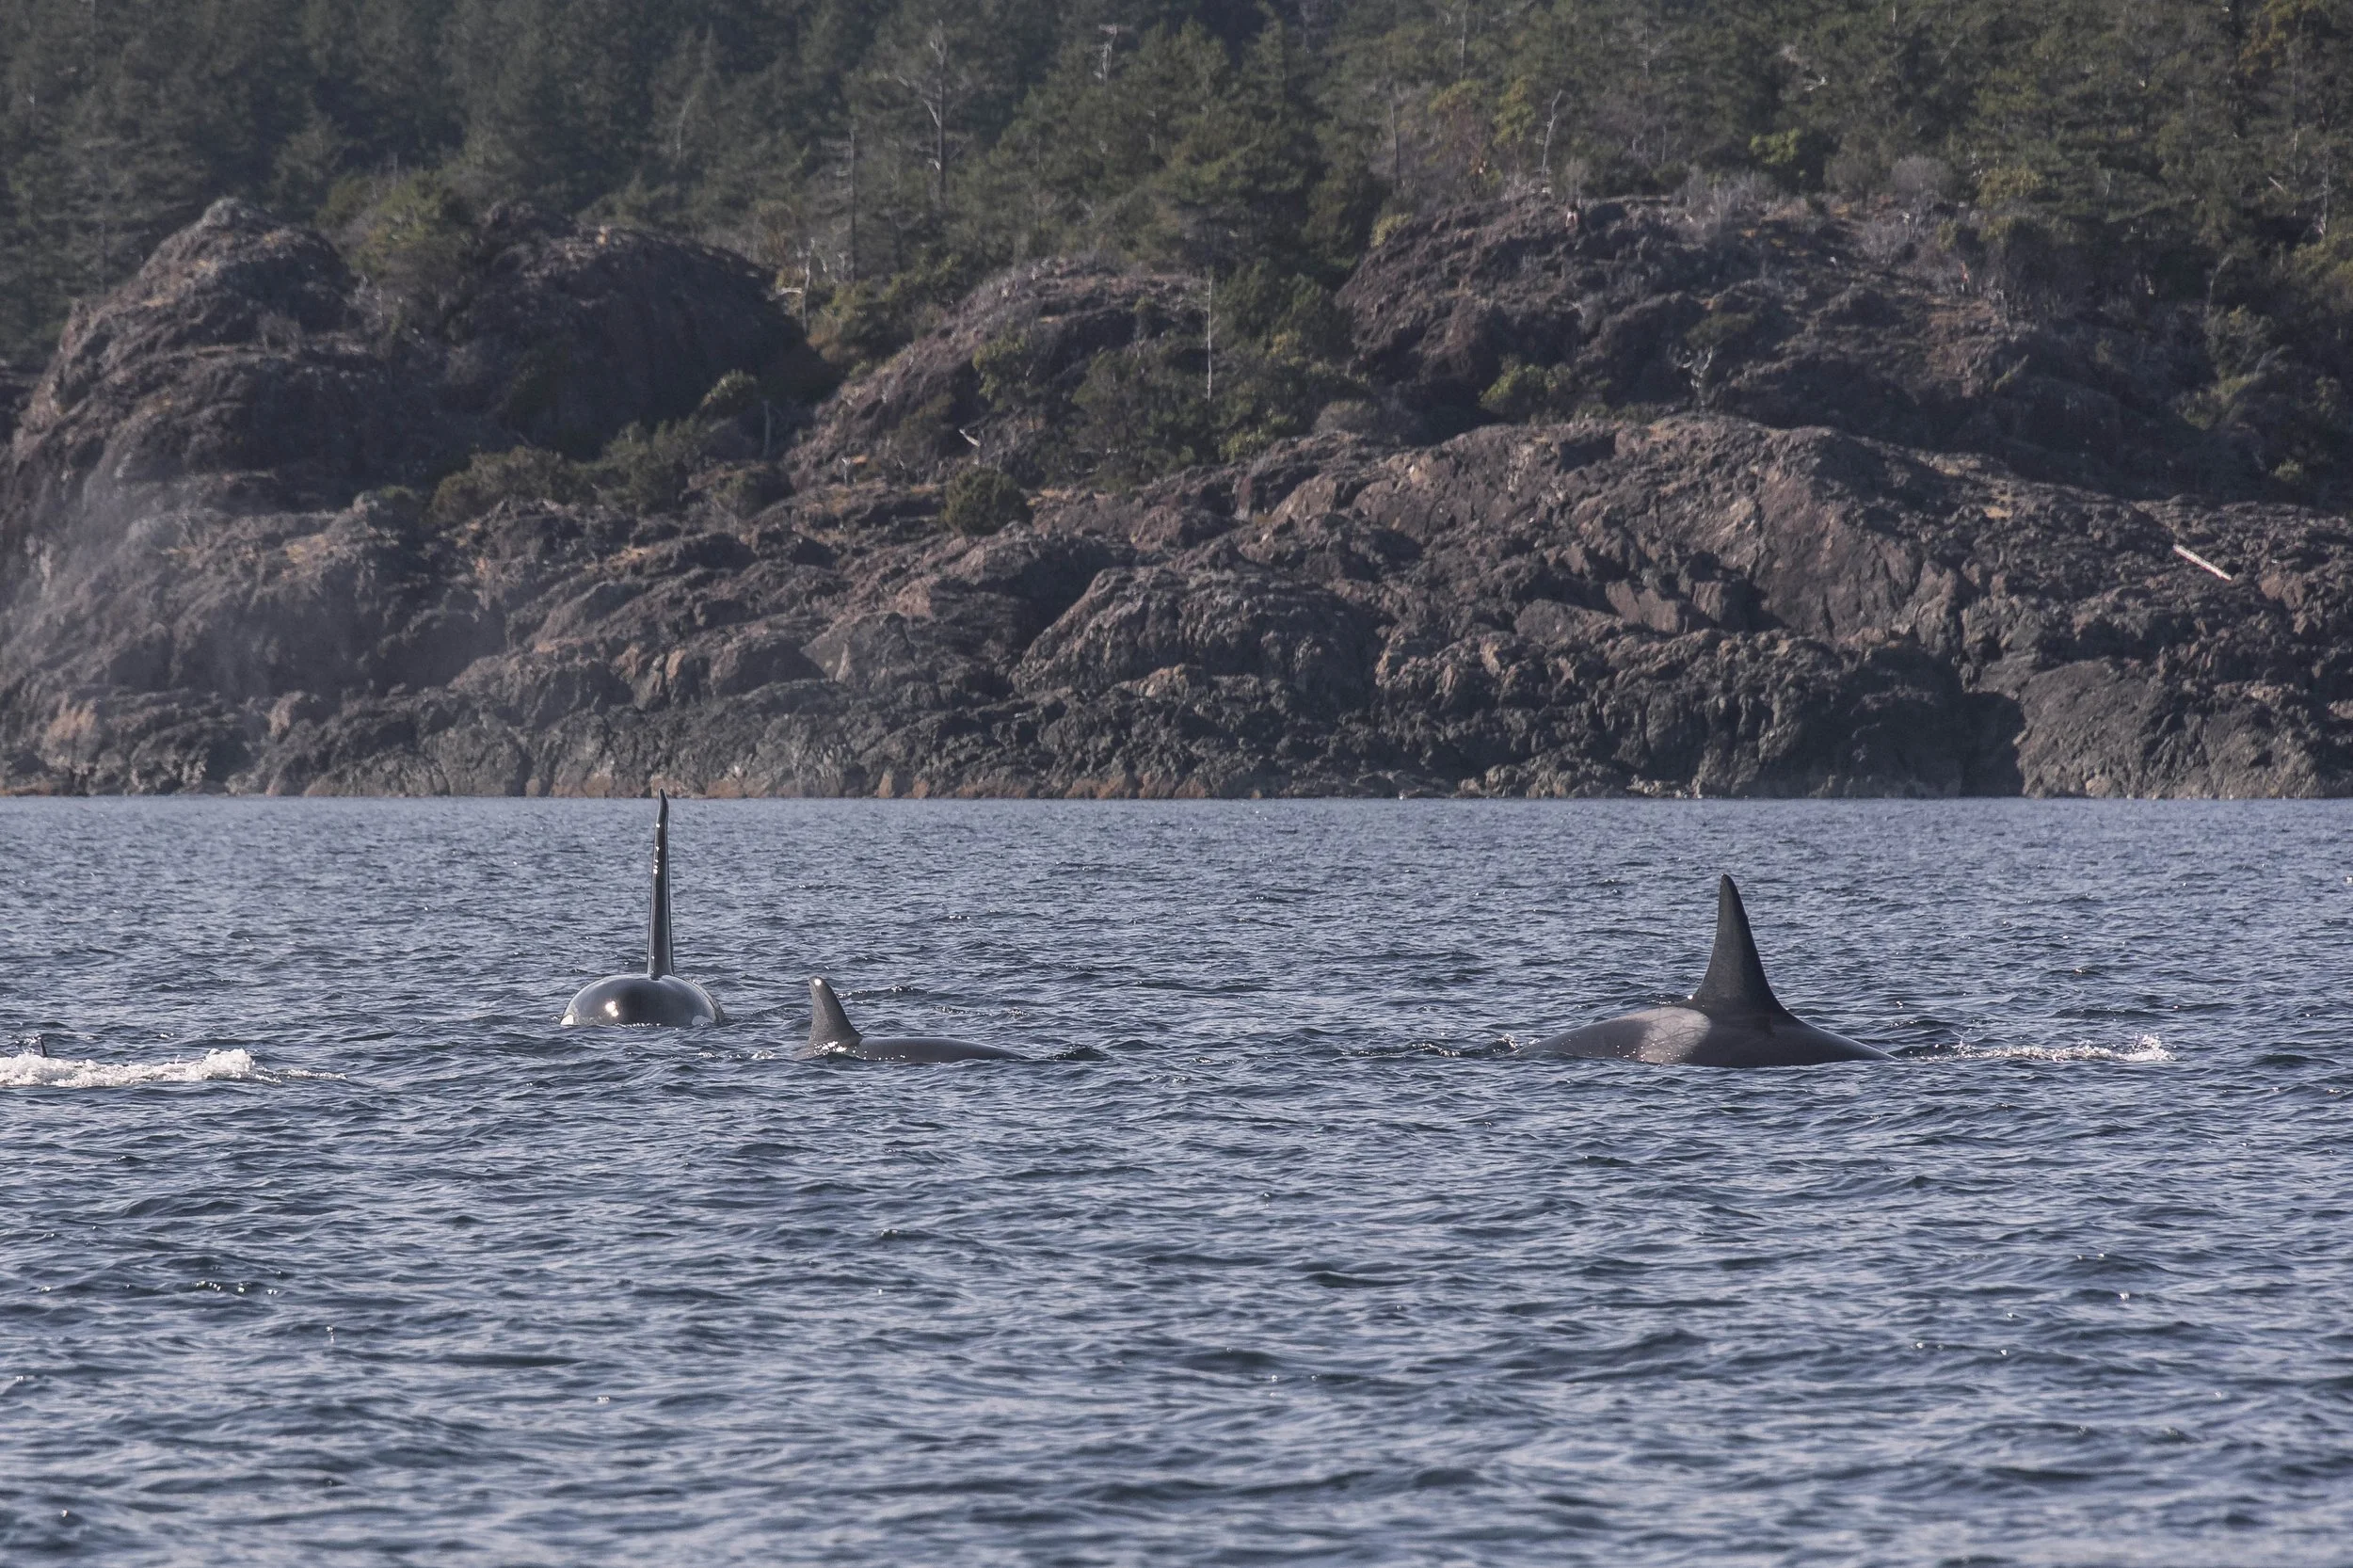
As we were approaching, it was an interesting sight to behold, as we saw both the tall, bushy blows indicating there were humpbacks present, as well as the black dorsal fins of orca in the mix. It seems that we stumbled across an interspecific interaction unfolding!
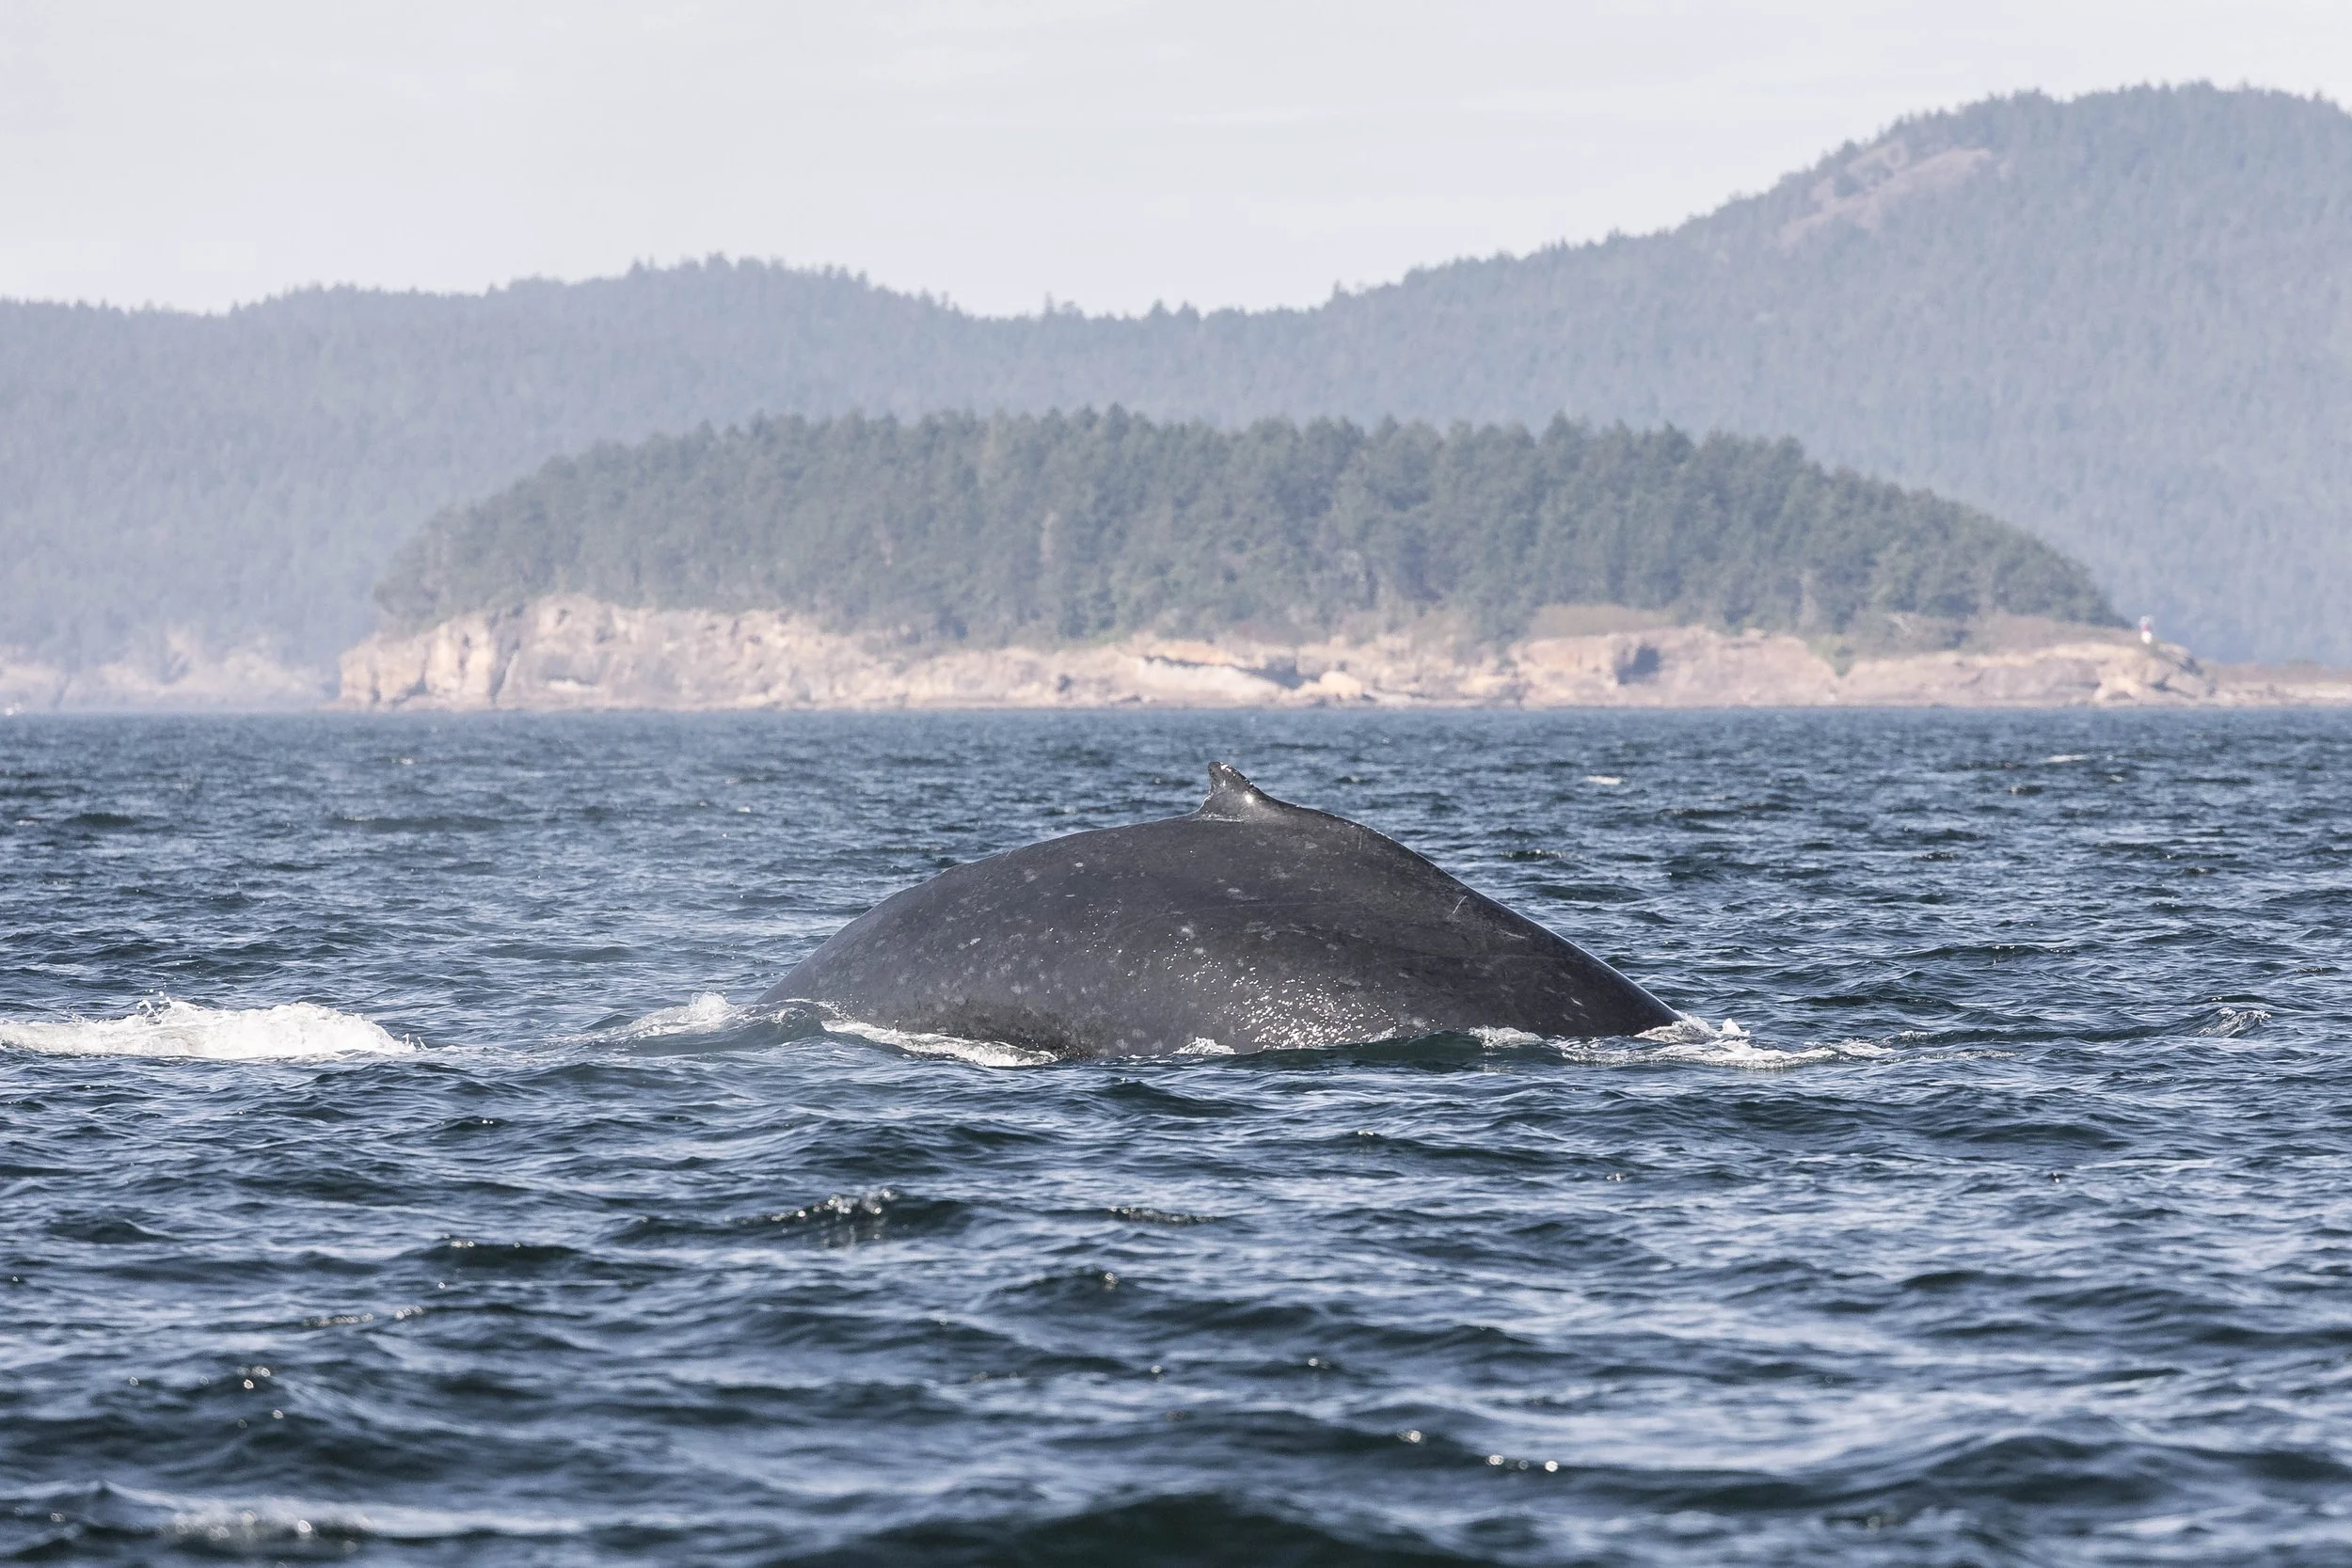
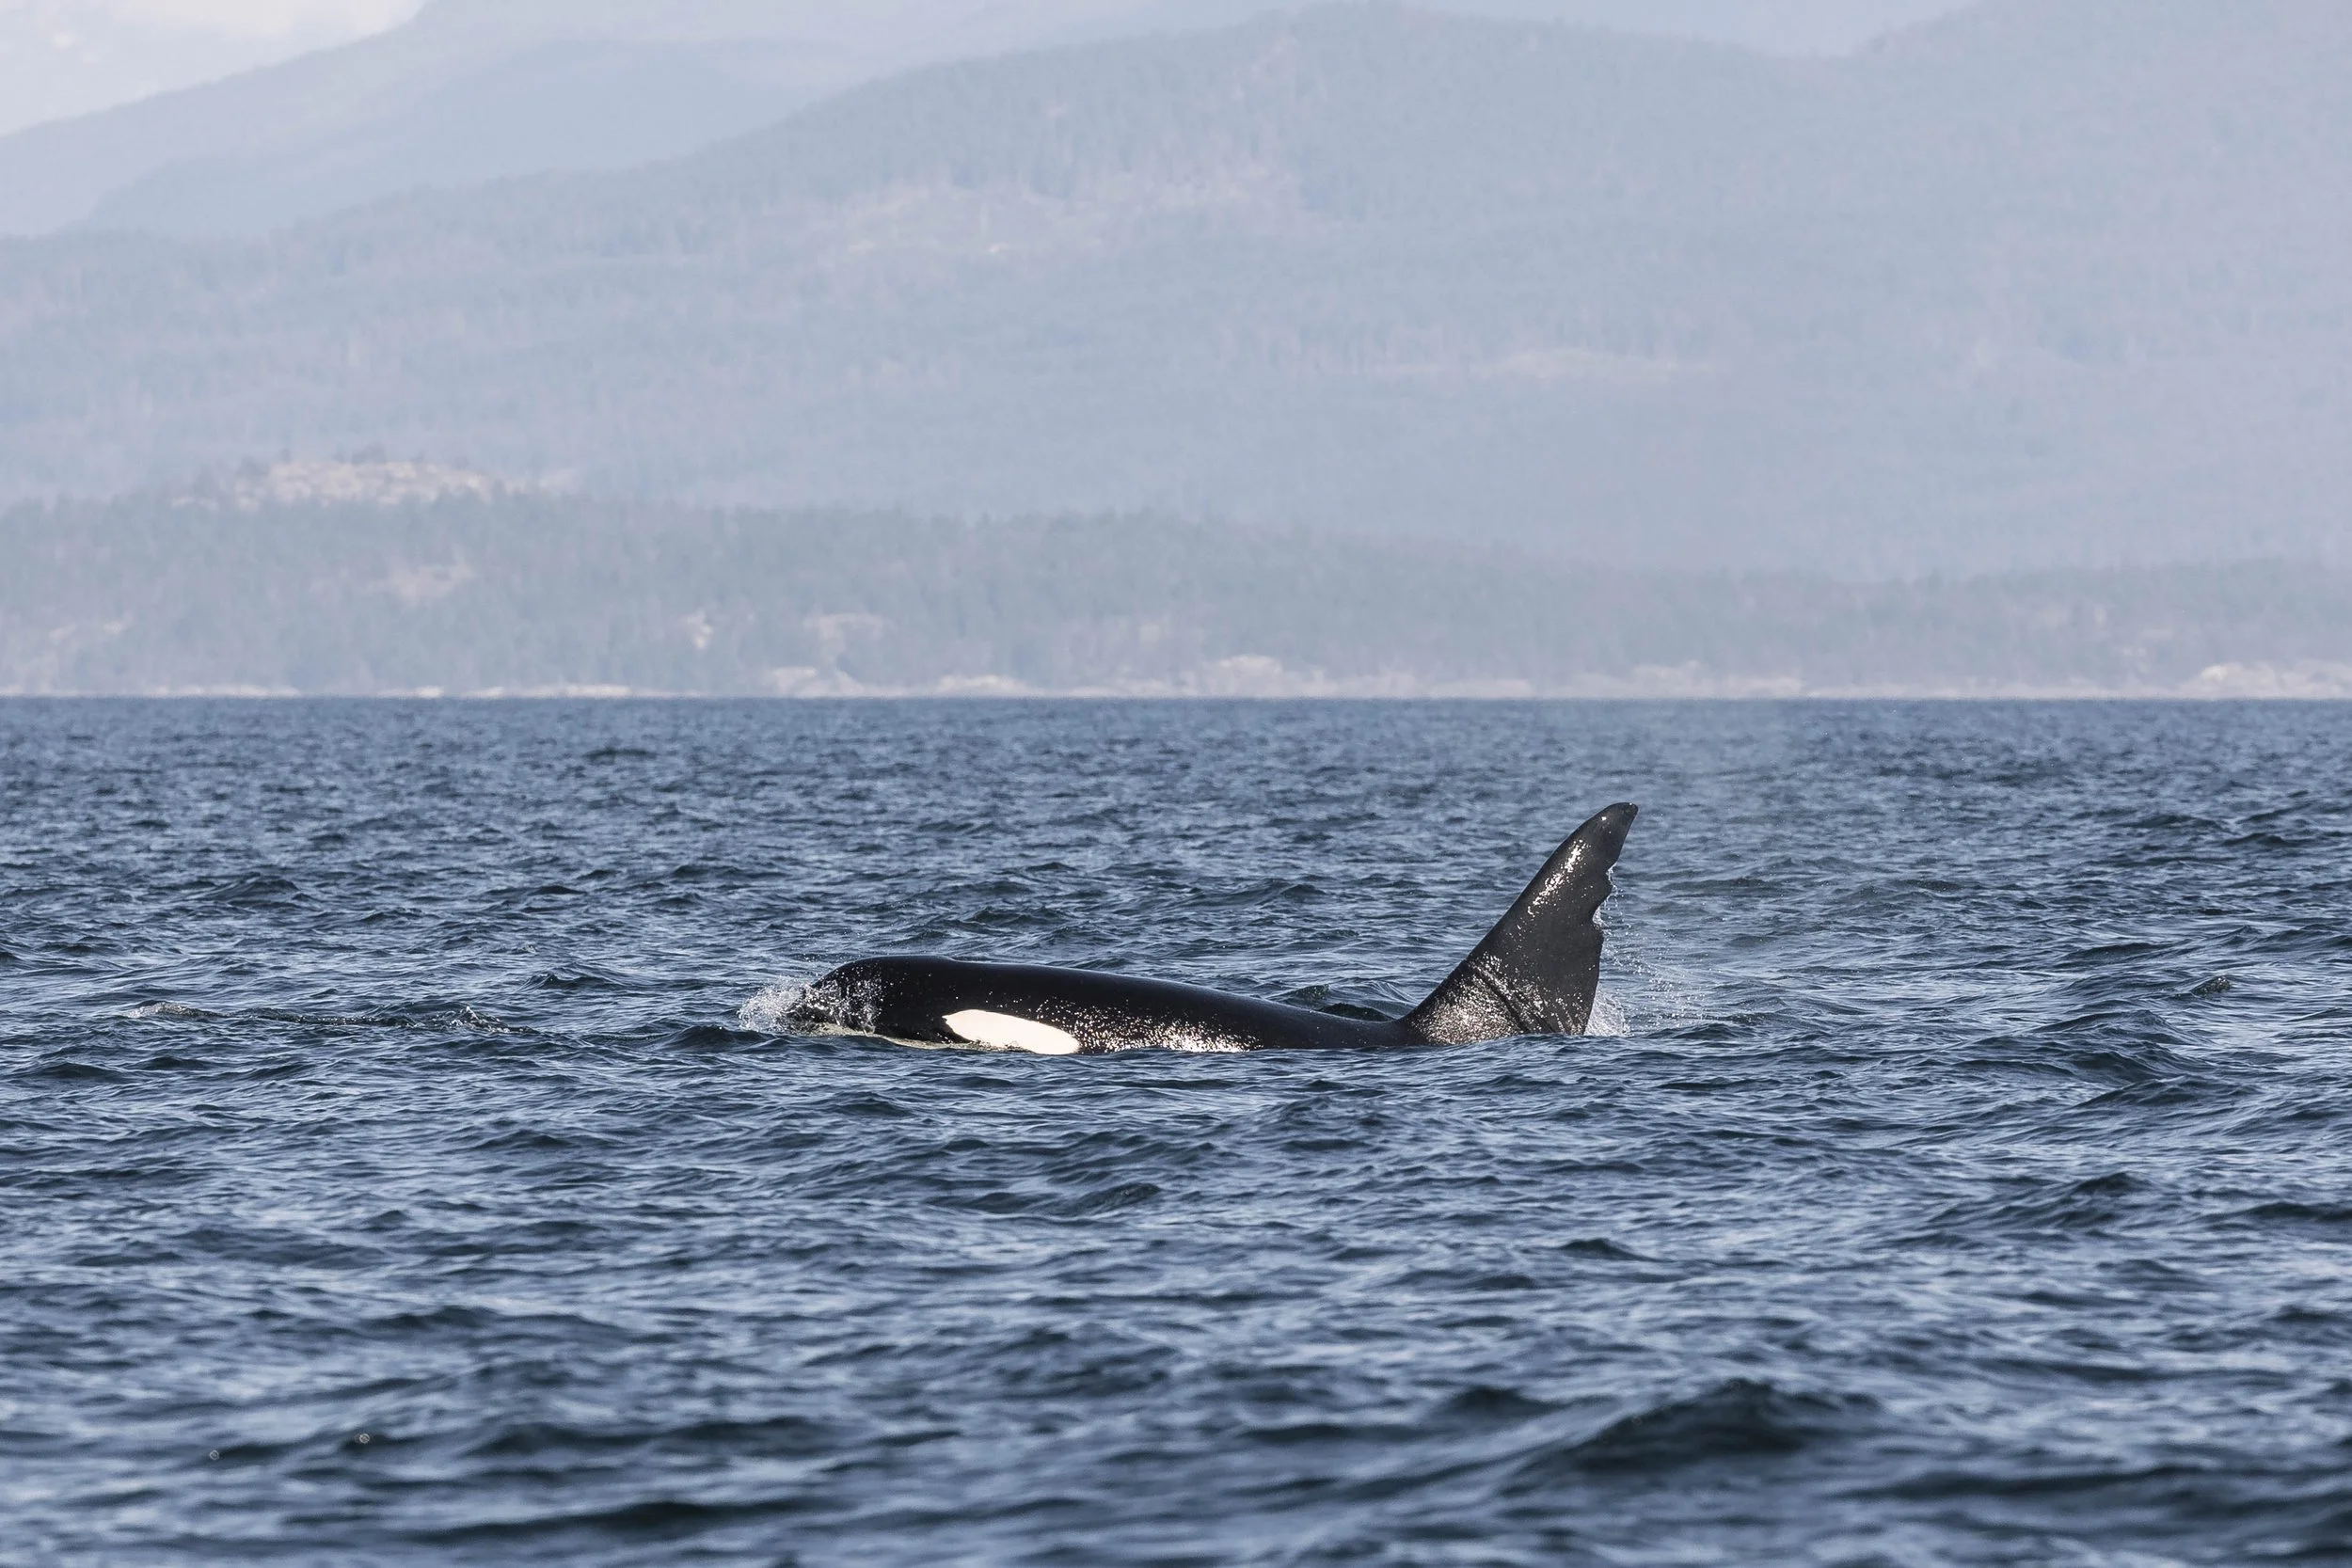
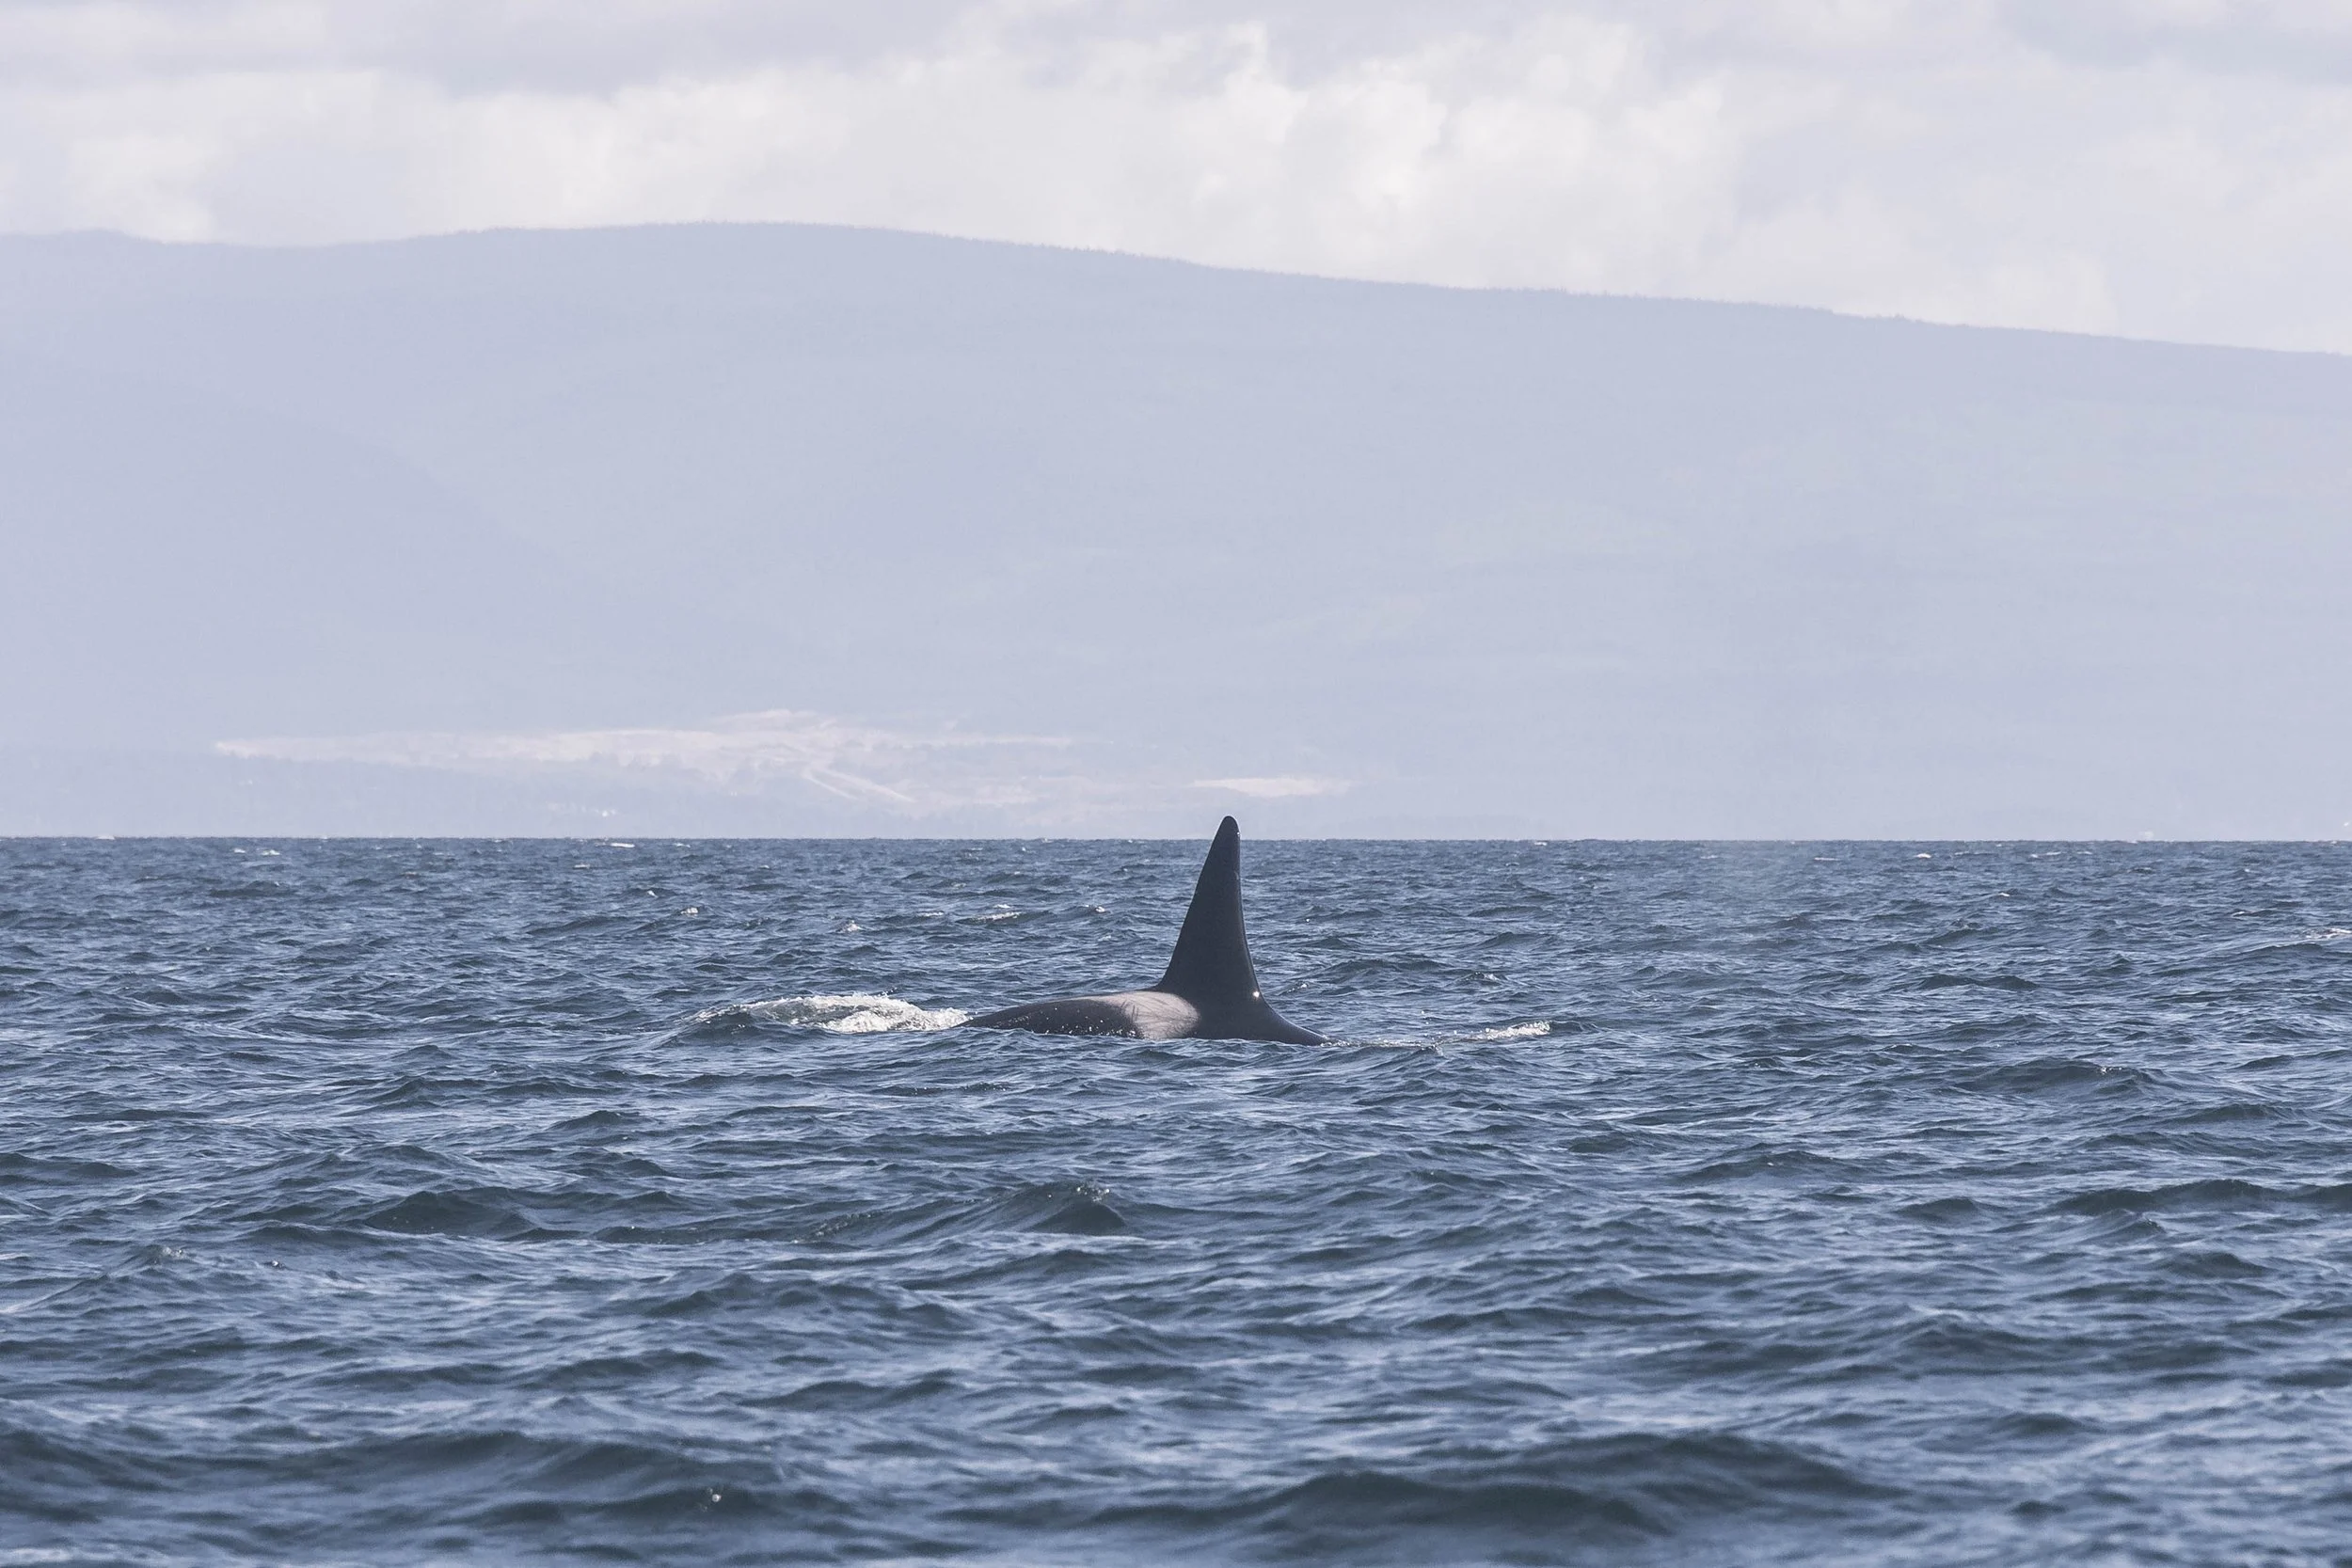
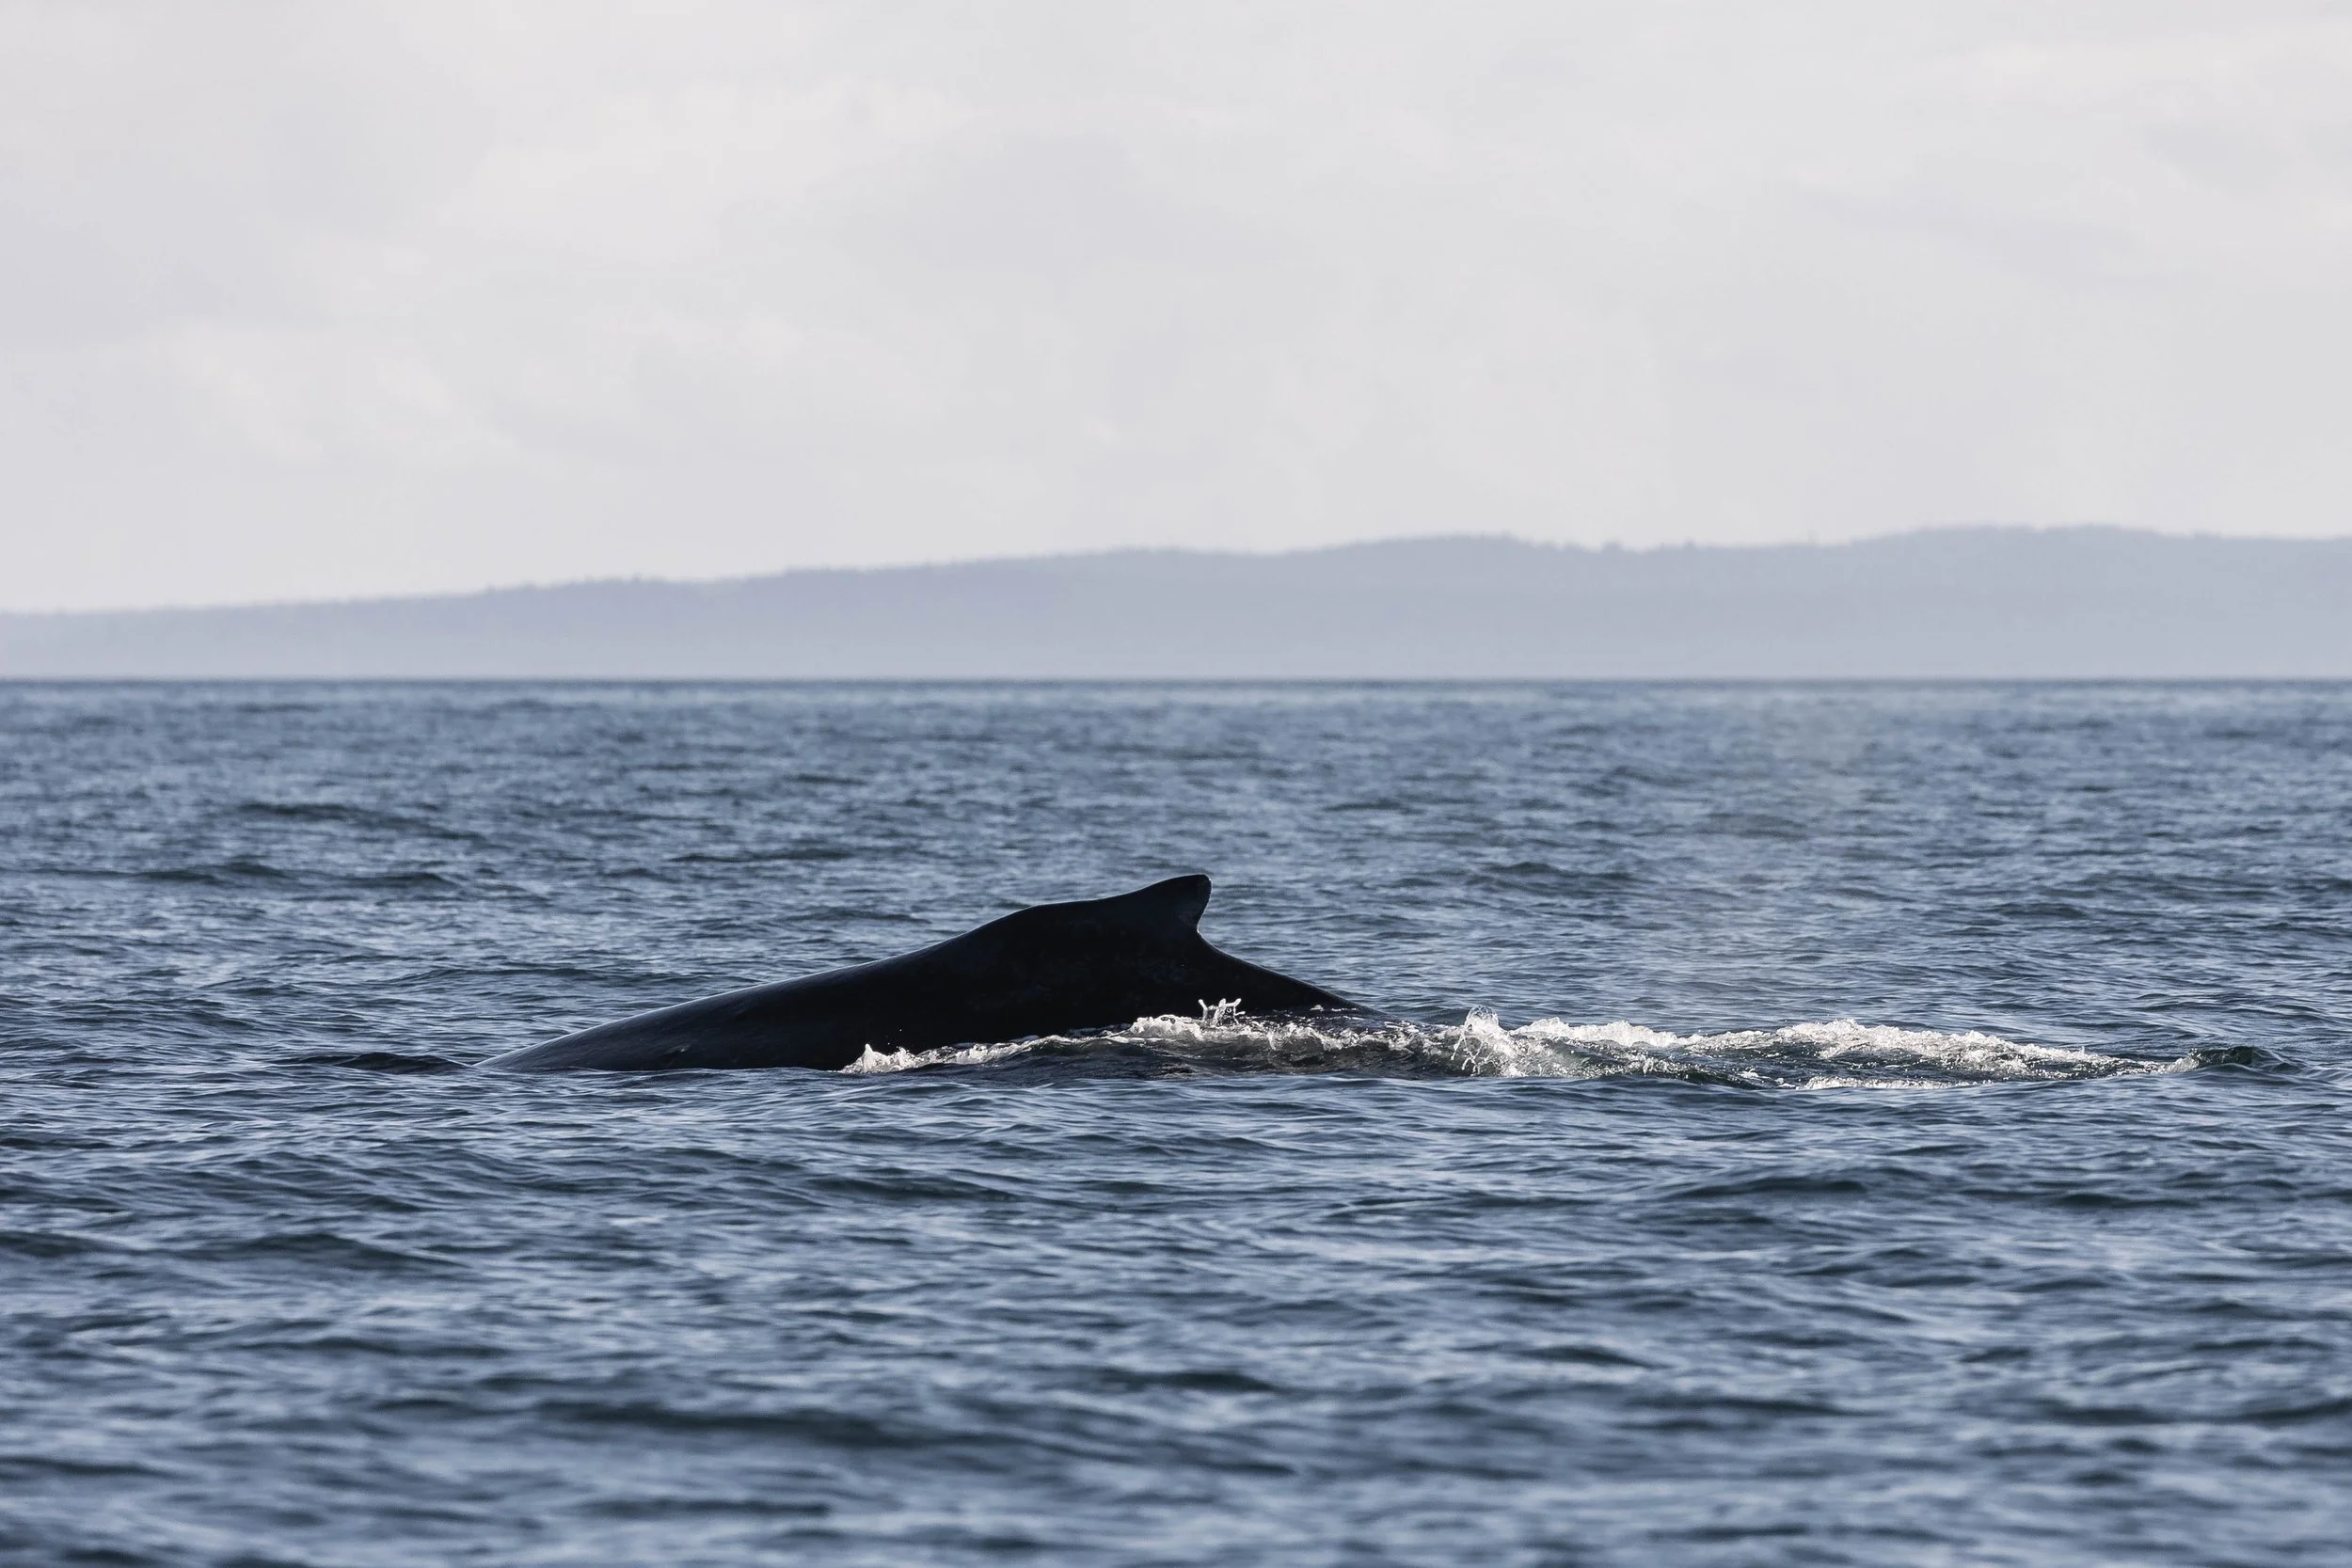
These types of interactions seem to be becoming more common in the area, likely as the humpback and transient orca populations both are on the rise. With more individuals around, the chances of running into each other are also increasing. These interactions can be initiated by either species, which sometimes surprises people, given that humpback whales are technically on the menu for orca. Although here in BC that's not realistically true. Even the calves are too large for a pod of orca to hunt easily, and the mothers will make every effort to prevent any harm coming to their calves. Sometimes, the orca will still give it a try along the migration route from the breeding grounds in Hawaii and Mexico to their feeding grounds here. When this happens, the humpback usually bears the scars from it for the rest of their life, scarring known as Rake Marks. Although none of the humbpacks present today have those scars, they may still have had negative interactions with orca in the past, which makes it so they don’t like them having fun around them anymore! The humpbacks we were able to identify in this group were Poptart (BCY1014), Arial (BCY0767), and Watson (BCY1461). There were also 4 pods of orca present:
T036A1 Tierna ♀ (2005)
T036A1A Drift ♂ (2022)
T065 Whidbey II ♀ (~1971)
T063 Chainsaw ♂ (~1978)
T100 Hutchins ♀ (~1979)
T100C Laurel ♂ (2002)
T100F Estrella (2014)
T101 Reef ♀ (≤1969)
T101A Rush ♂ (1993)
T101B Lagoon ♂ (1997)
It changed from the humpbacks chasing the orca, to the orca chasing the humpbacks, and back and forth it went. The orca seemed to be having a great time, splashing about at the surface, and the humpbacks did too. Humpback whales are known to have some empathy, having been recorded putting themselves between sharks and humans, as well as prey species and their predators. Could this be what drives the humpbacks to bother the orca? Or is it more that the noise from the socializing orca is causing disturbance to the whales? Hopefully, as more of these events are recorded, we will start to have a better idea.
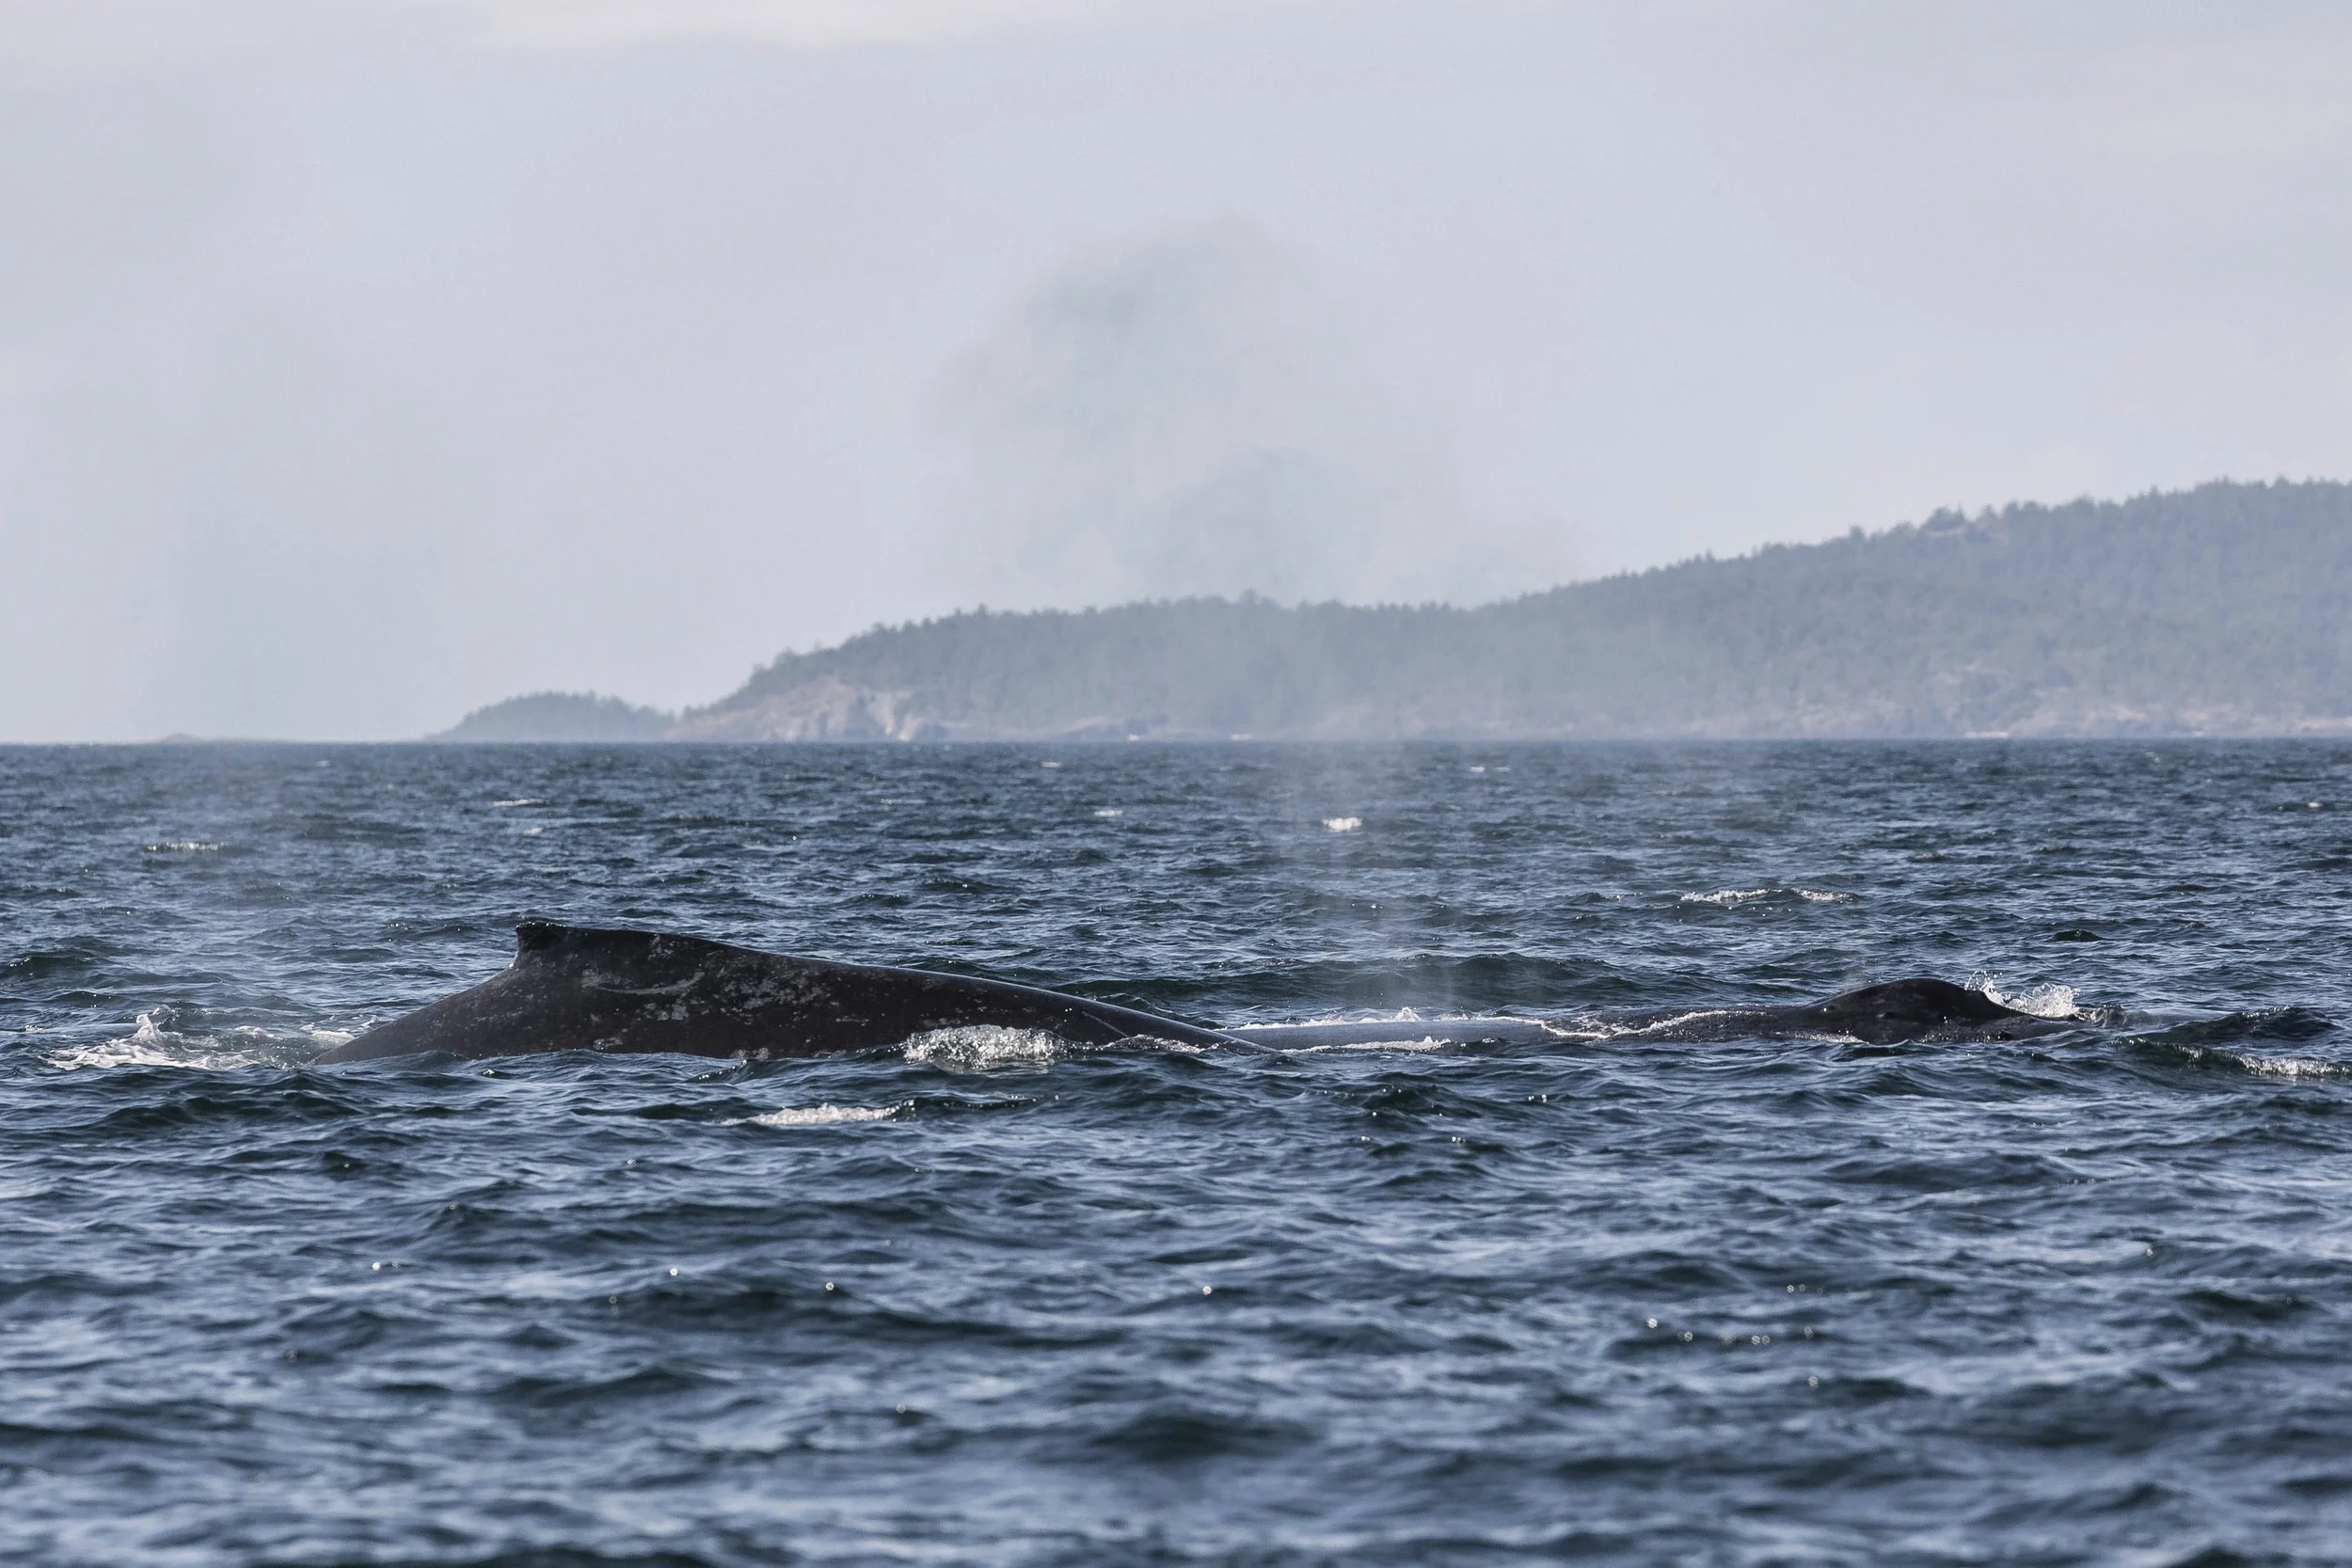
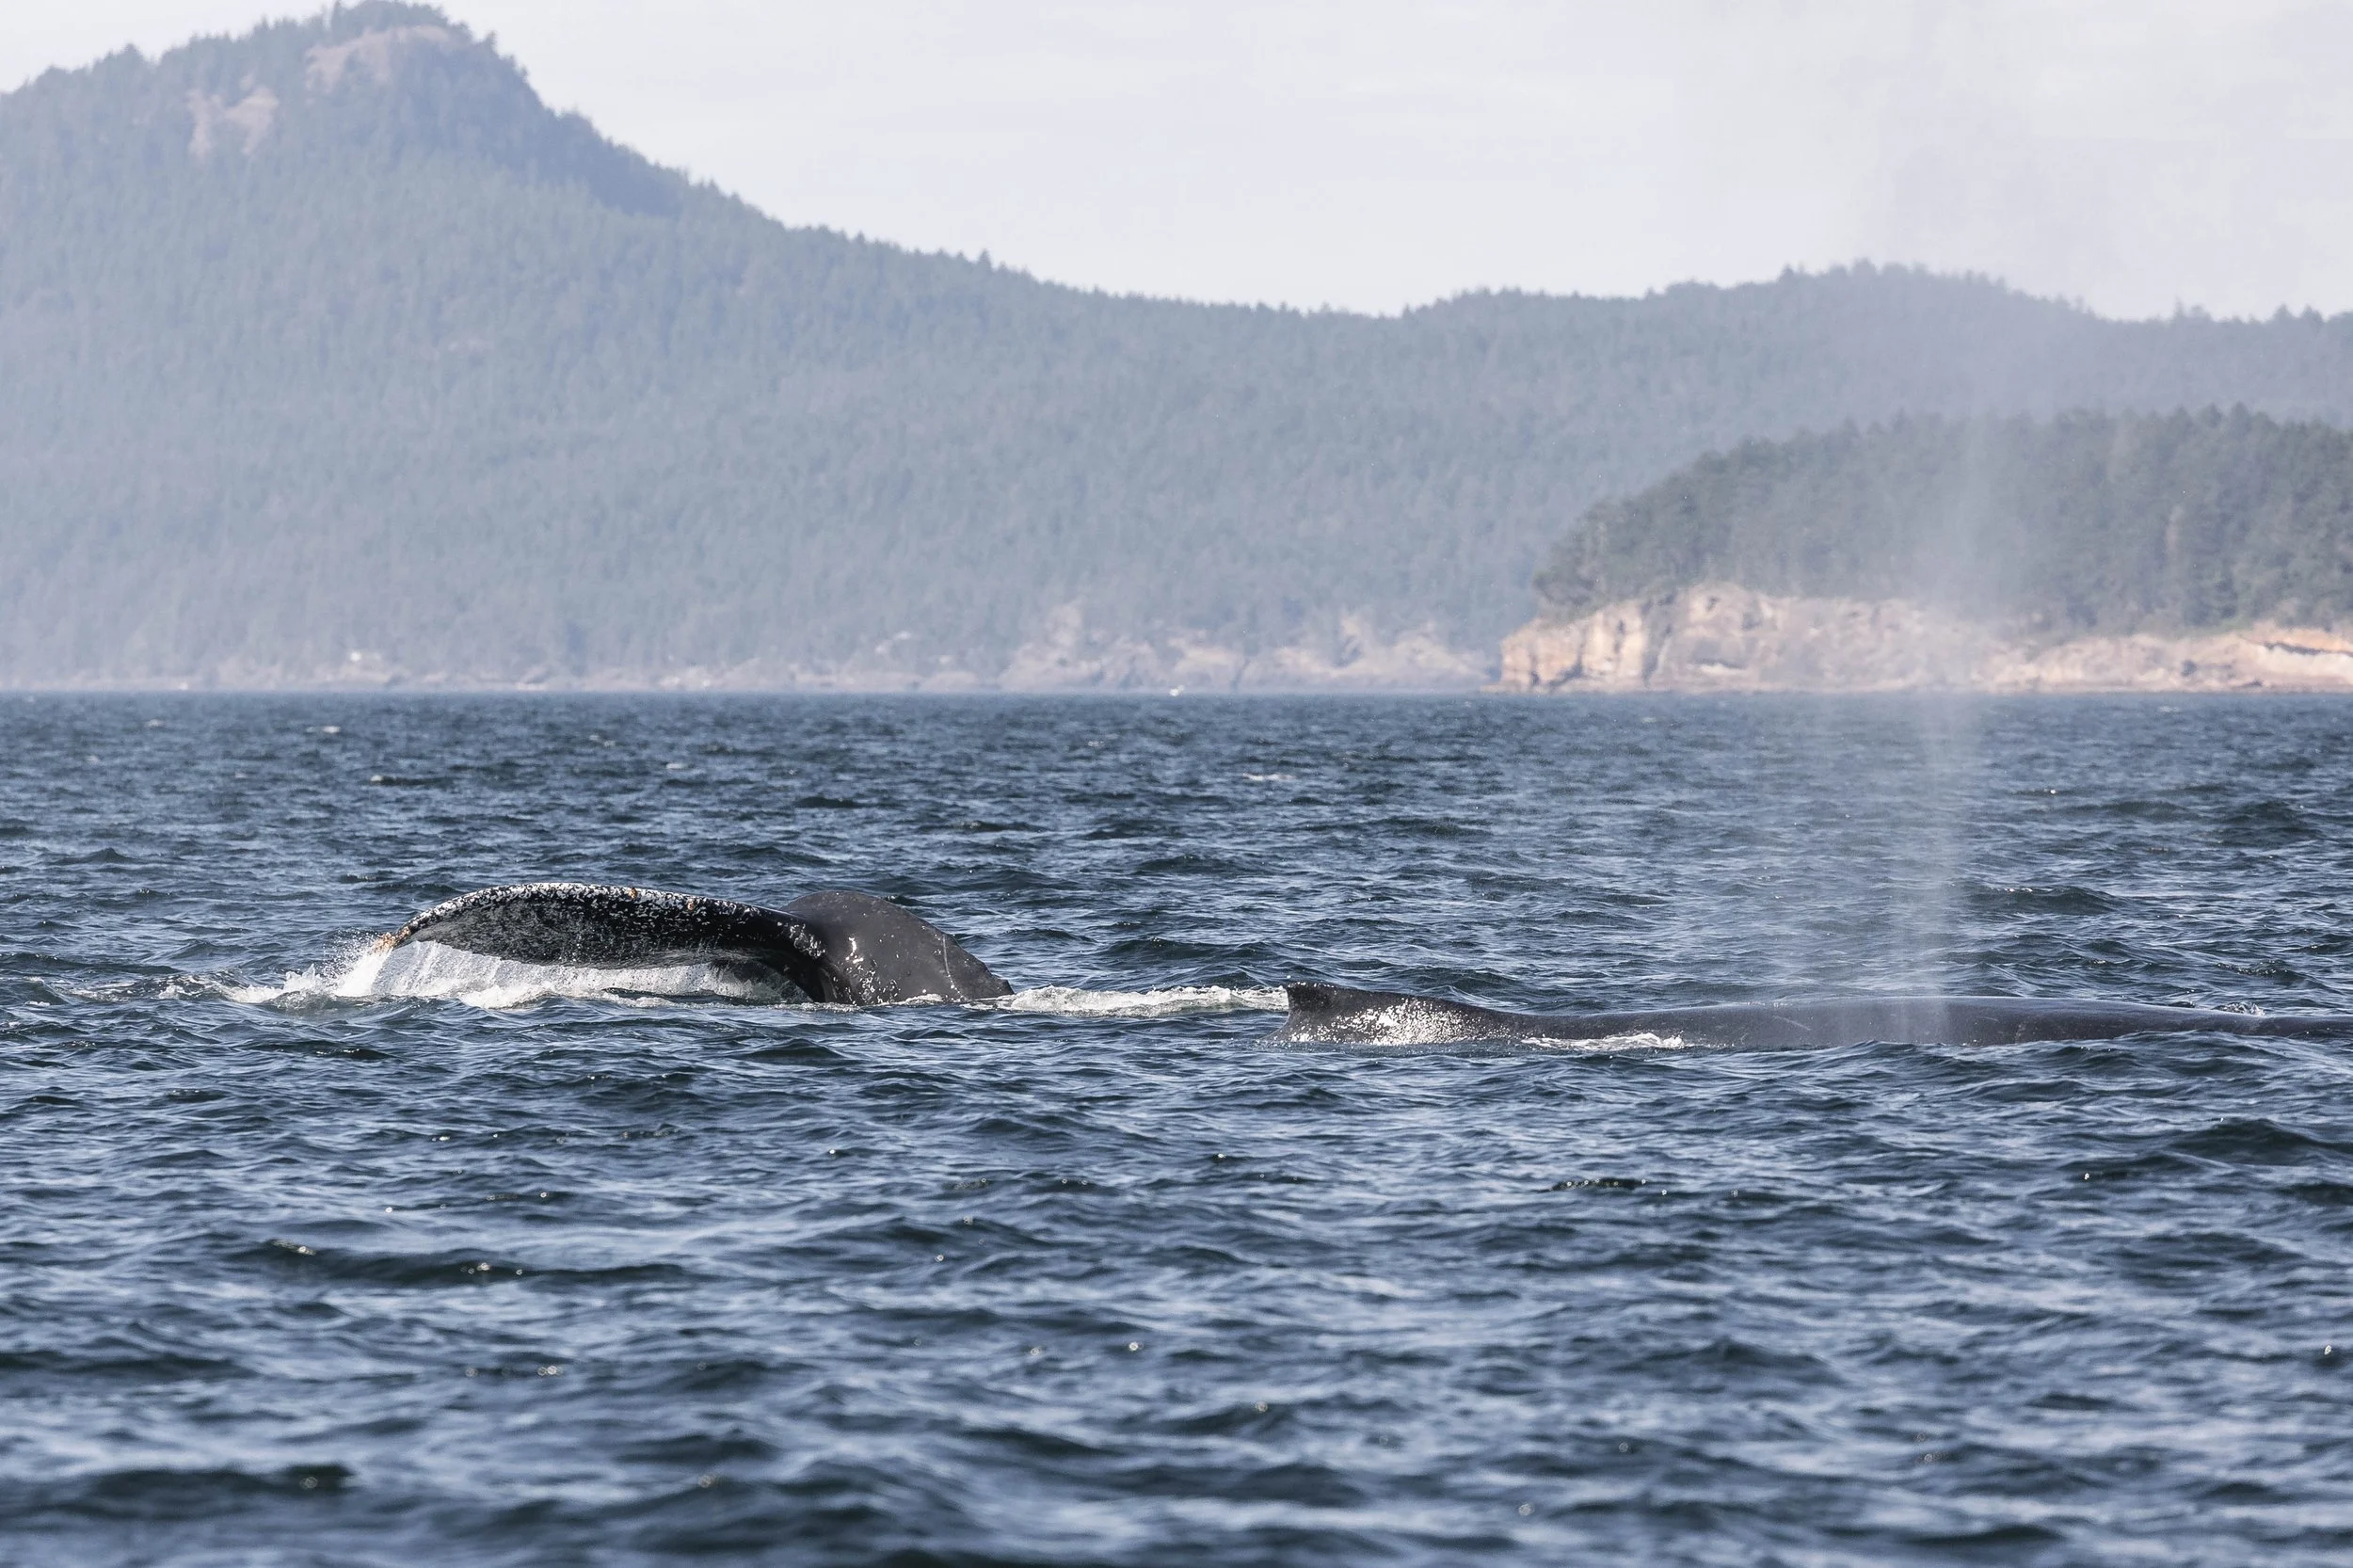
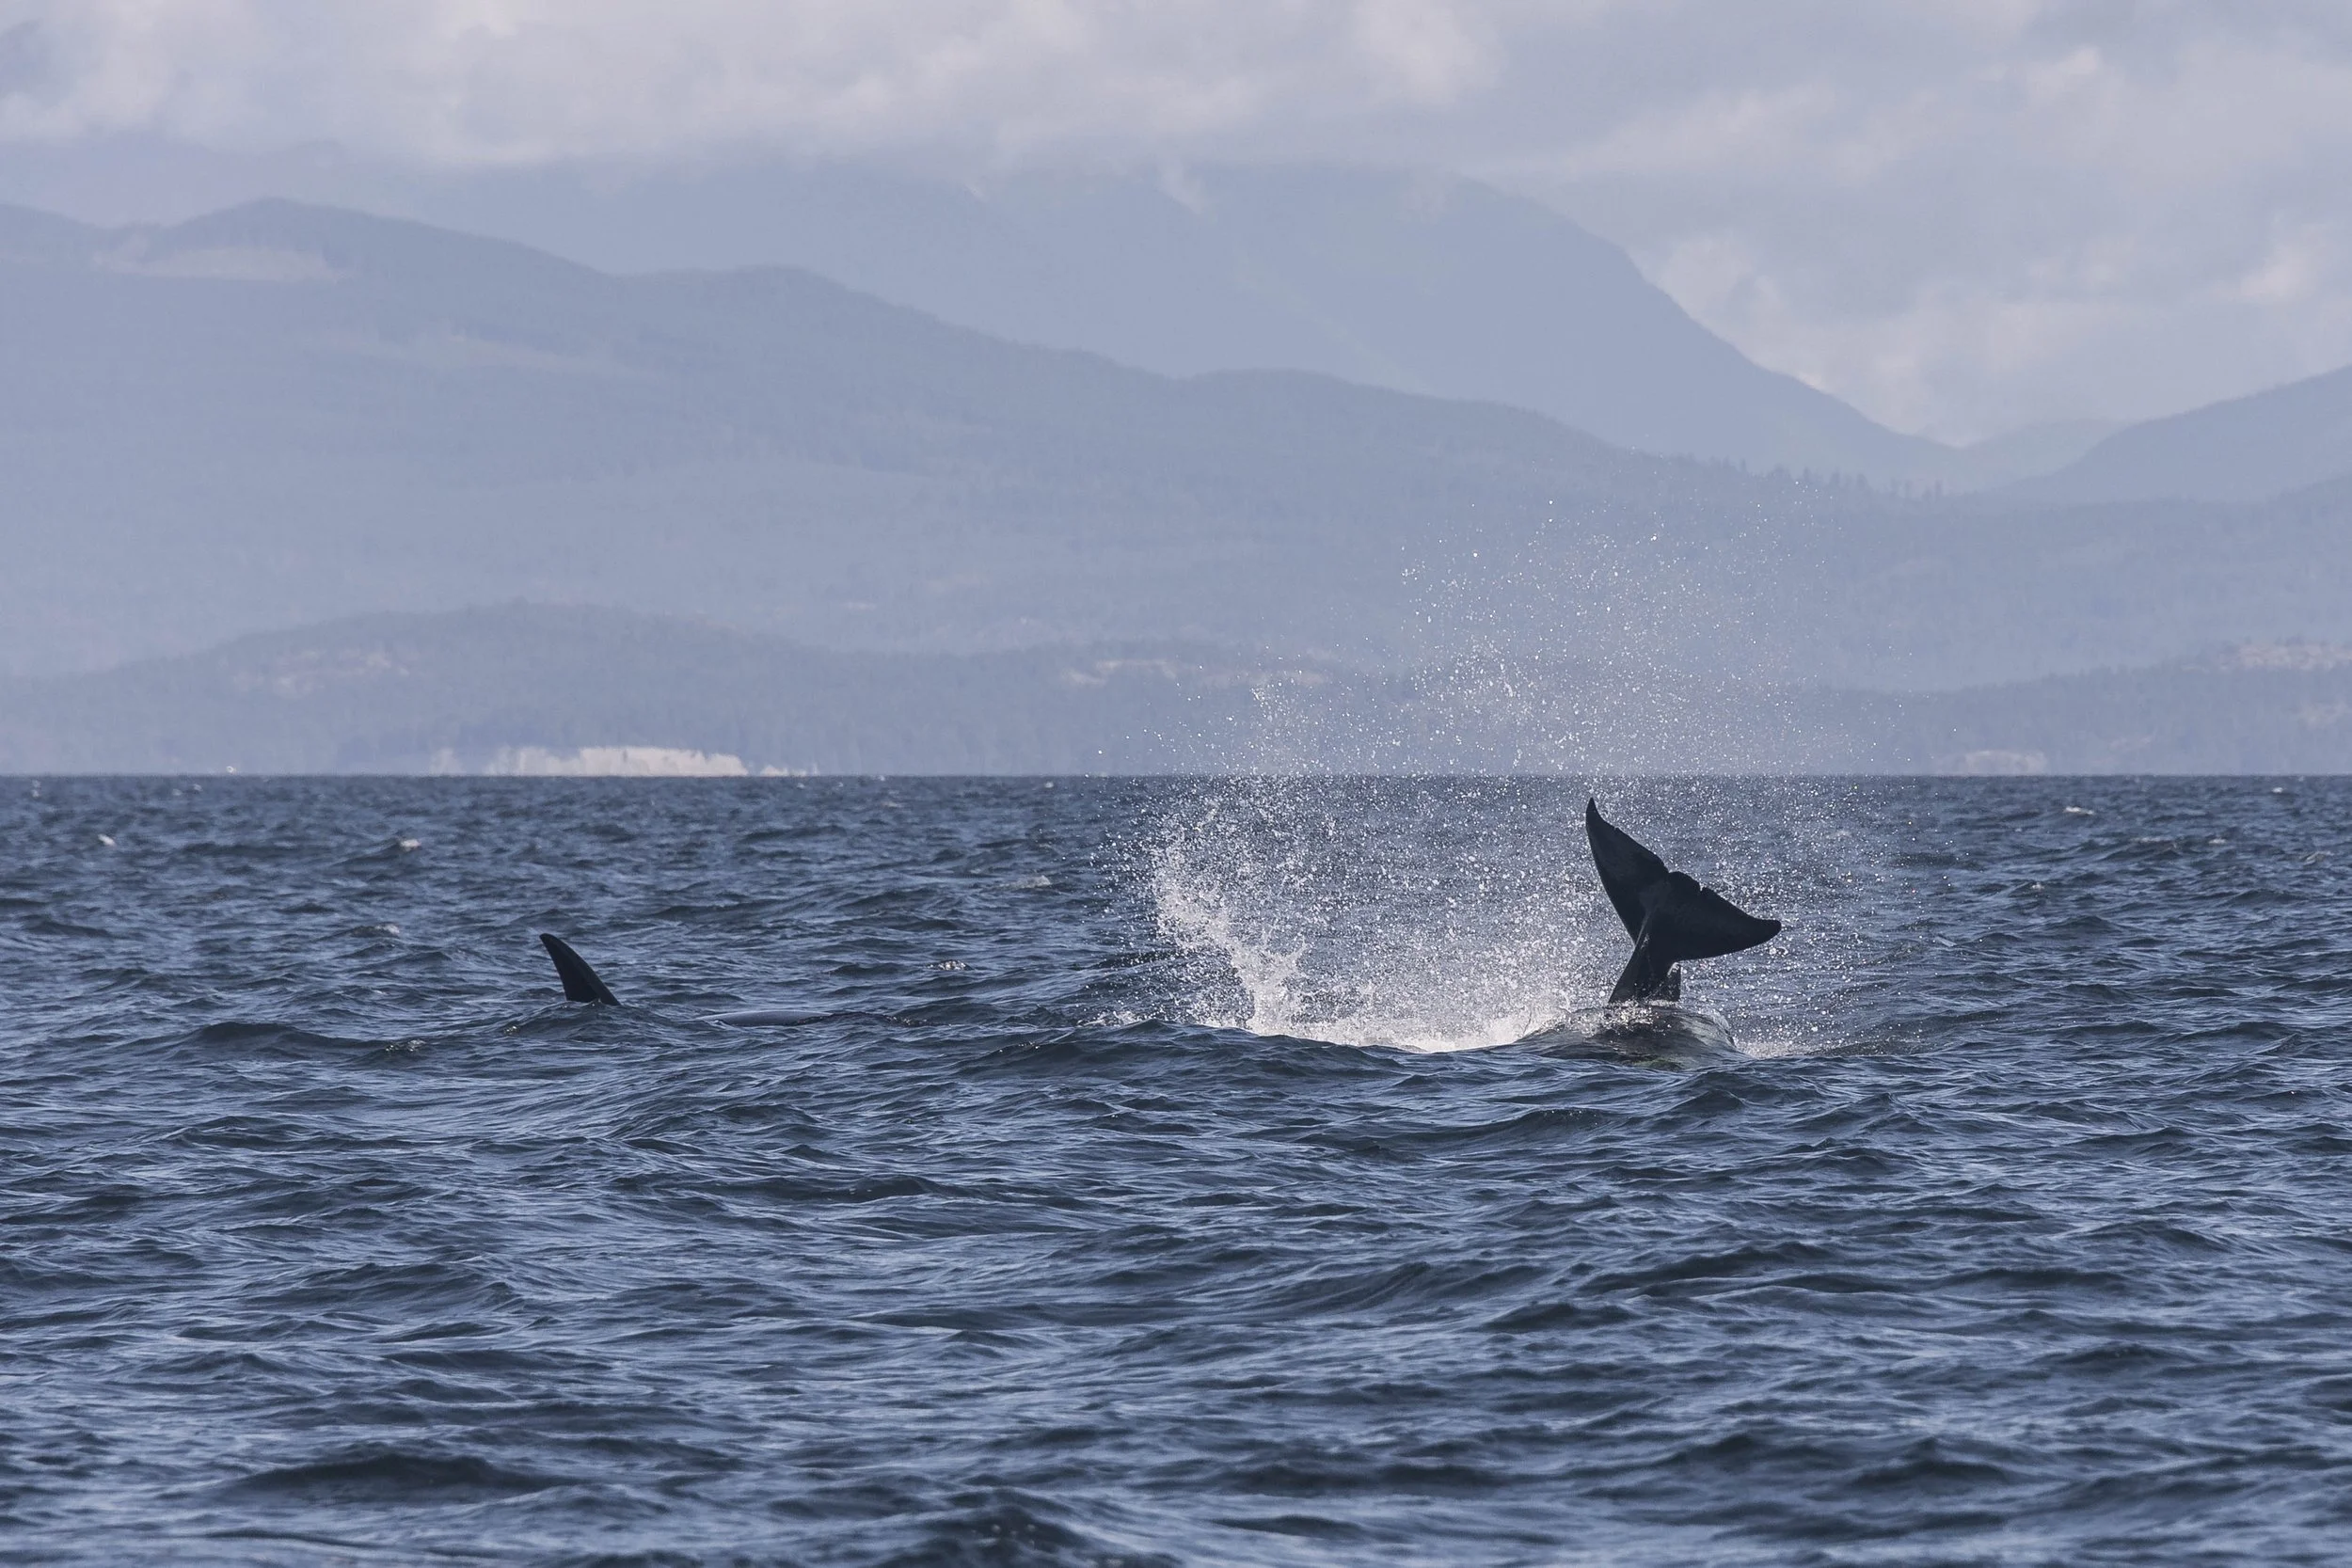
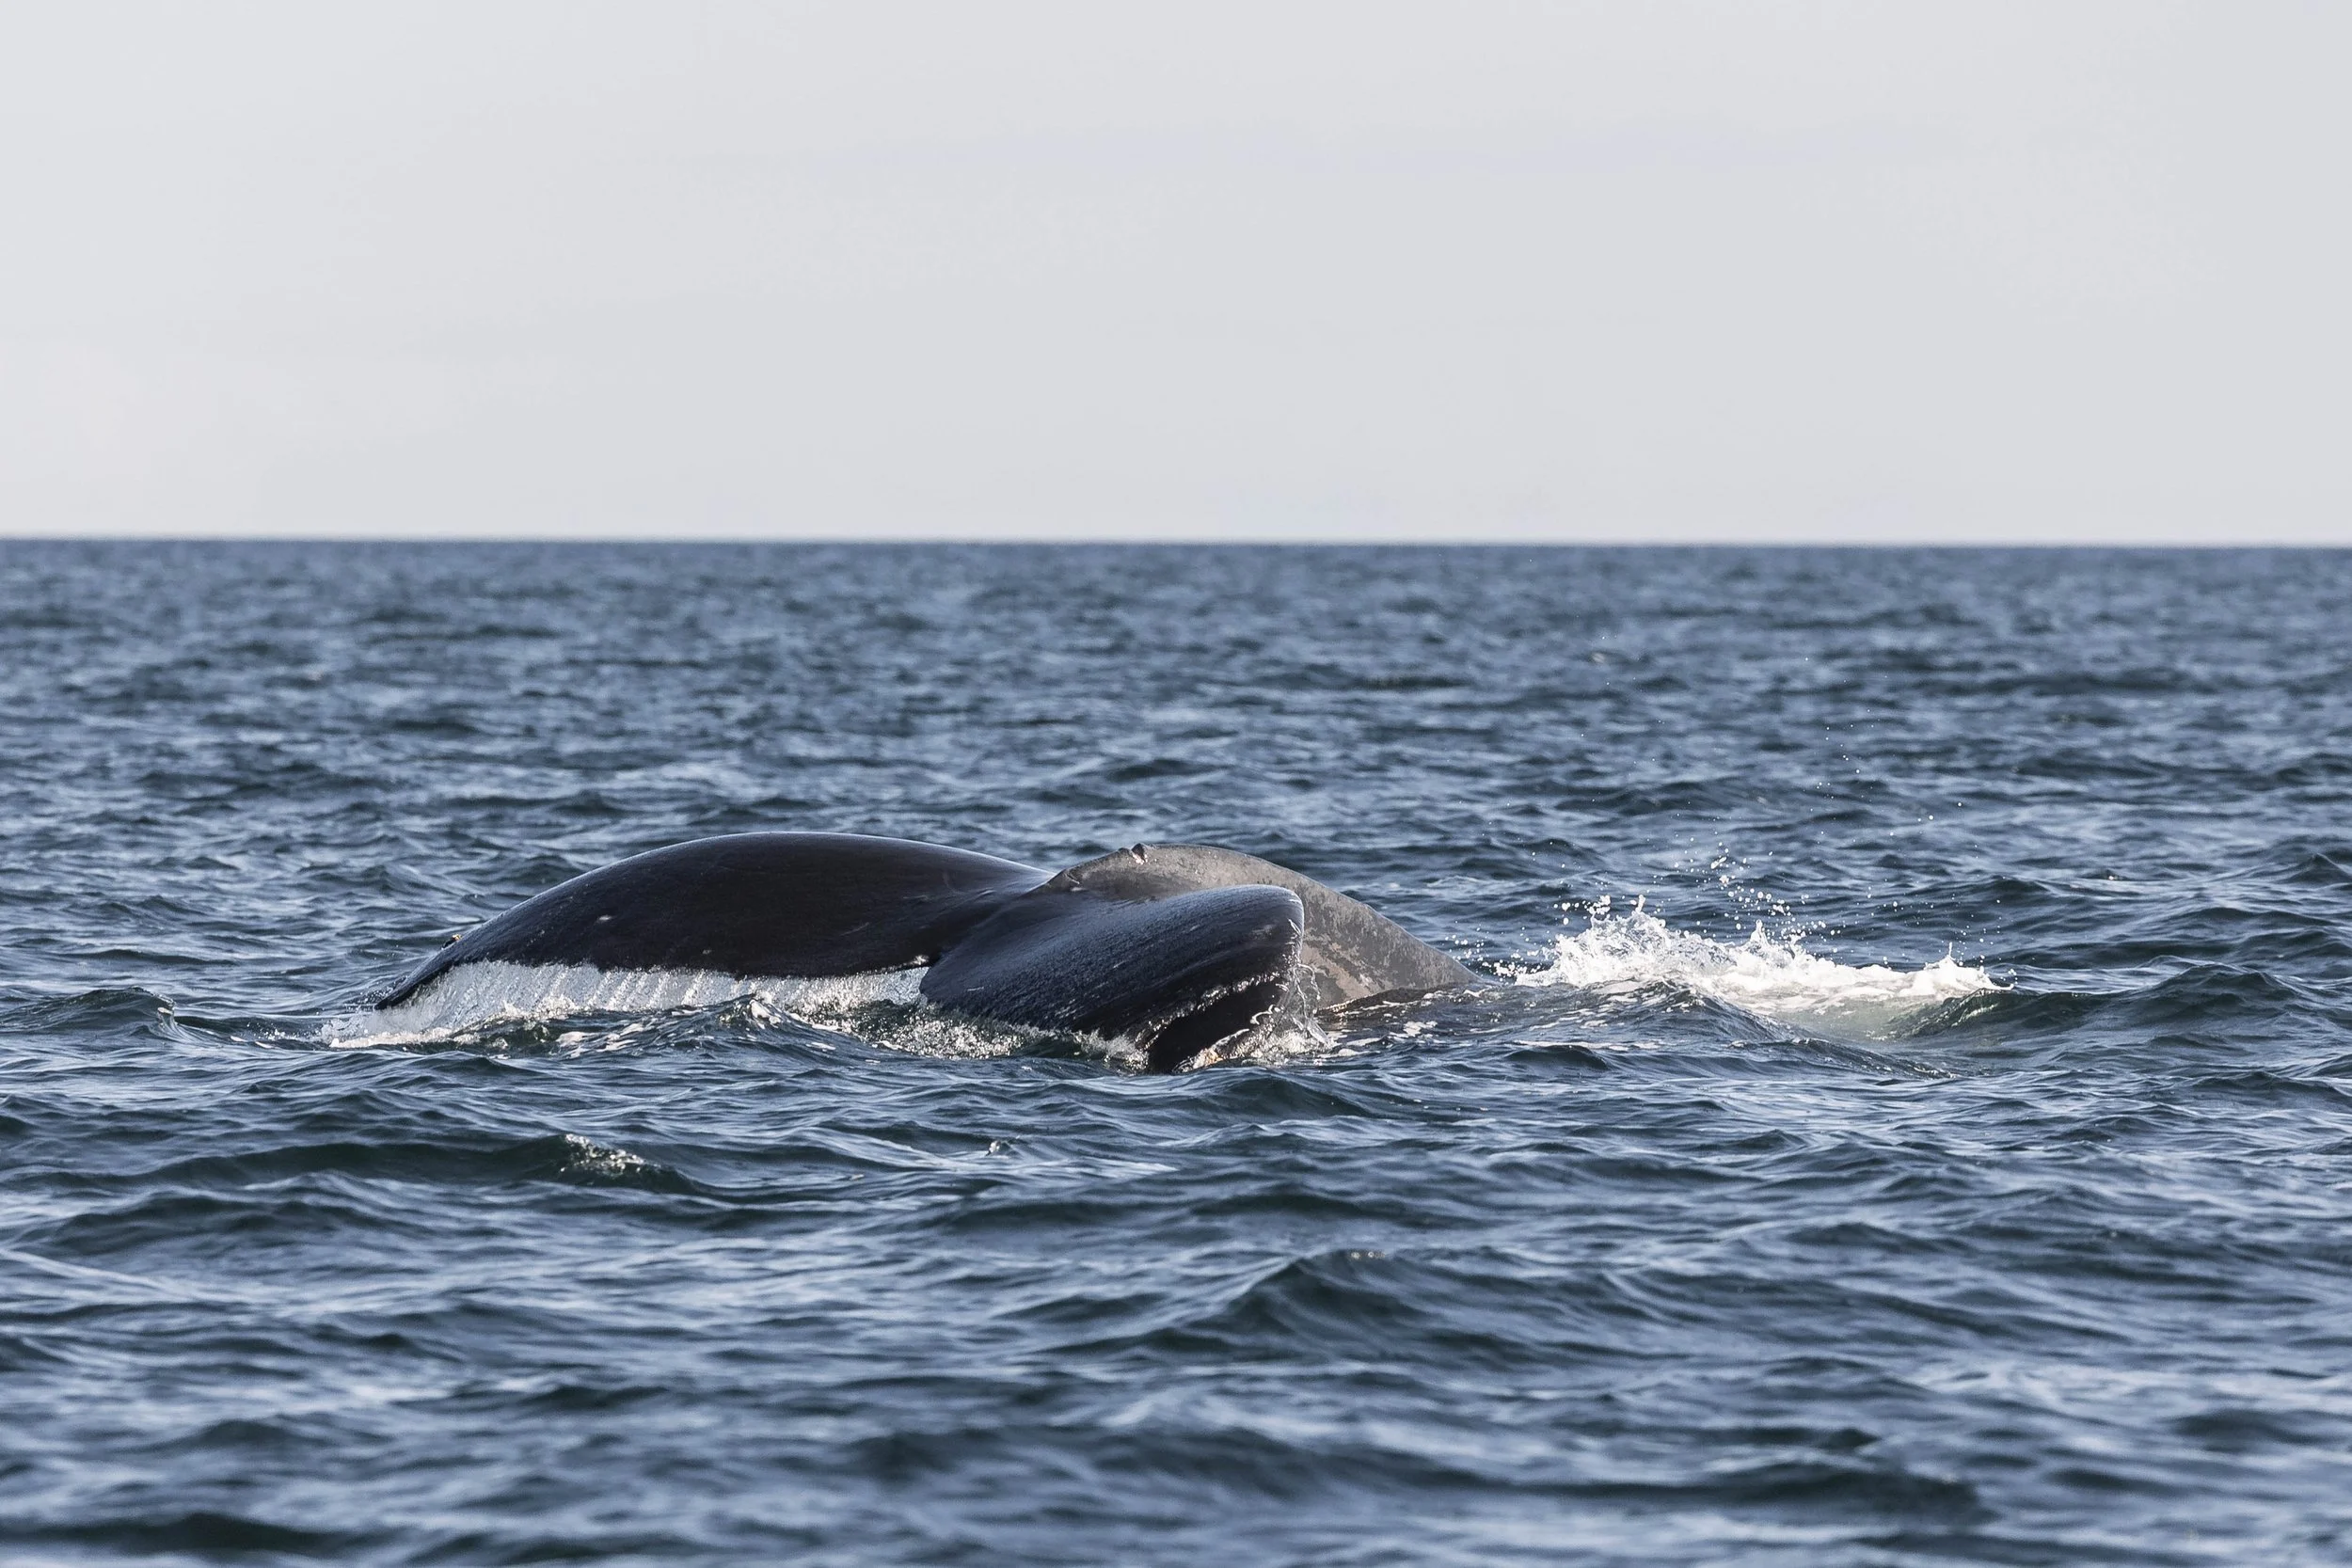
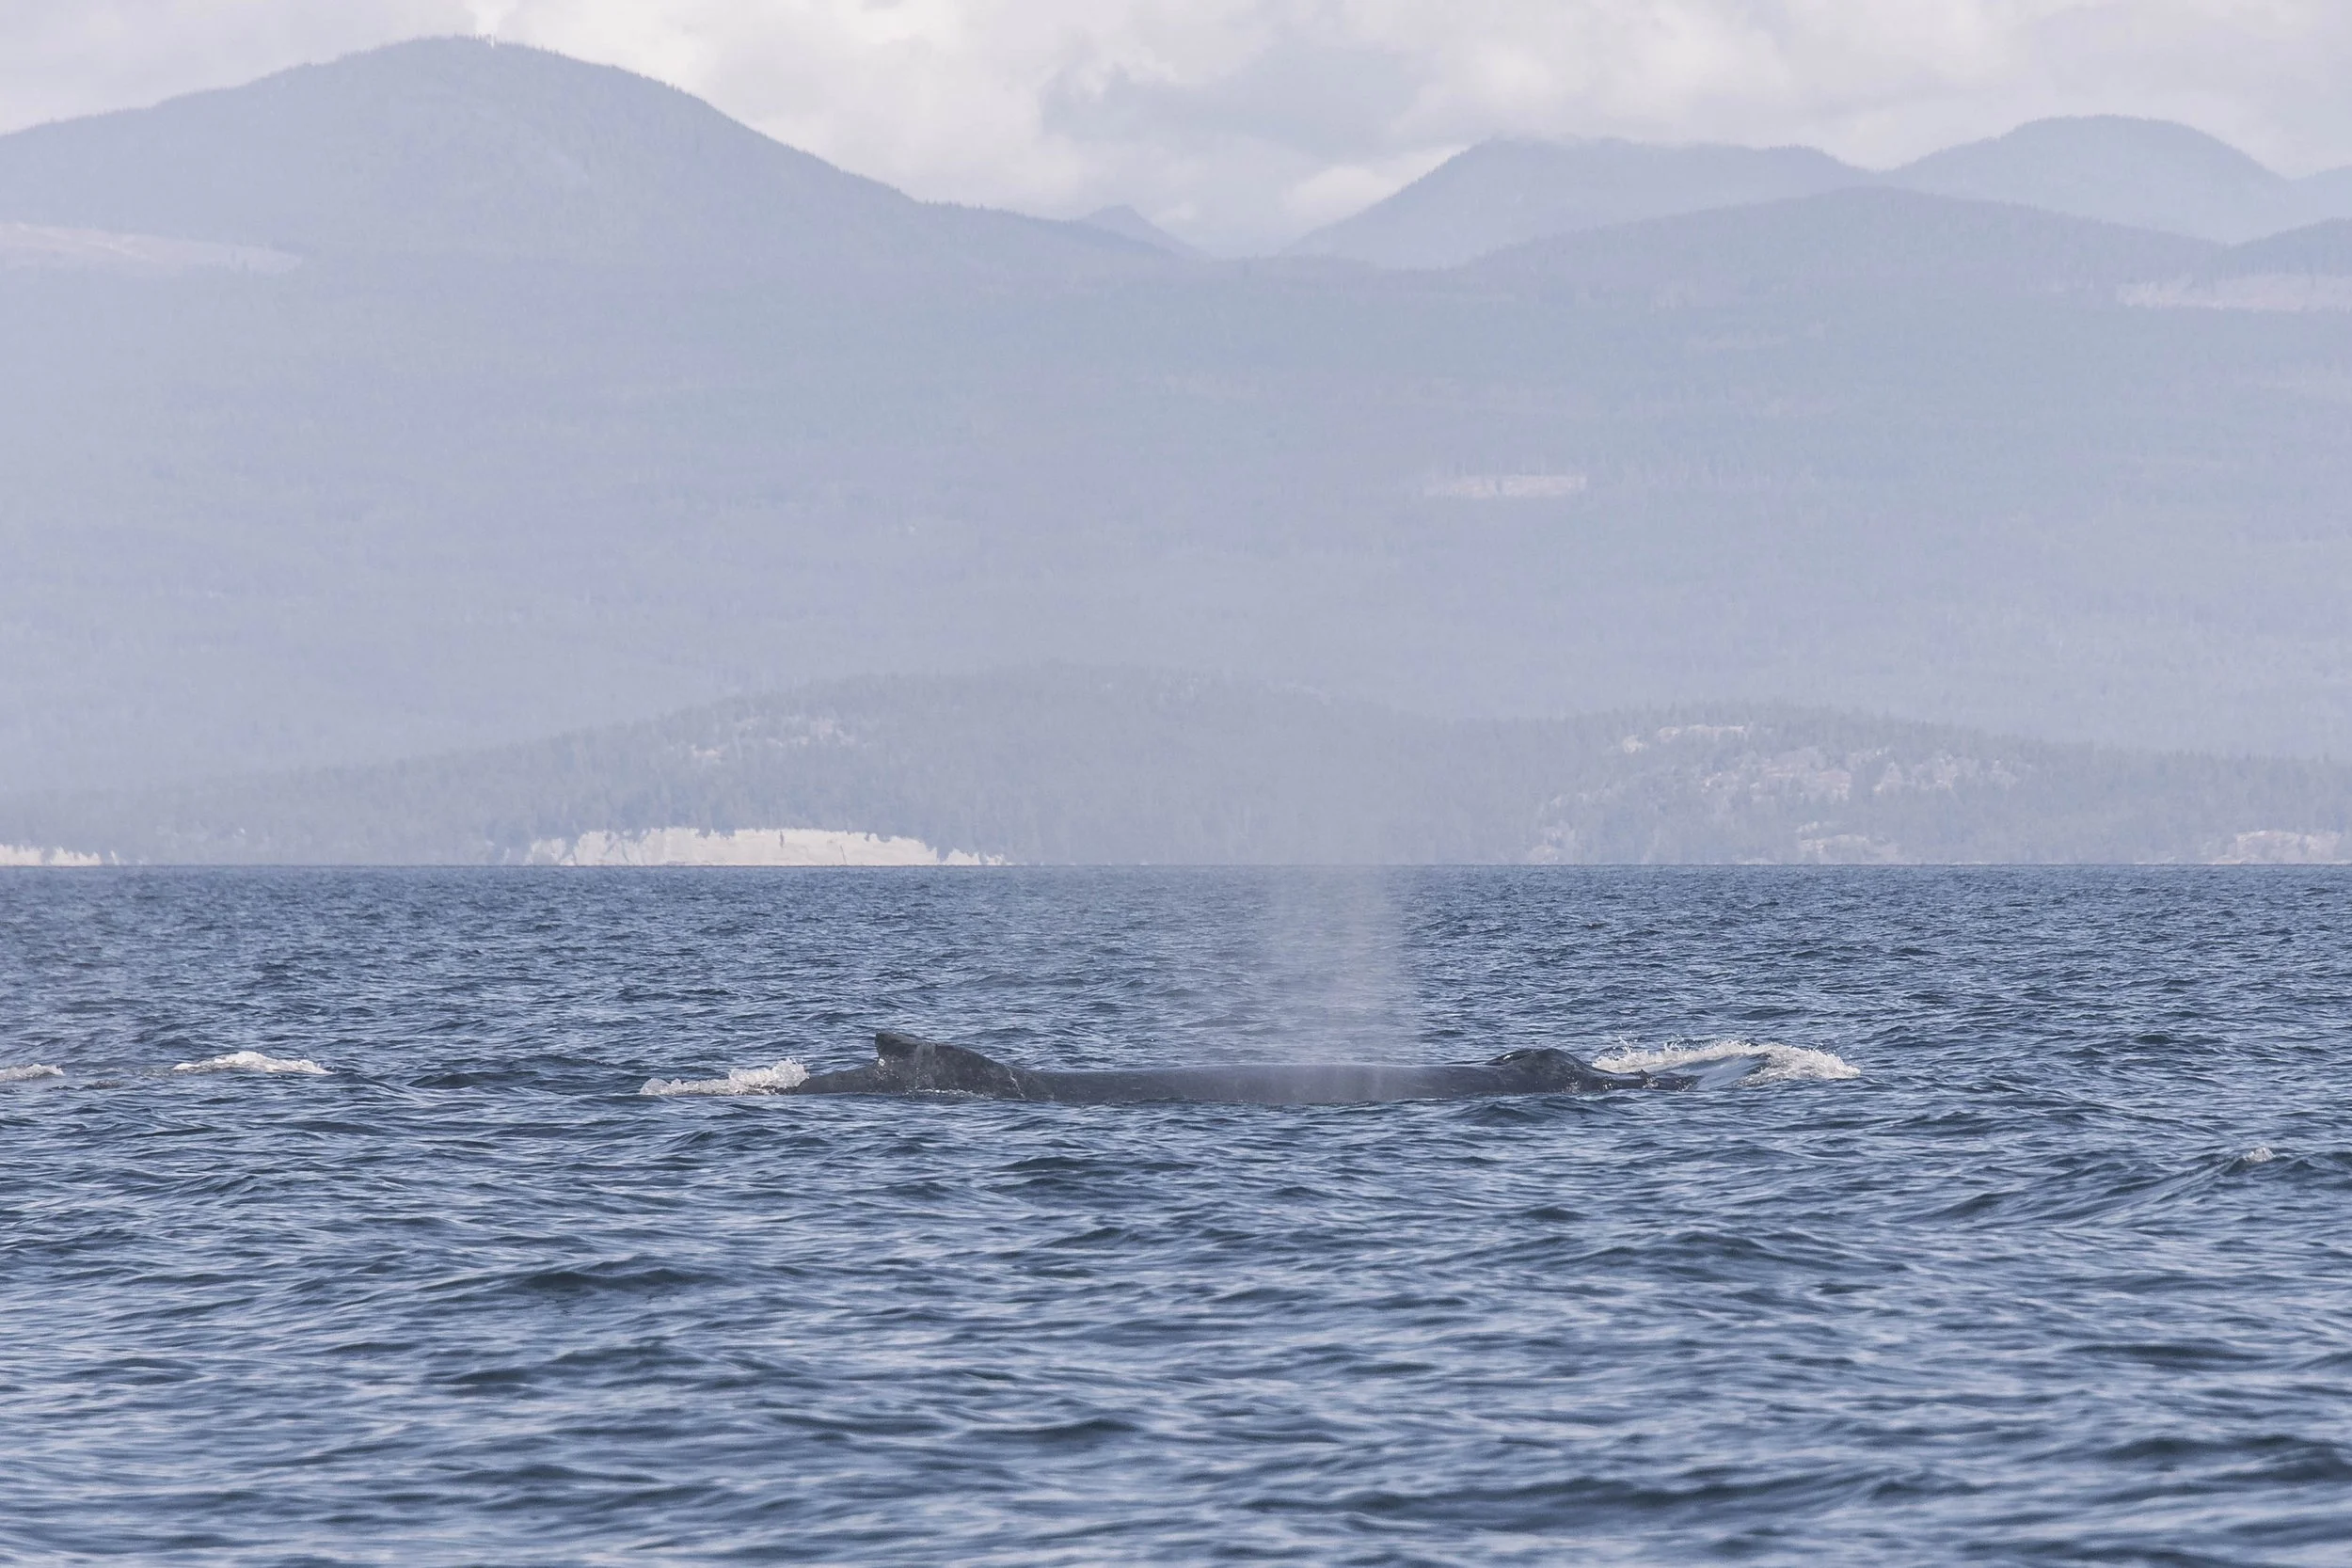
While we were watching the humpback vs orca interaction unfolding before us, another pair of humpbacks came in from the distance. At first, we thought they wanted to join in the brawl, but they continued on their way instead. However, as we watched them pass, we noticed a red buoy being dragged behind the pair. It seems we stumbled across a humpback that was currently entangled! Although it was hard to leave behind, we quickly reacted and followed this whale away from the larger group, calling the Department of Fisheries and Oceans as we went to see if they wanted us to stick with the whale until they could get the Marine Mammal Rescue crew ready and able to take over. It turned out they did, so we stayed with this pair of whales, following them and capturing photos and videos that DFO might use to assist in the disentanglement. As we travelled with them, we were able to get IDs for both individuals: it was Wiggins (BCY1469) and Fader (BCY0195). While on the water, our crew believed Wiggins was in distress, but later we learned it was actually Fader who was entangled. Wiggins was acting much more erratically than Fader was, but this might be empathy in the humpbacks coming into play once again. Wiggins might have been concerned about Fader, which could have provided him comfort during their travels. Upon reviewing our photos back at the office, we noticed the rope draped across Fader’s rostrum, and drone footage of the rescue confirmed that this was the primary wrap on Fader. By the end of our time following Fader and Wiggins, we had passed it on to our other vessel, which stuck with the original whales, while the one with Fader went to finish their time with the orca group they had left behind. Soon, DFO arrived, and we were able to see them attach the satellite tracking device, which would enable them to keep track of Fader's location. This would allow them to gather equipment and crew to head out and assist the whale. Luckily, they were able to disentangle Fader successfully the next day. There was also some amazing drone footage captured by them during the rescue, showing the remarkable precision of the disengagement! On the 24th of September, we actually encountered Fader once more, travelling with a different whale all the way down in the USA, off of San Juan Island! He looked really great when we saw him, with only minimal injuries visible from the over 450 feet of line that he had been freed from. It was great to confirm that he was doing well after his ordeal. Although it wasn’t what we expected from the tour, we felt thankful that we could assist in potentially avoiding a tragic outcome for Fader.
Throughout all these encounters, Marine Naturalists Desarae Poier and Hayleigh Hilbert captured some great photos, all of which are available to view below.
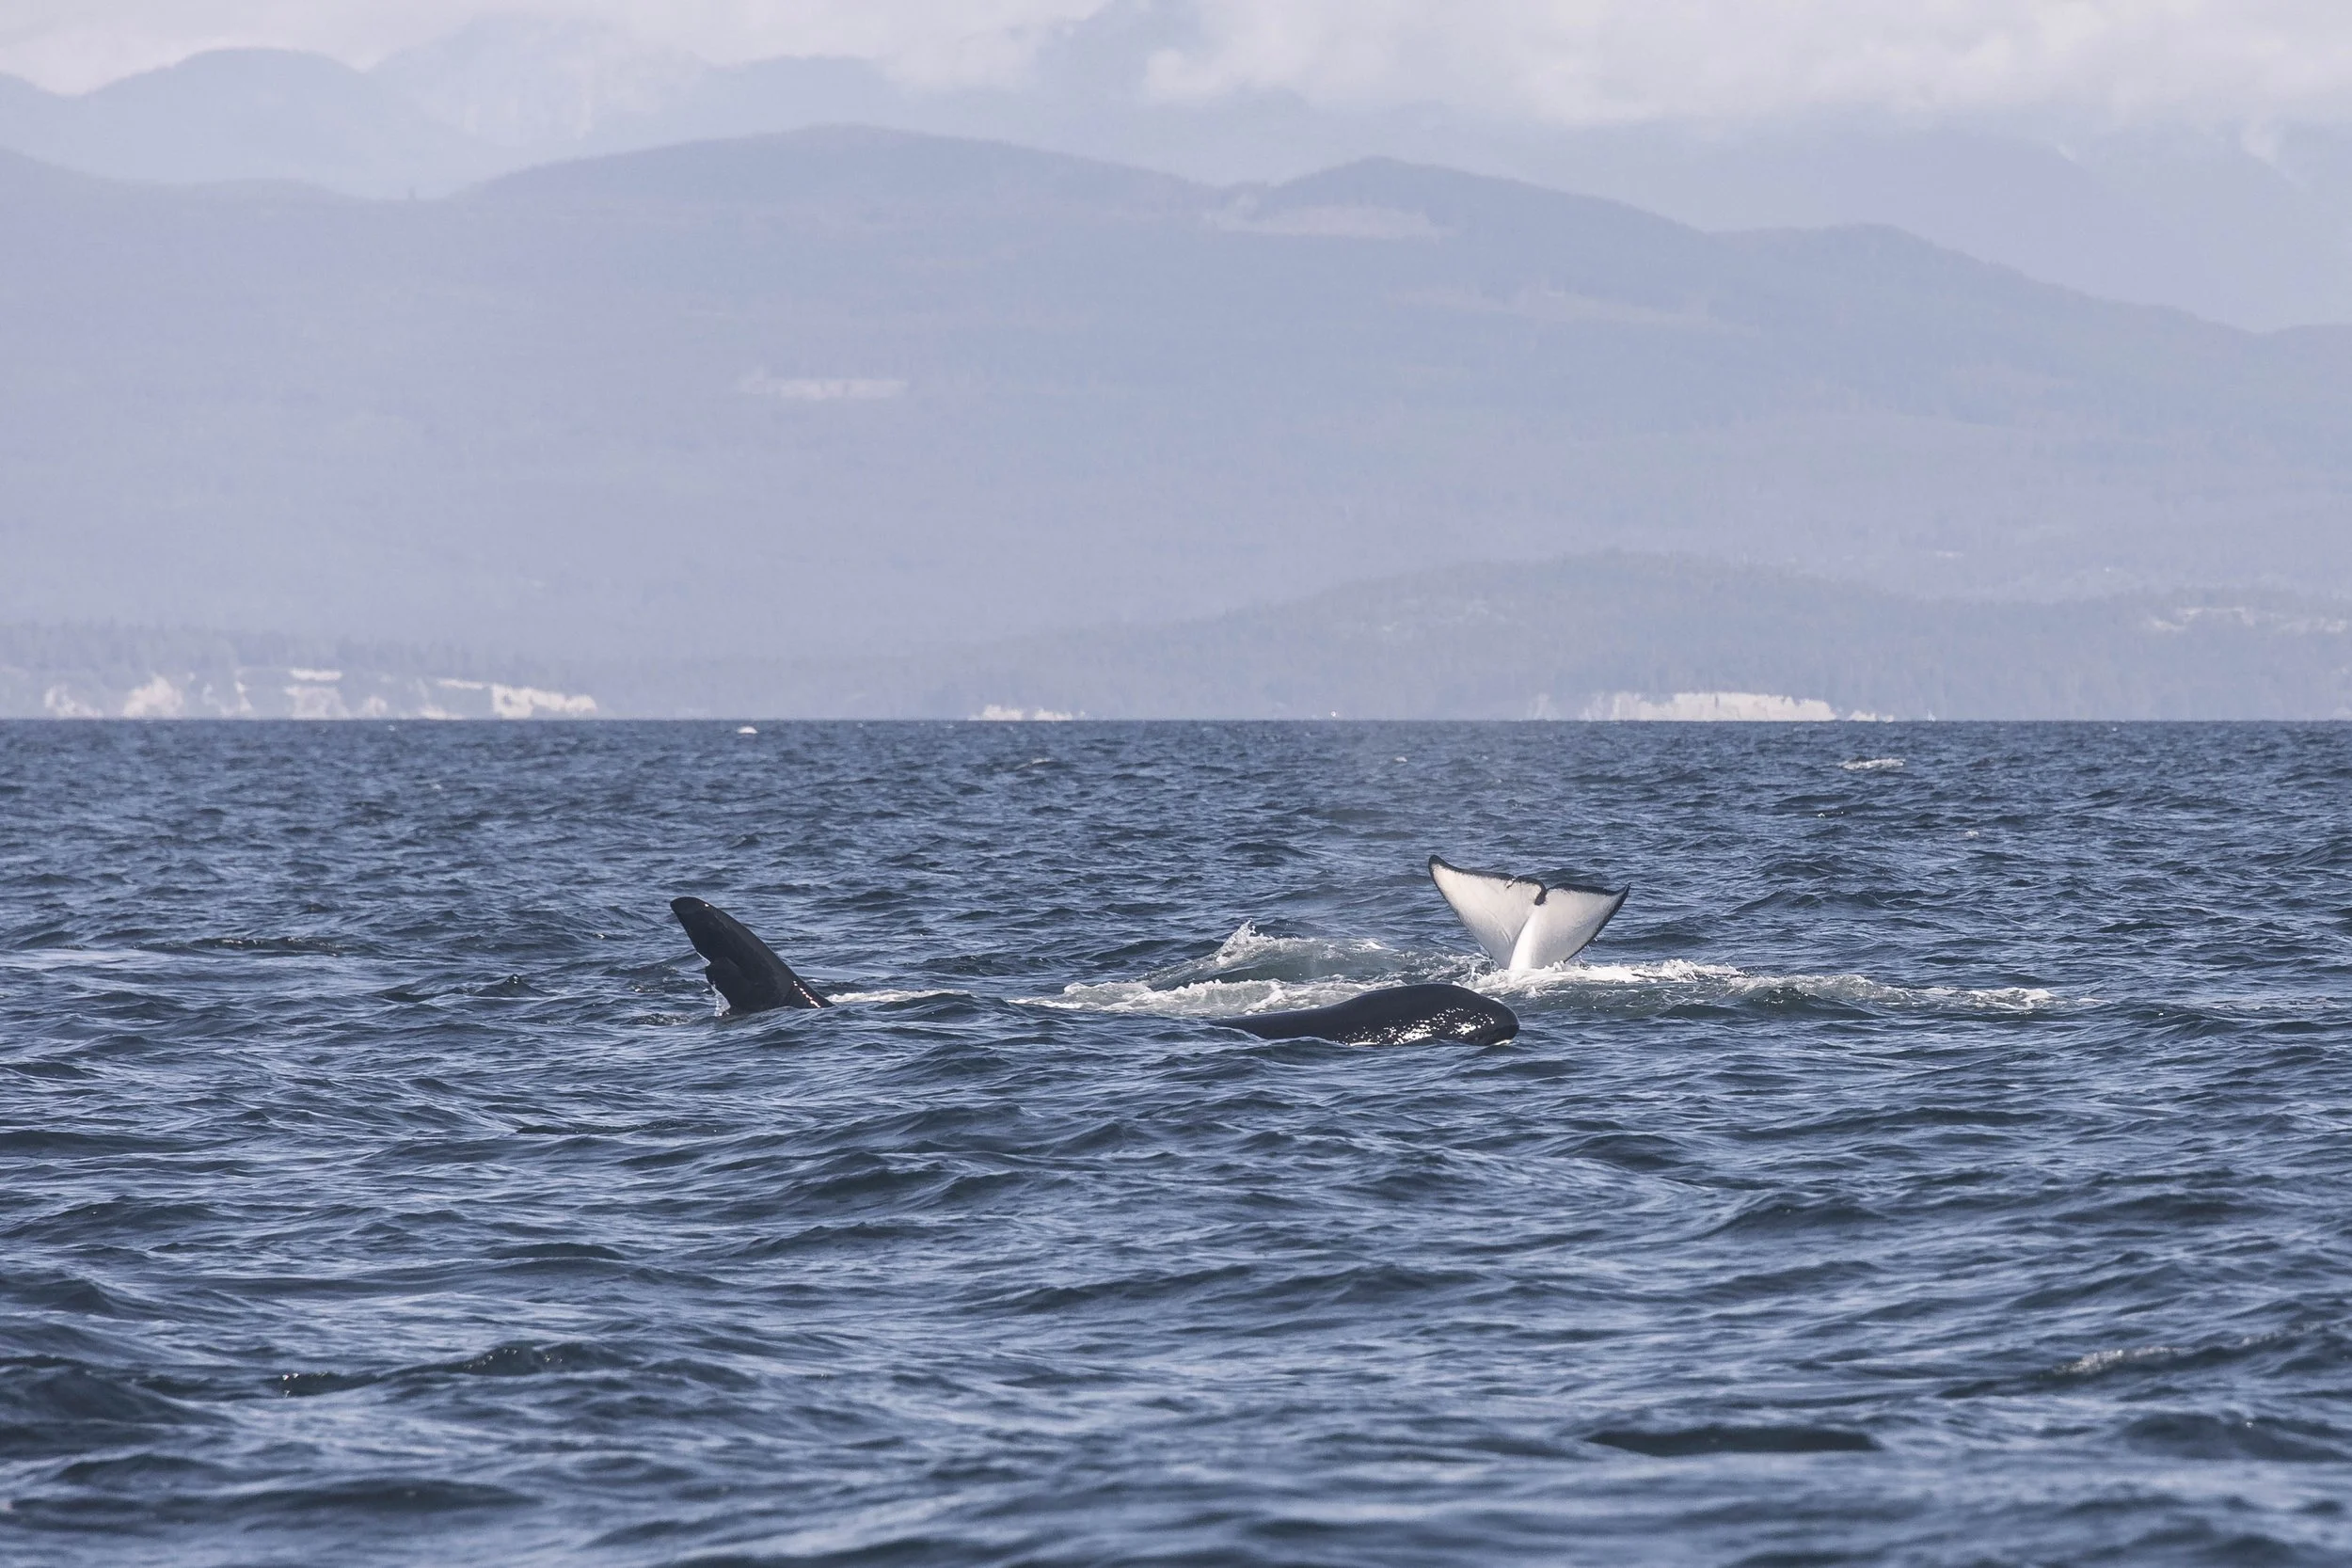
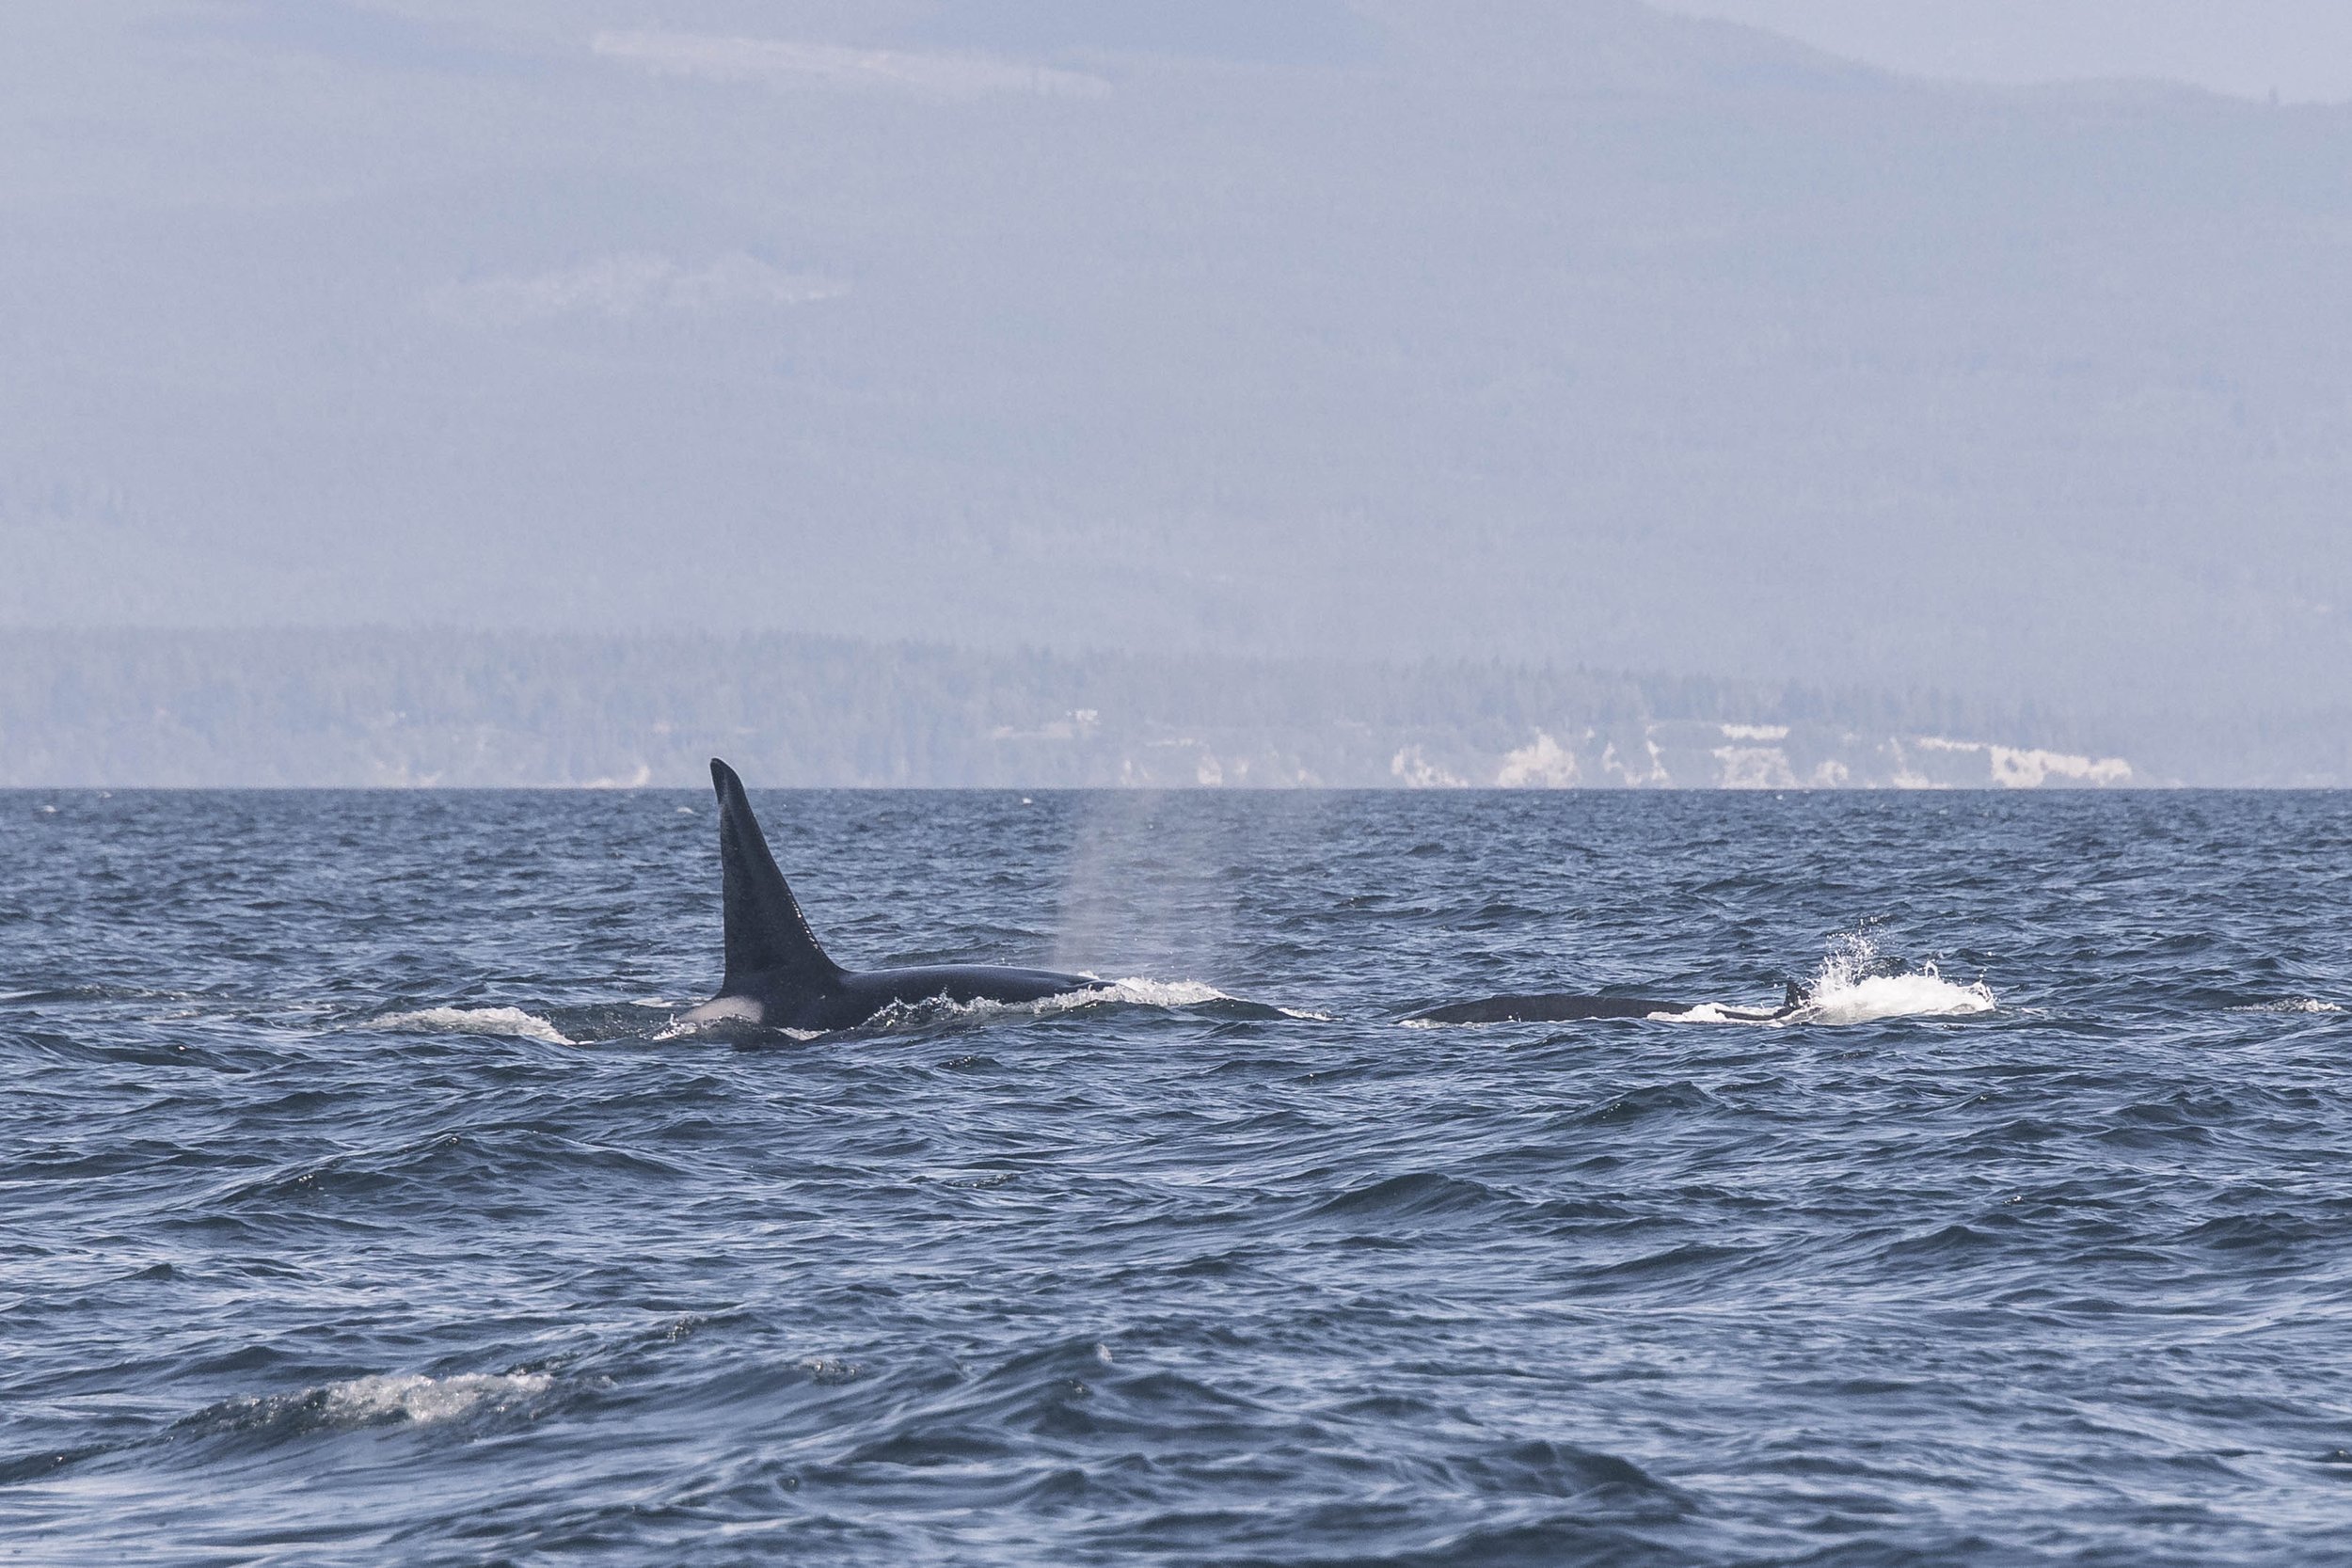
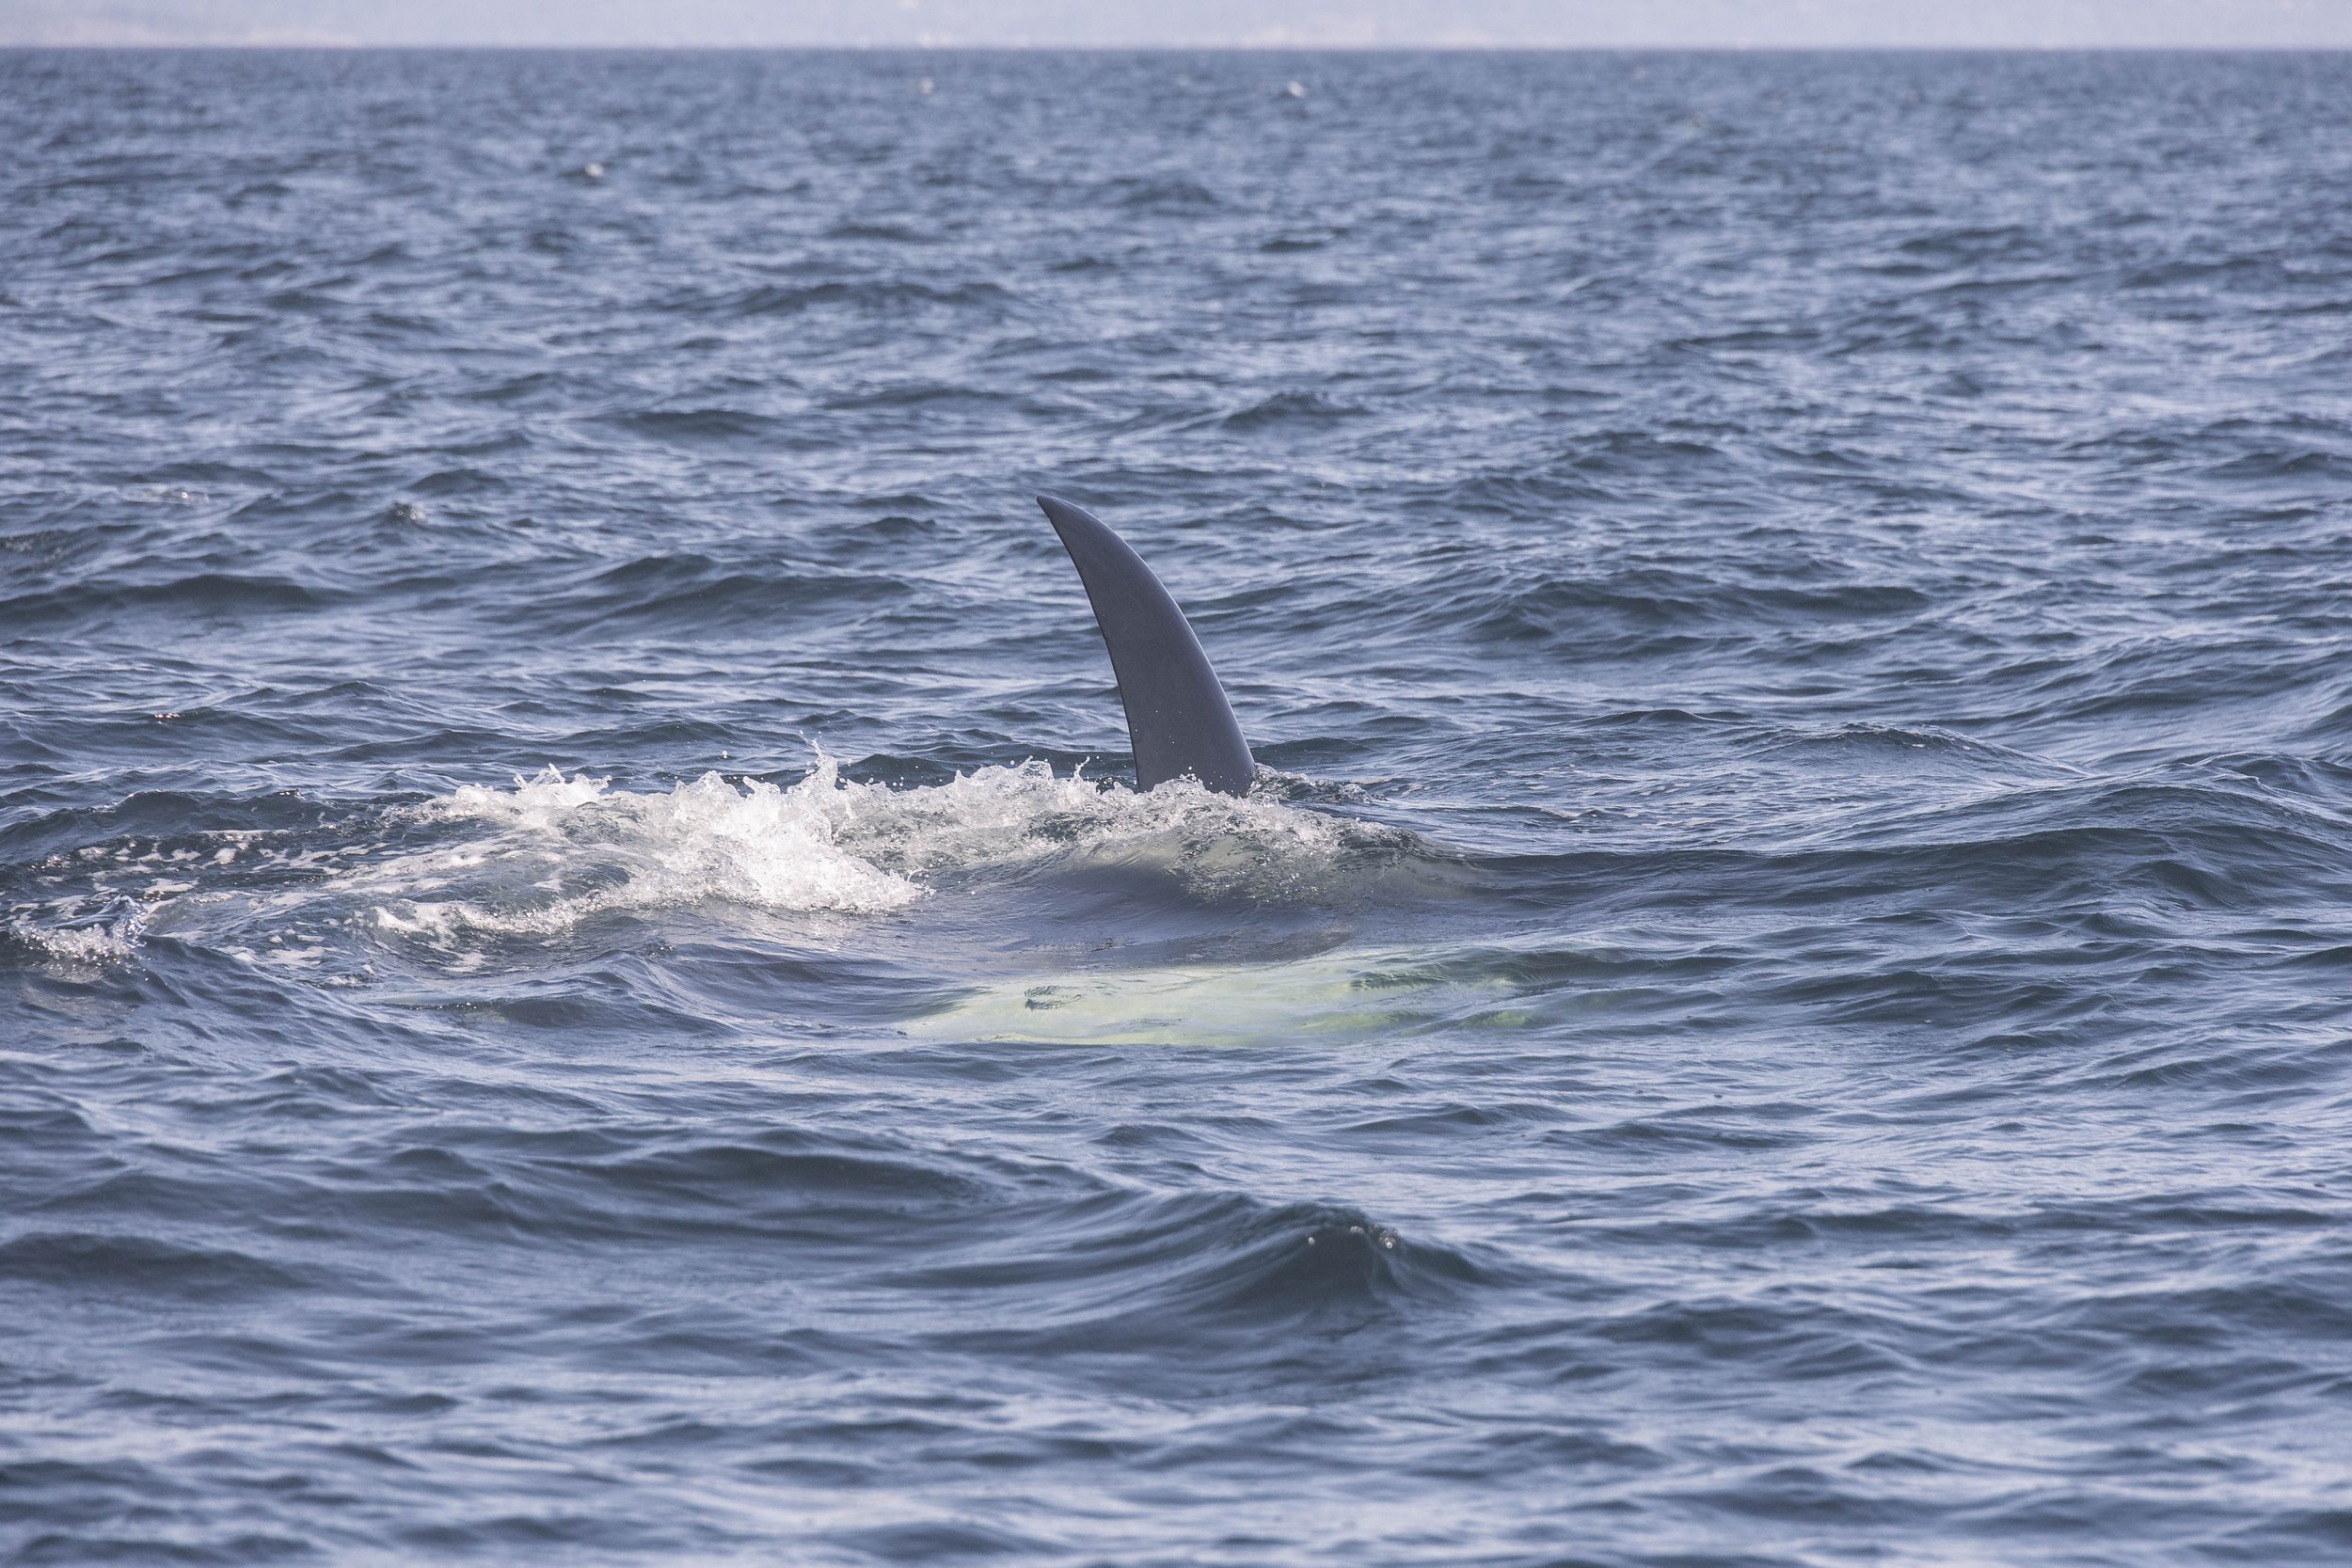
T-party versus Humpbacks

Poptart’s tail with Arial surfacing just behind her. Photo by Desarae Poier.
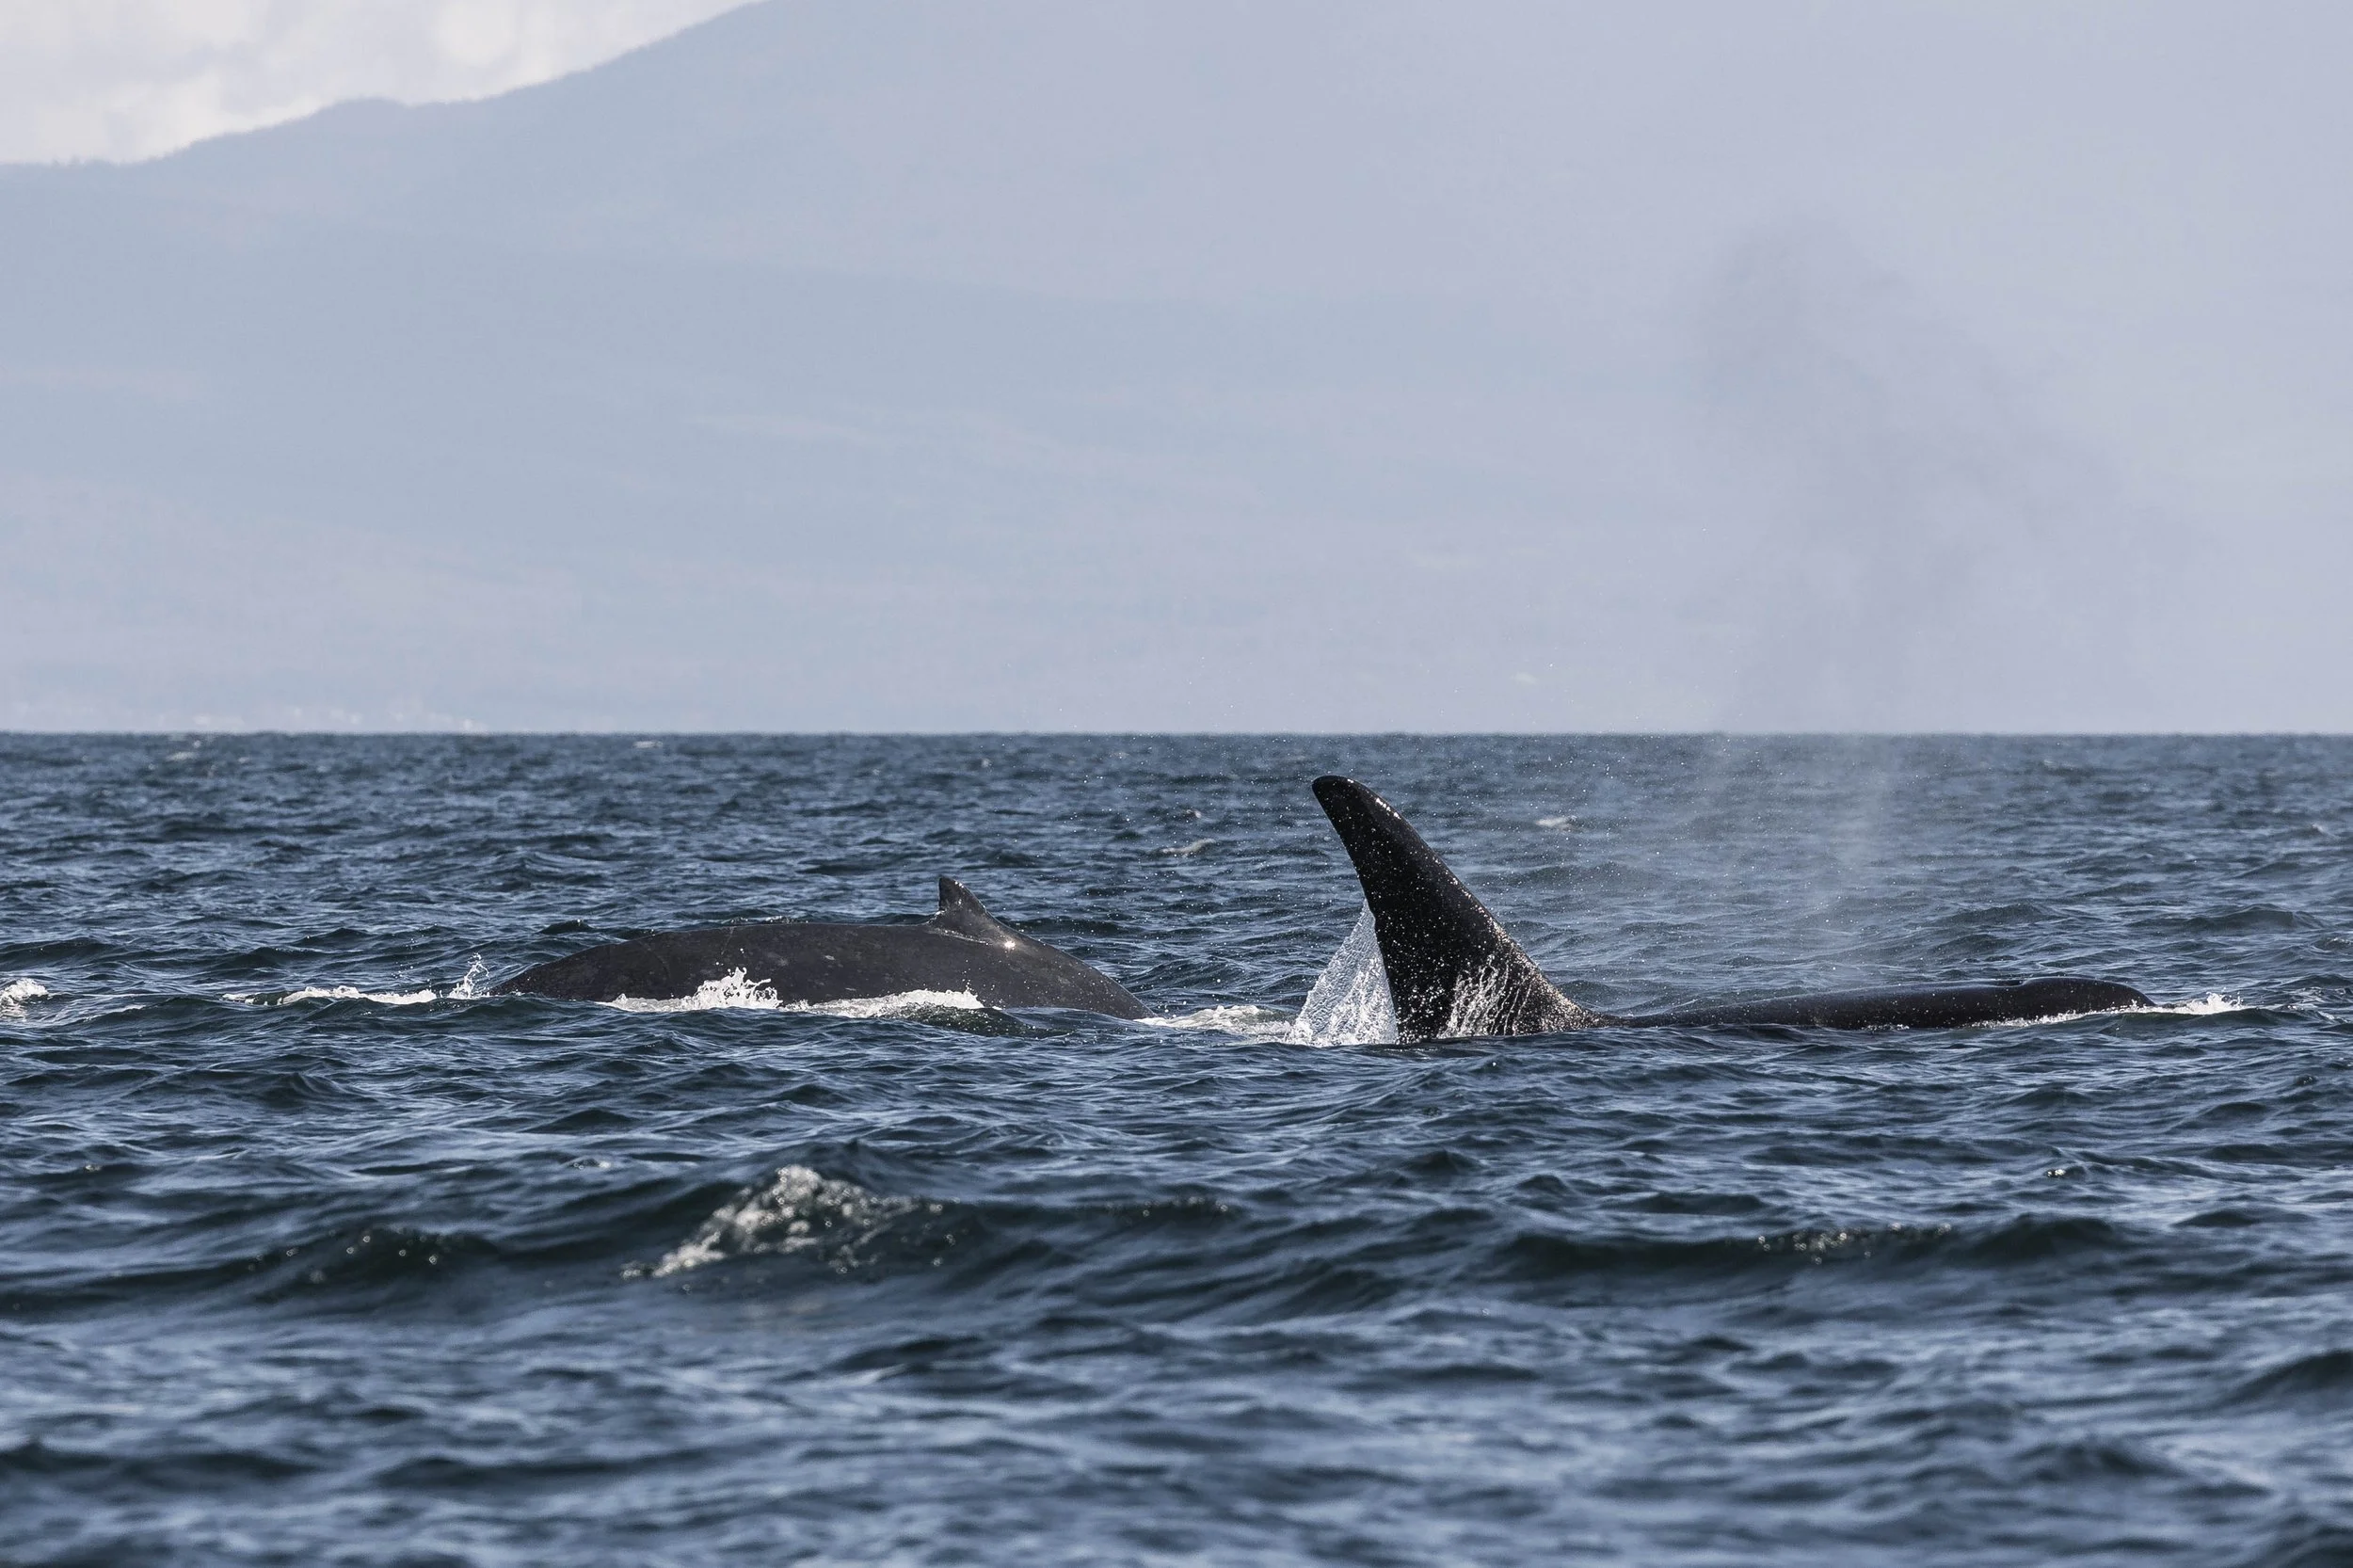
Arial on the left in close quarters with T100C Laurel. Photo by Desarae Poier.
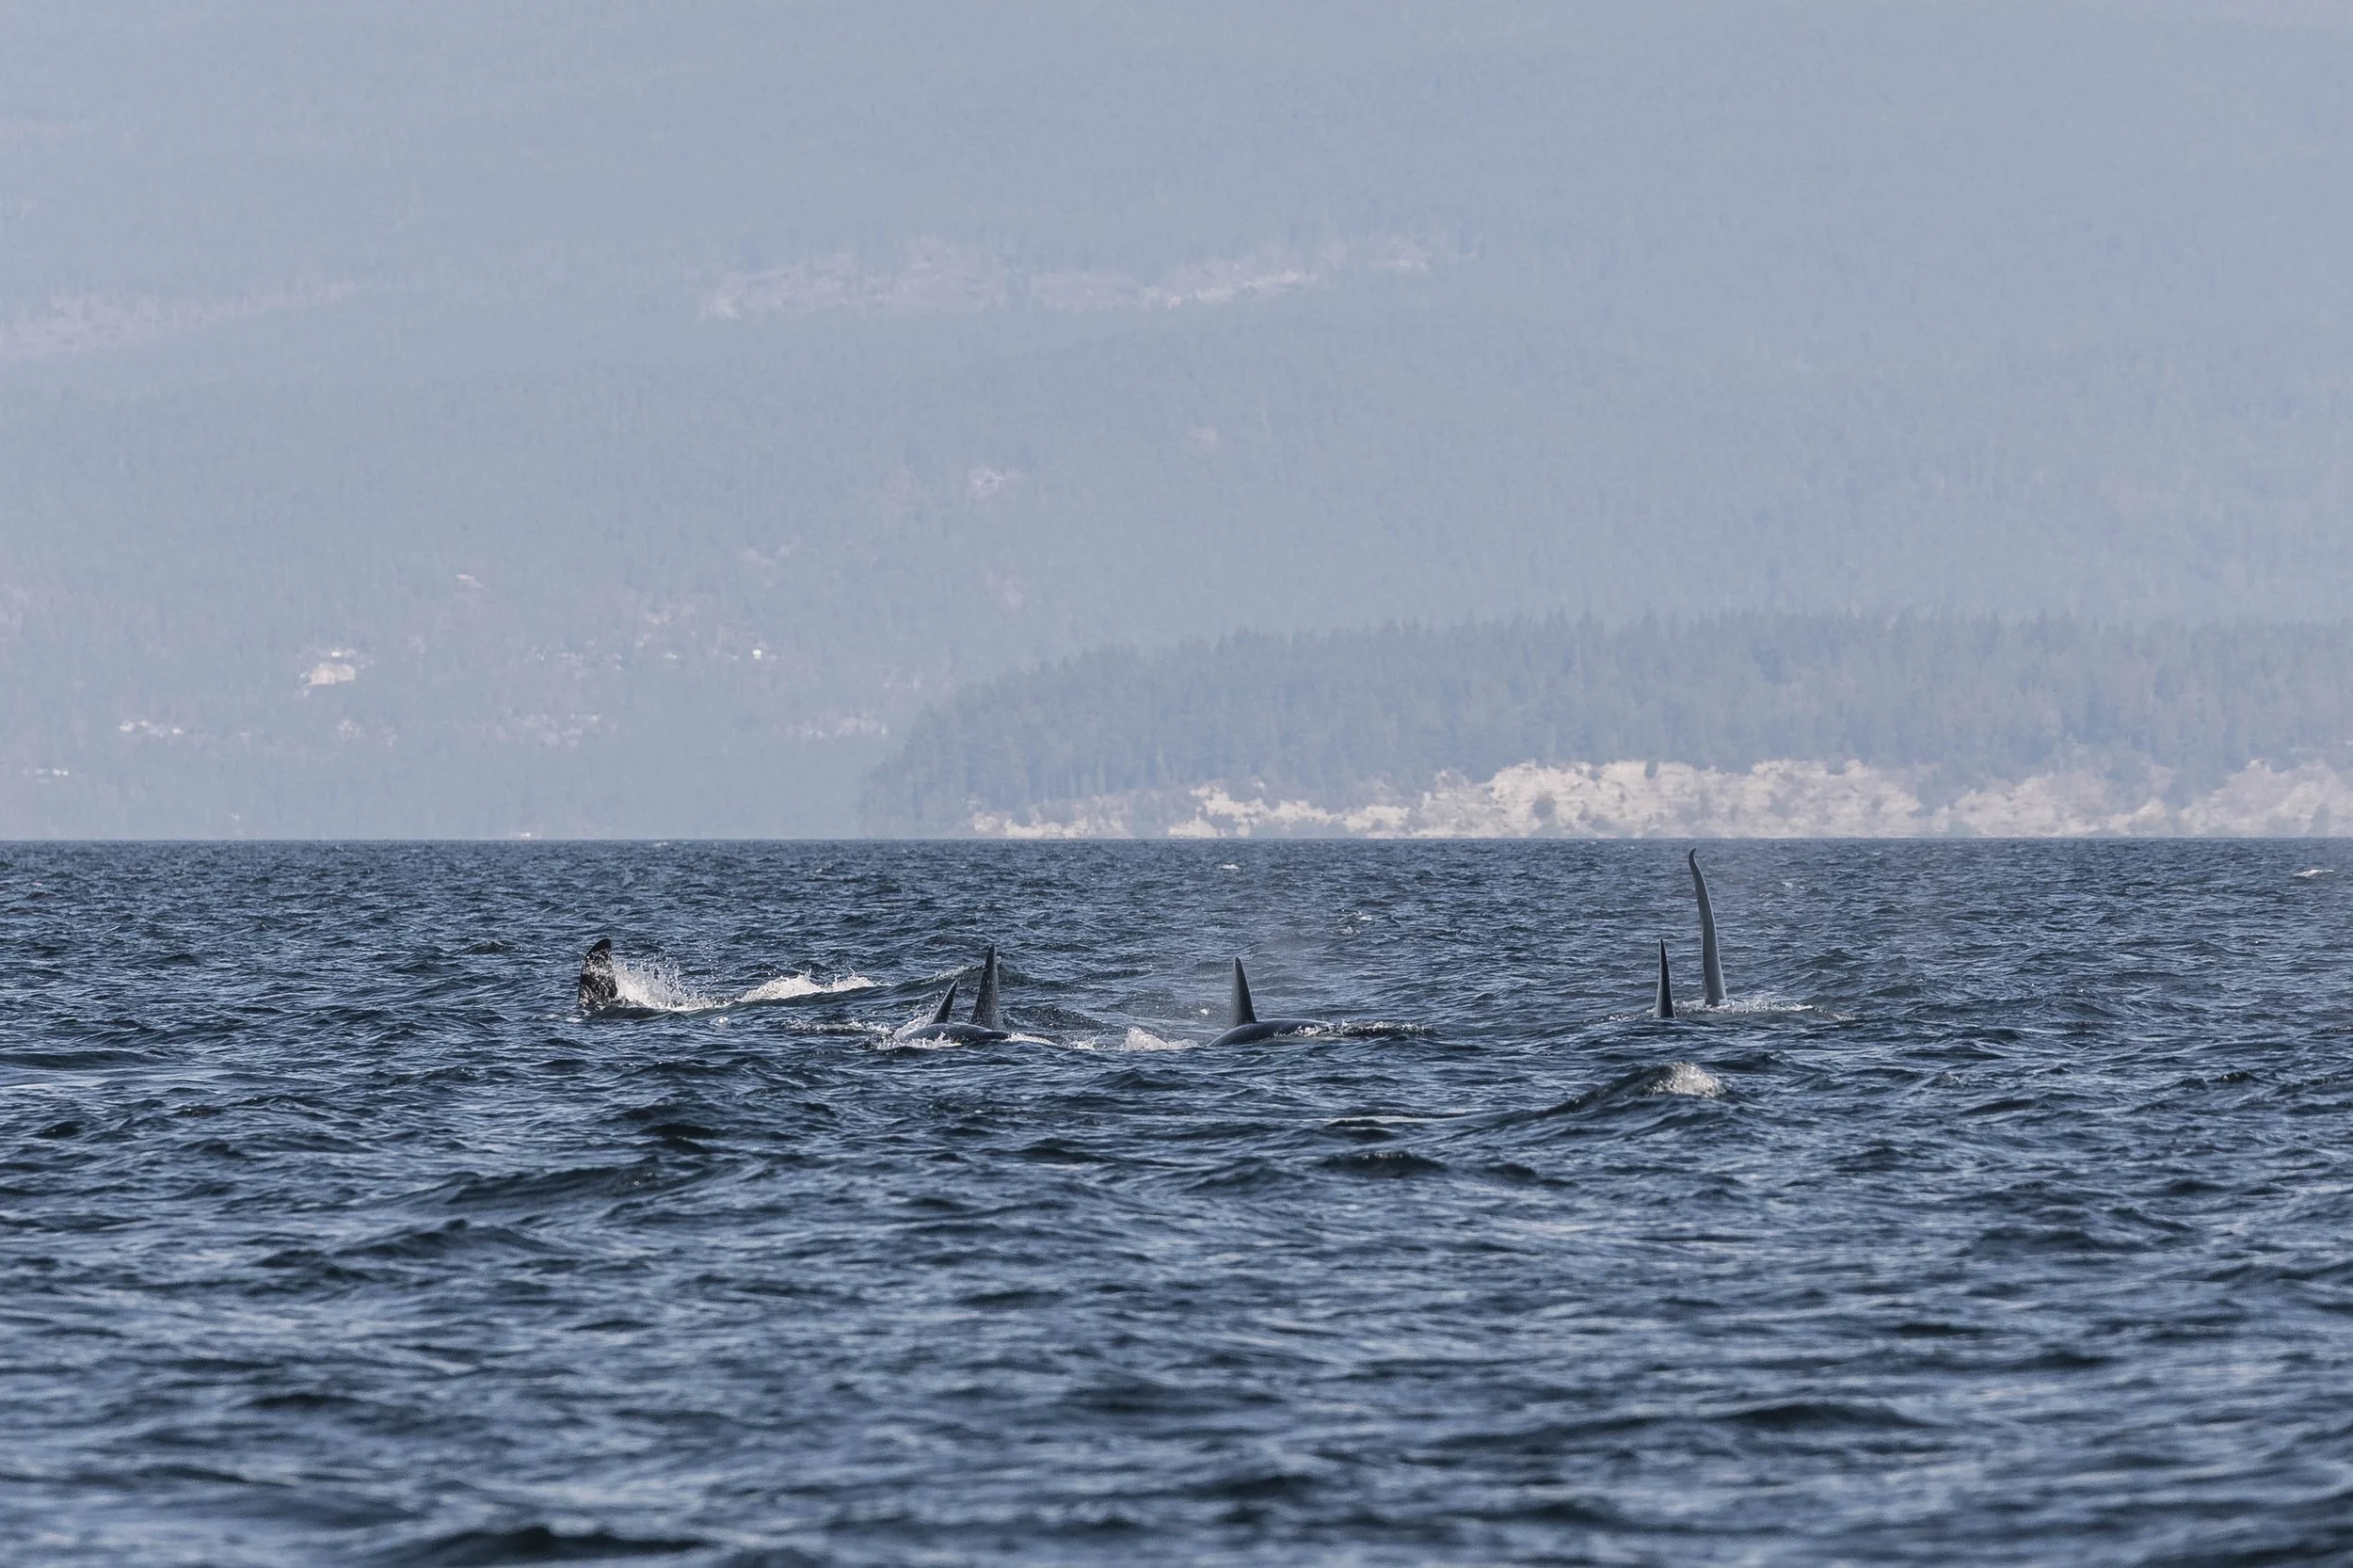
A big group of the orca coming at us! Photo by Desarae Poier.

A little breach with the group of orca moving in unison. Photo by Desarae Poier.

T100C Laurel surfacing in the waves. Photo by Desarae Poier.
T101A Rush surfacing in the waves. Photo by Desarae Poier.
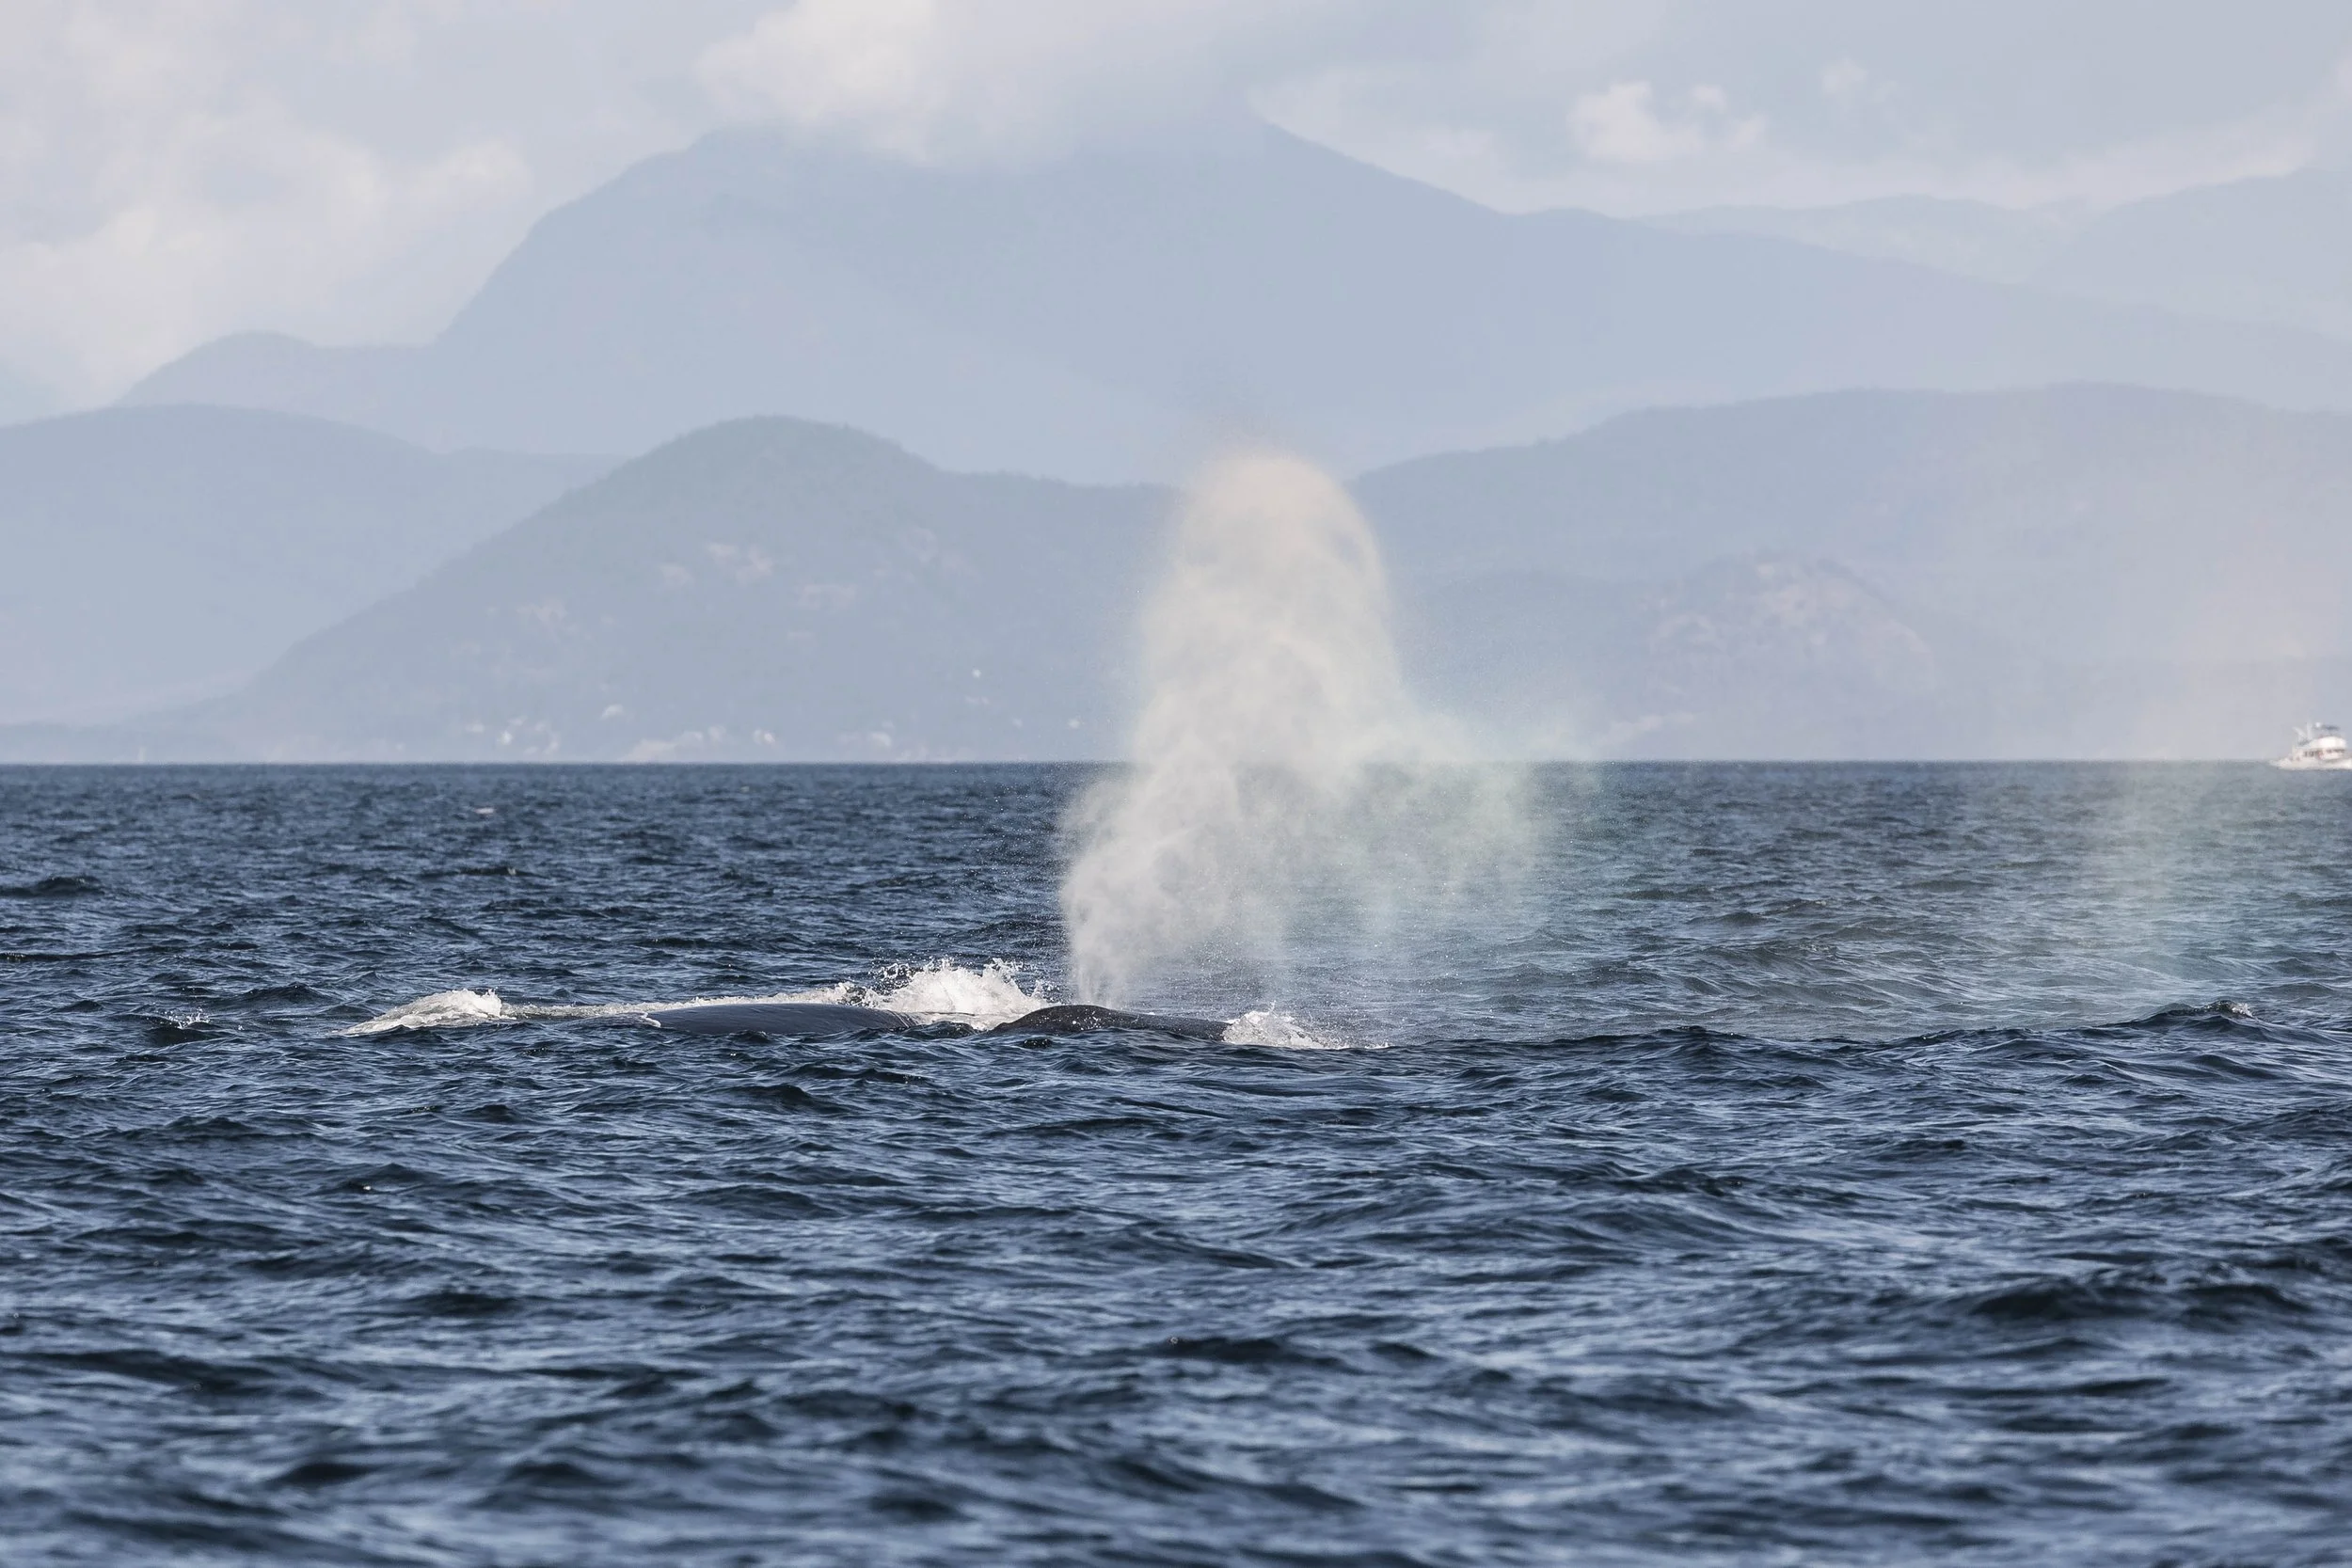
Some “Rainblows” from Poptart and Arial as they exhale at the surface. Photo by Desarae Poier.

Watson (left), Arial (middle) and Poptart (right) surfacing together during the brawl. Photo by Desarae Poier.
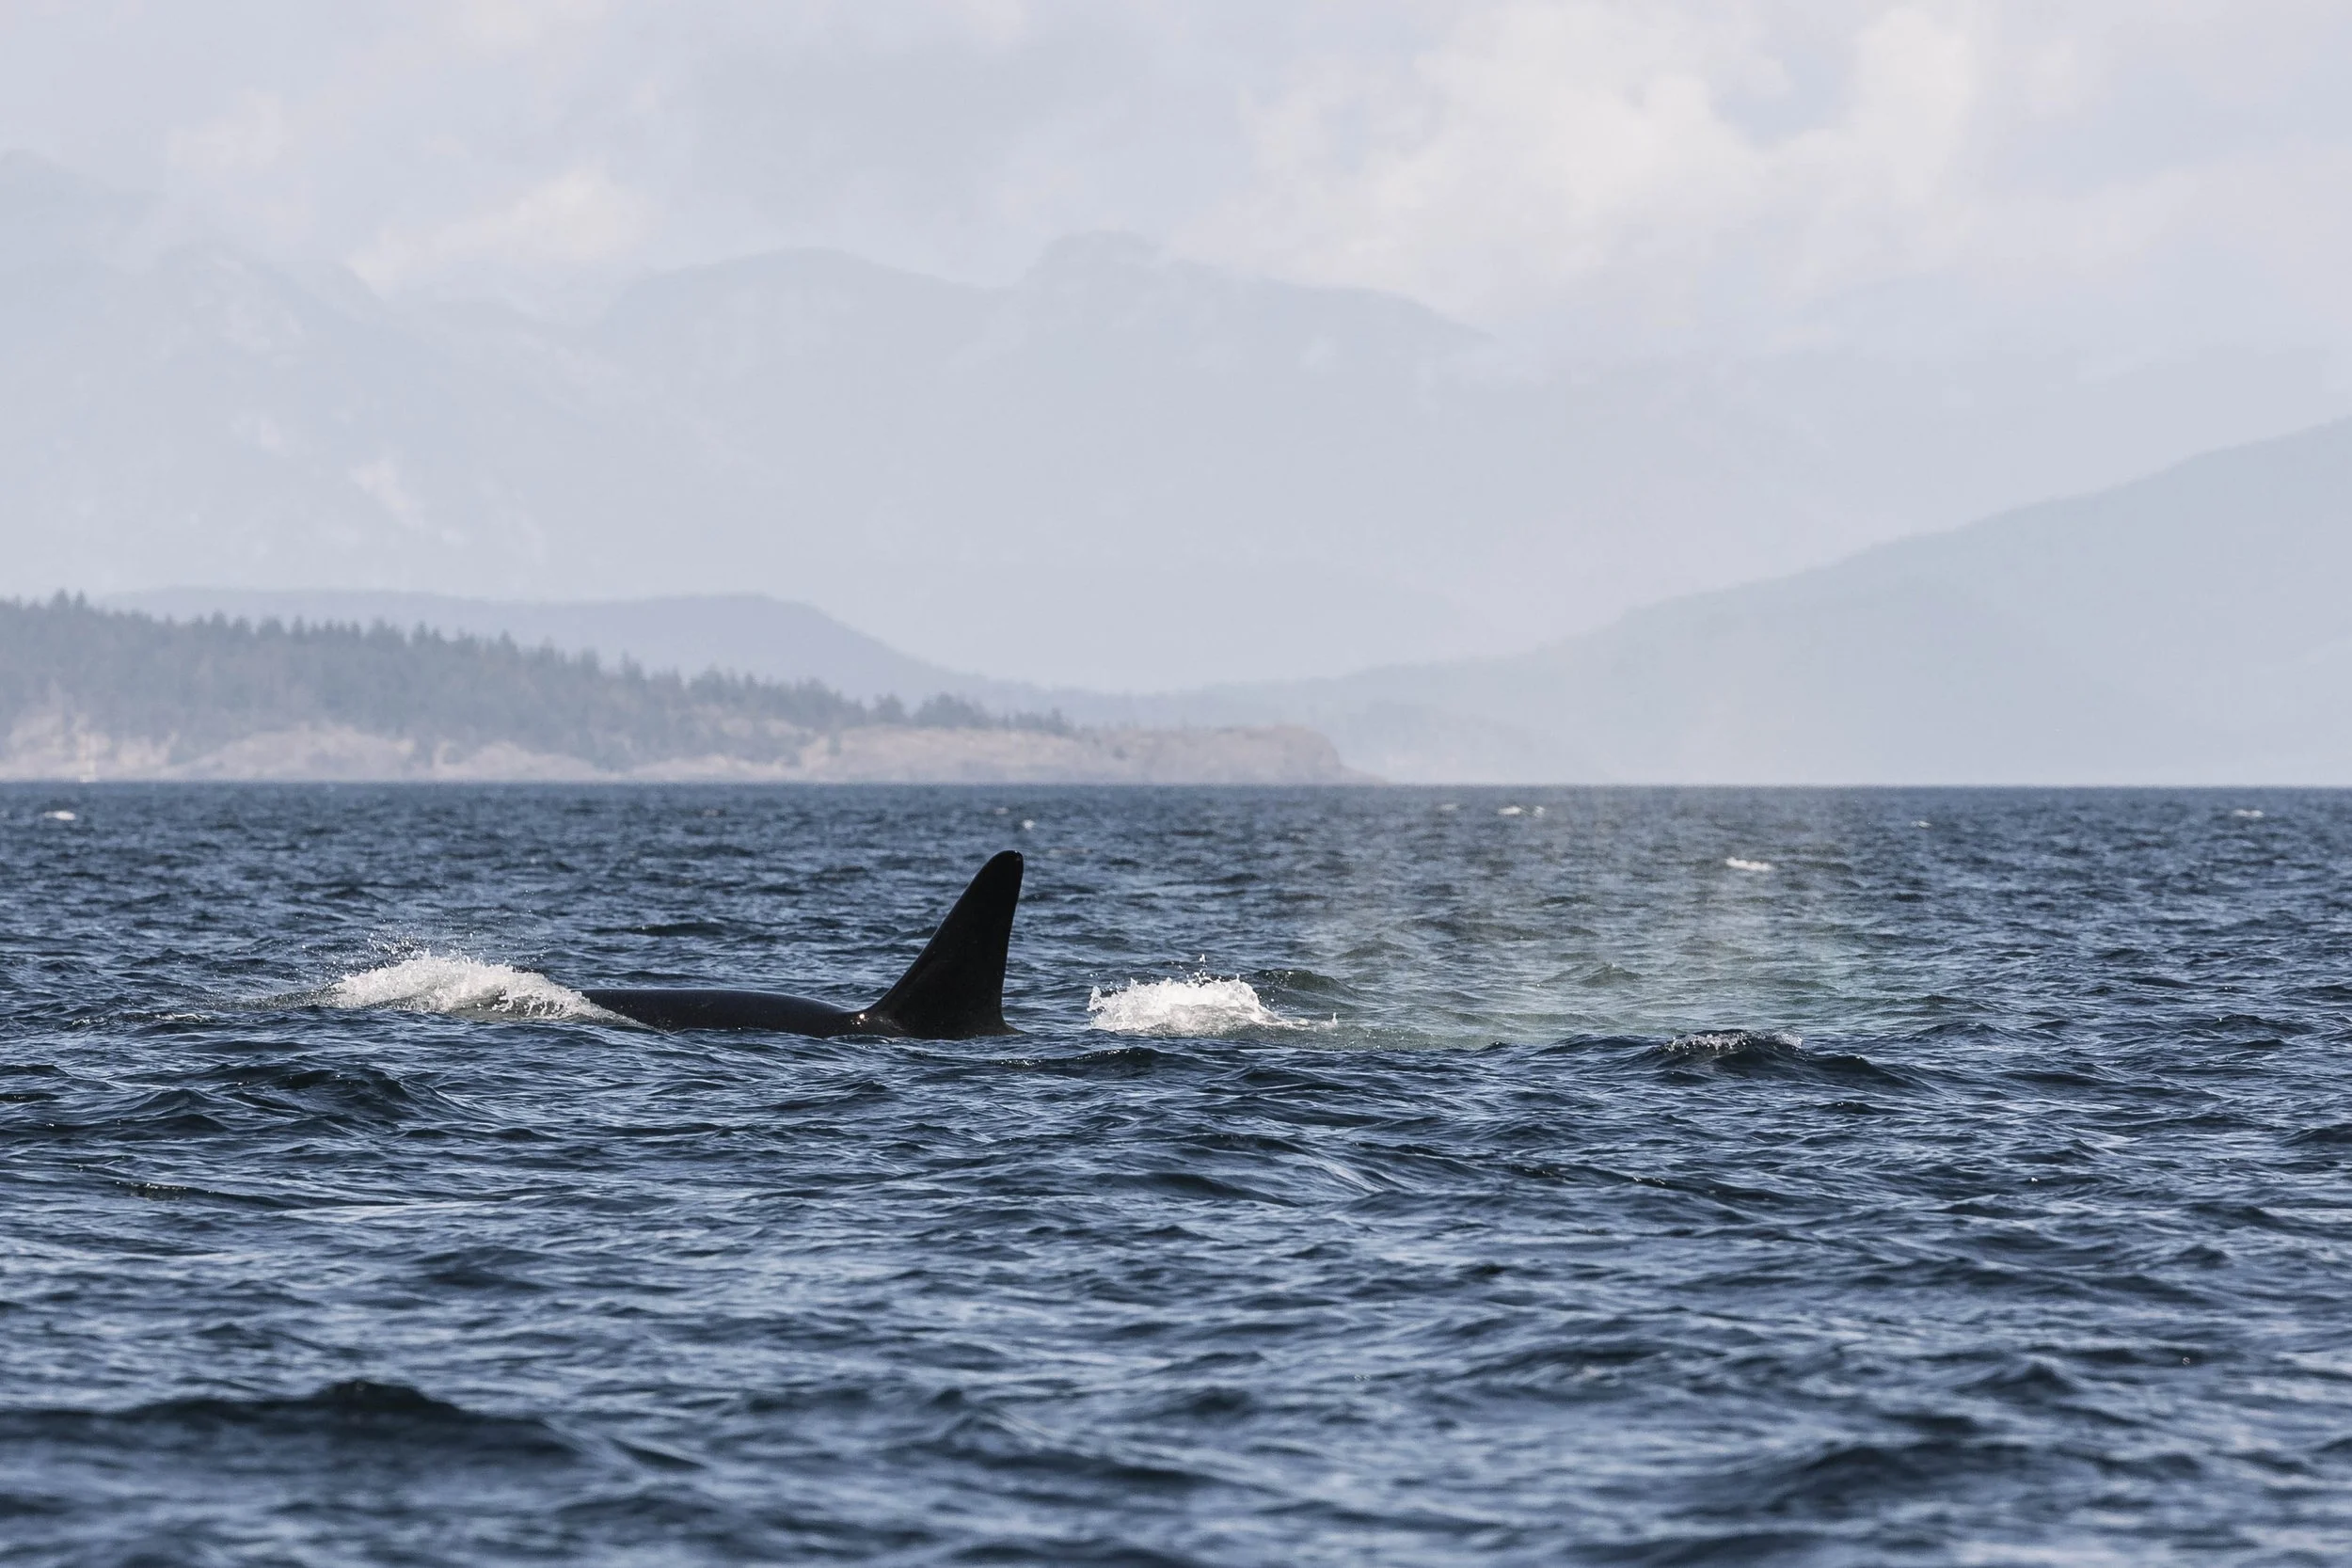
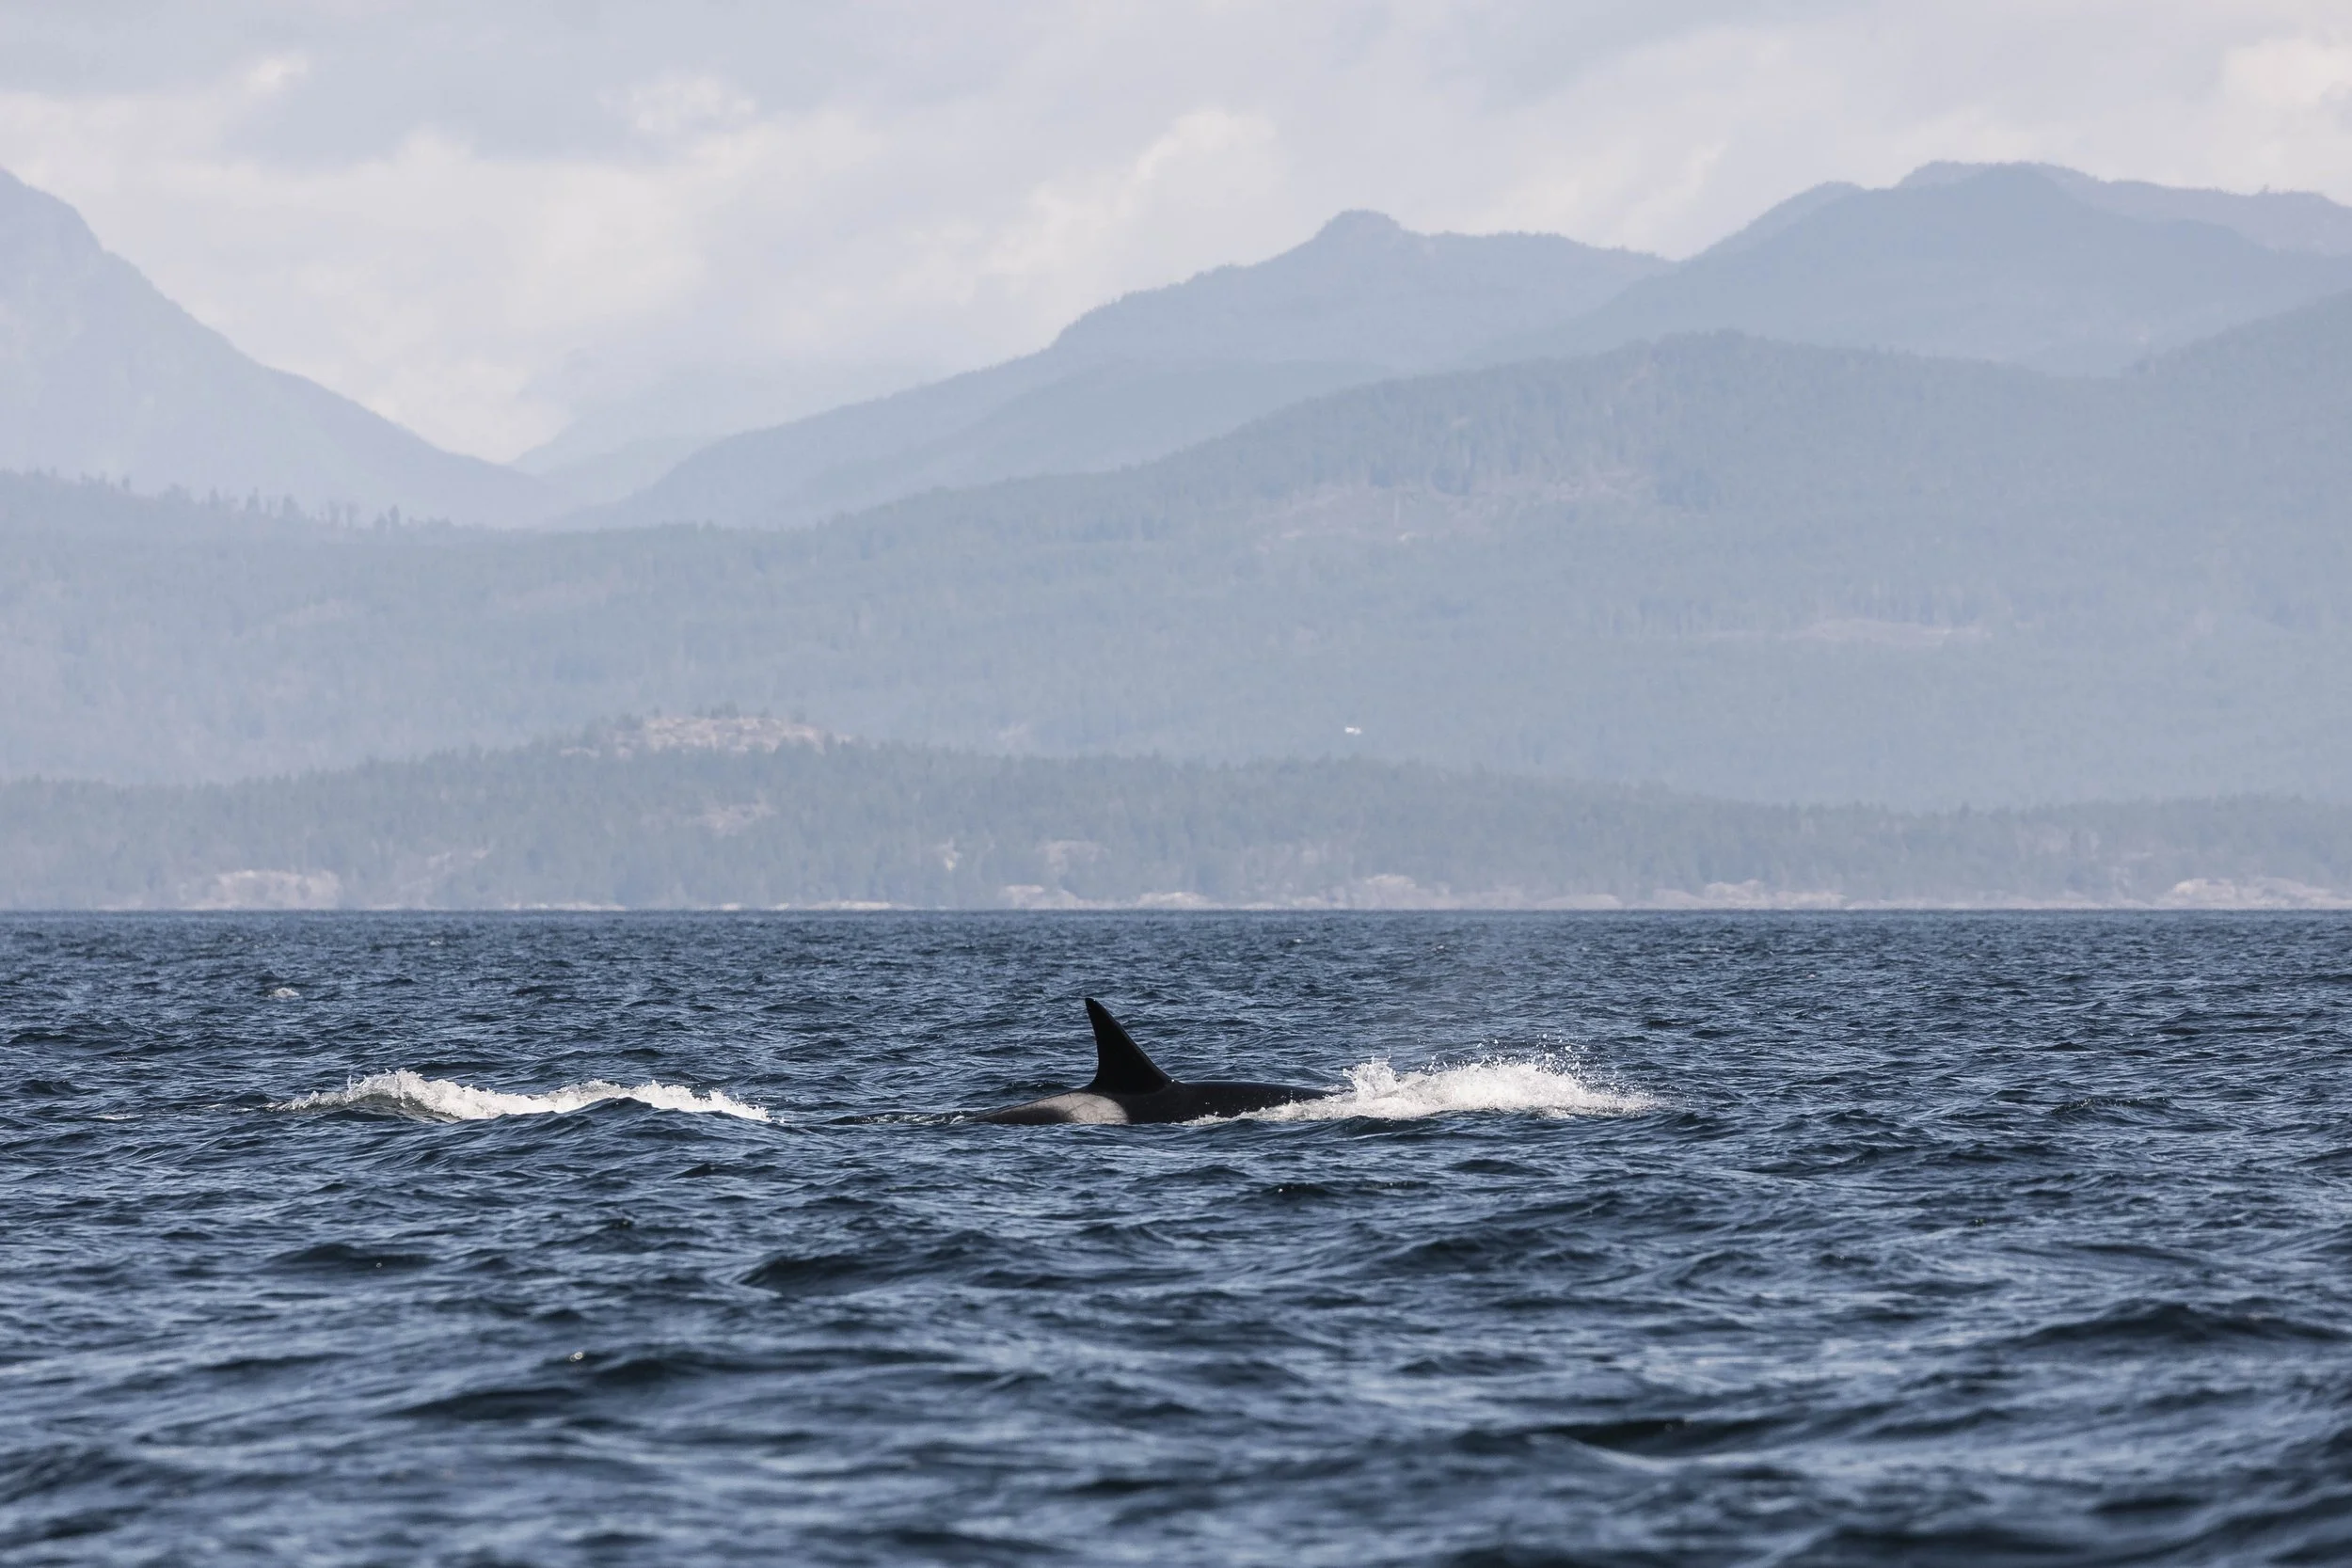
T063 Chainsaw surfacing. Photo by Desarae Poier.

T036A1 Tierna and T065 Whidbey II surfacing together. Photo by Desarae Poier.
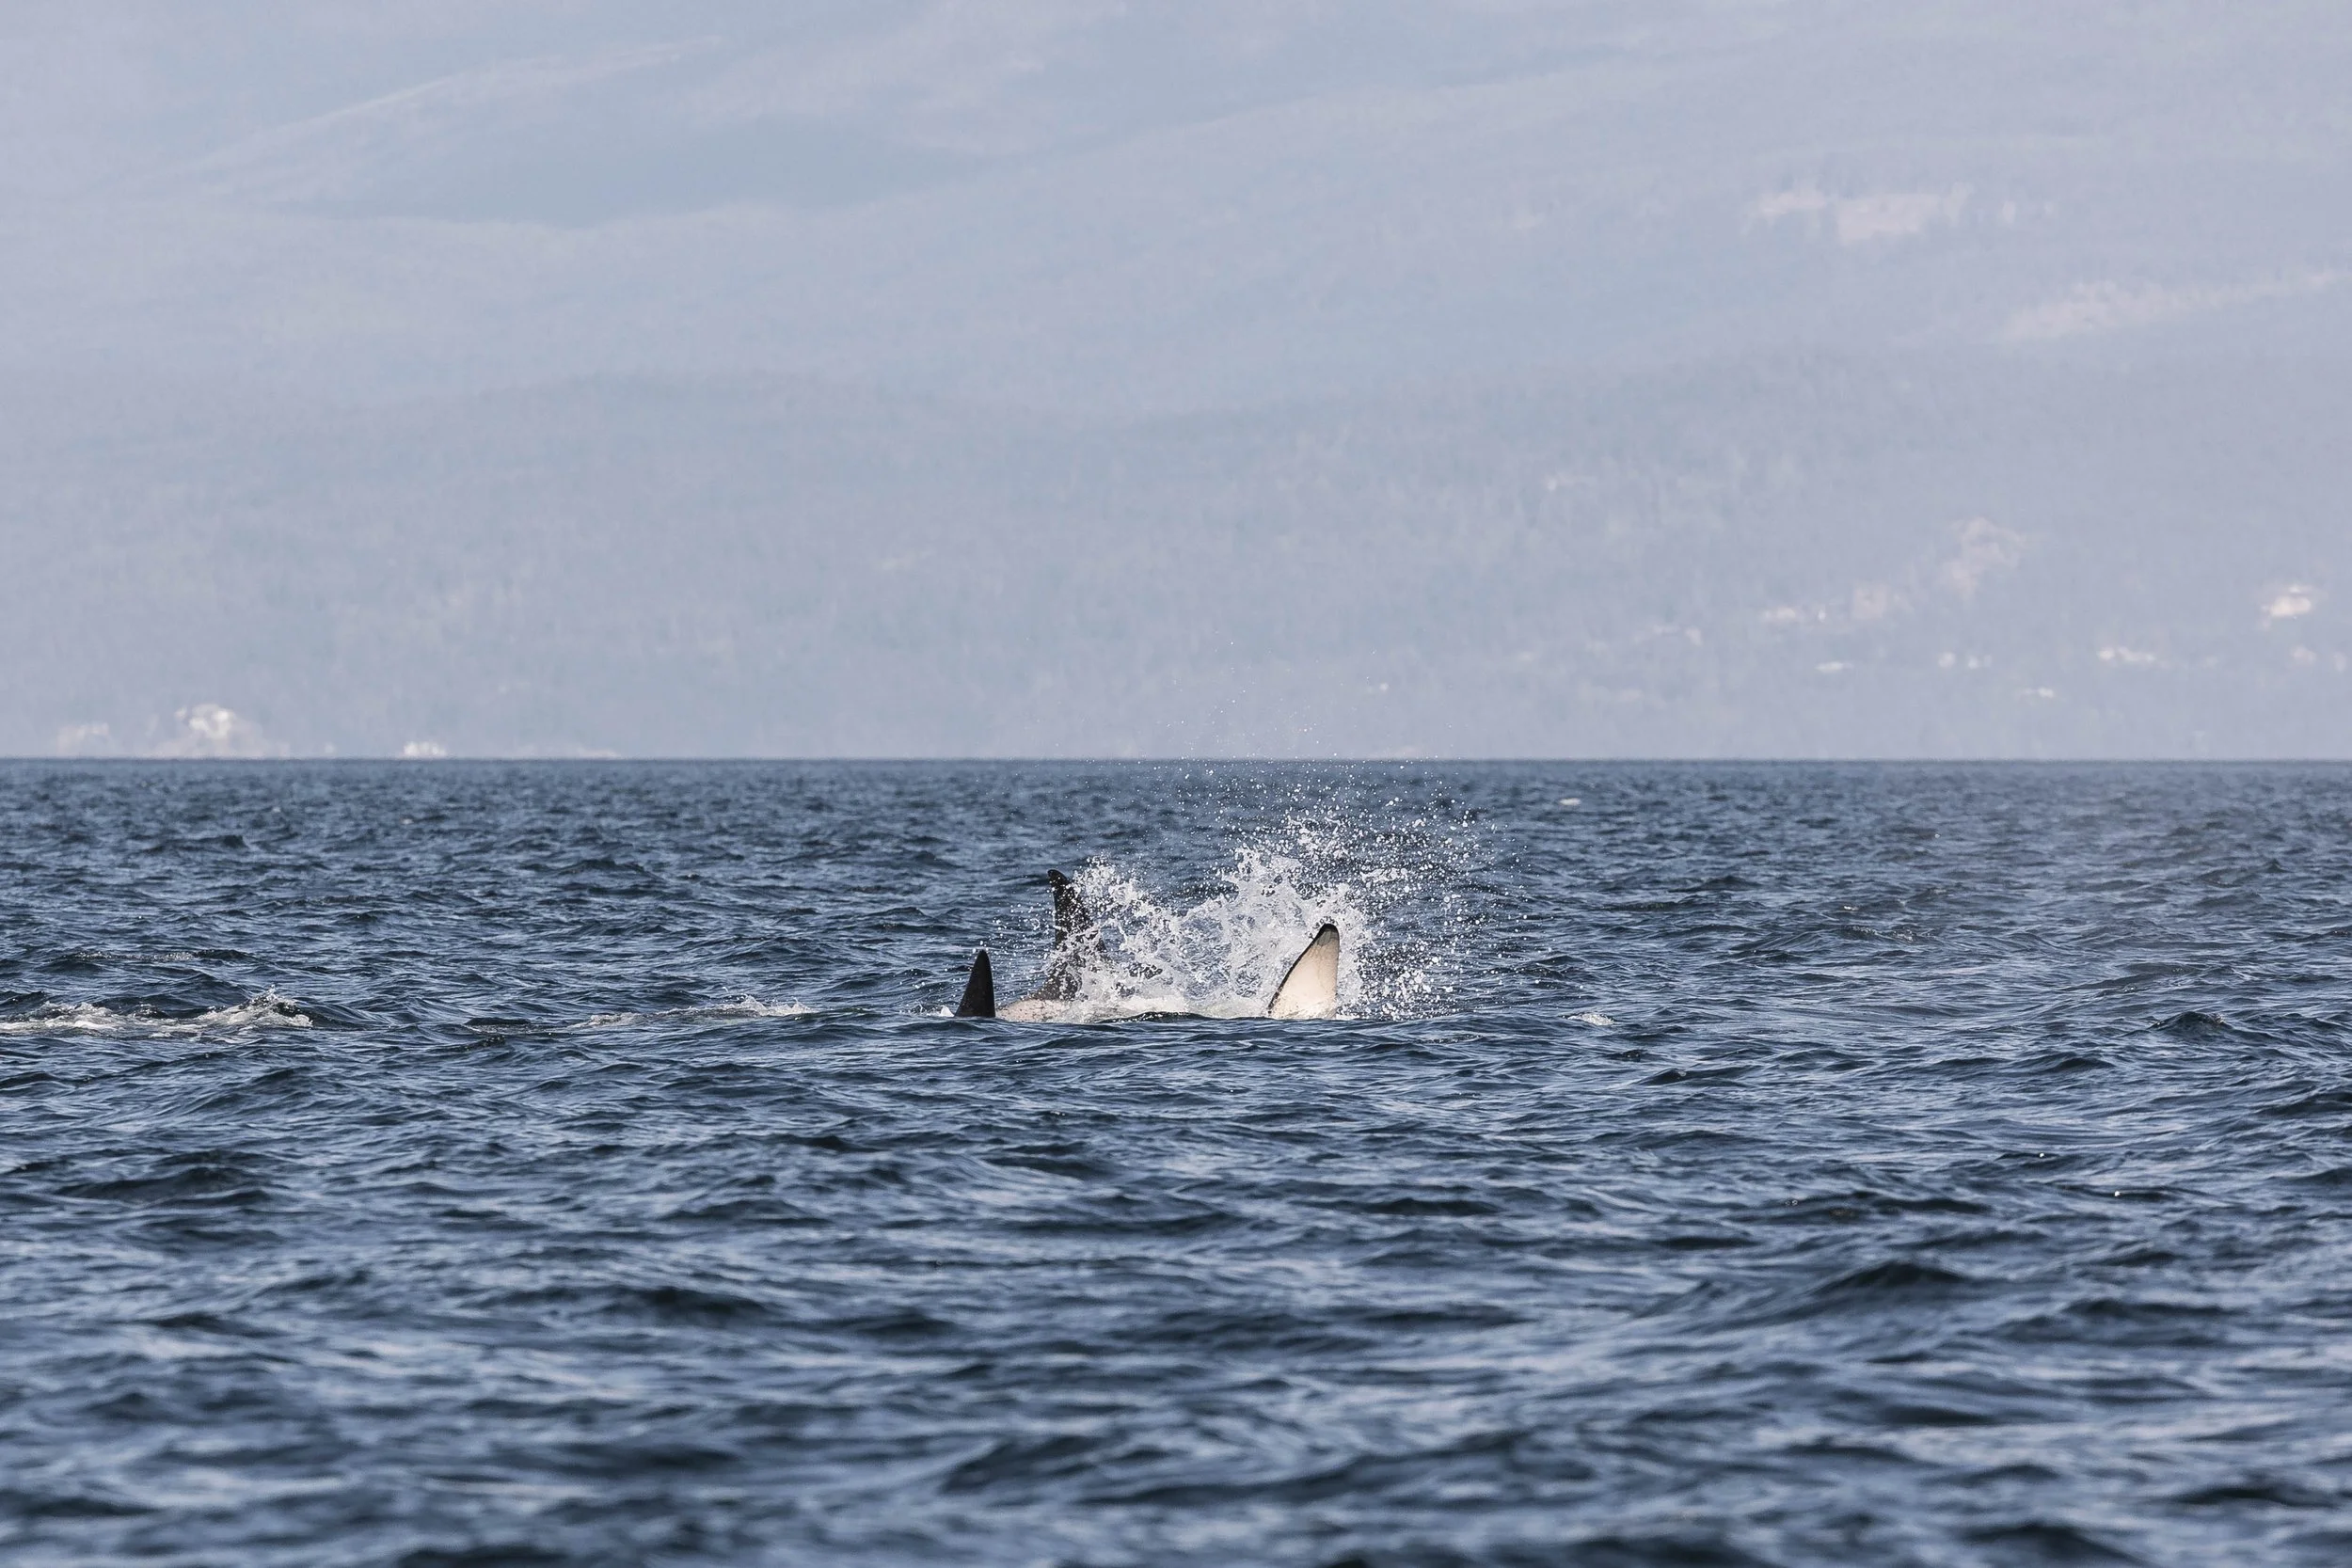
A big splash from a tail during the encounter. Photo by Desarae Poier.
T101 Reef moving quickly through the water. Photo by Desarae Poier.
A big arch from Watson as they dive. Photo by Desarae Poier.

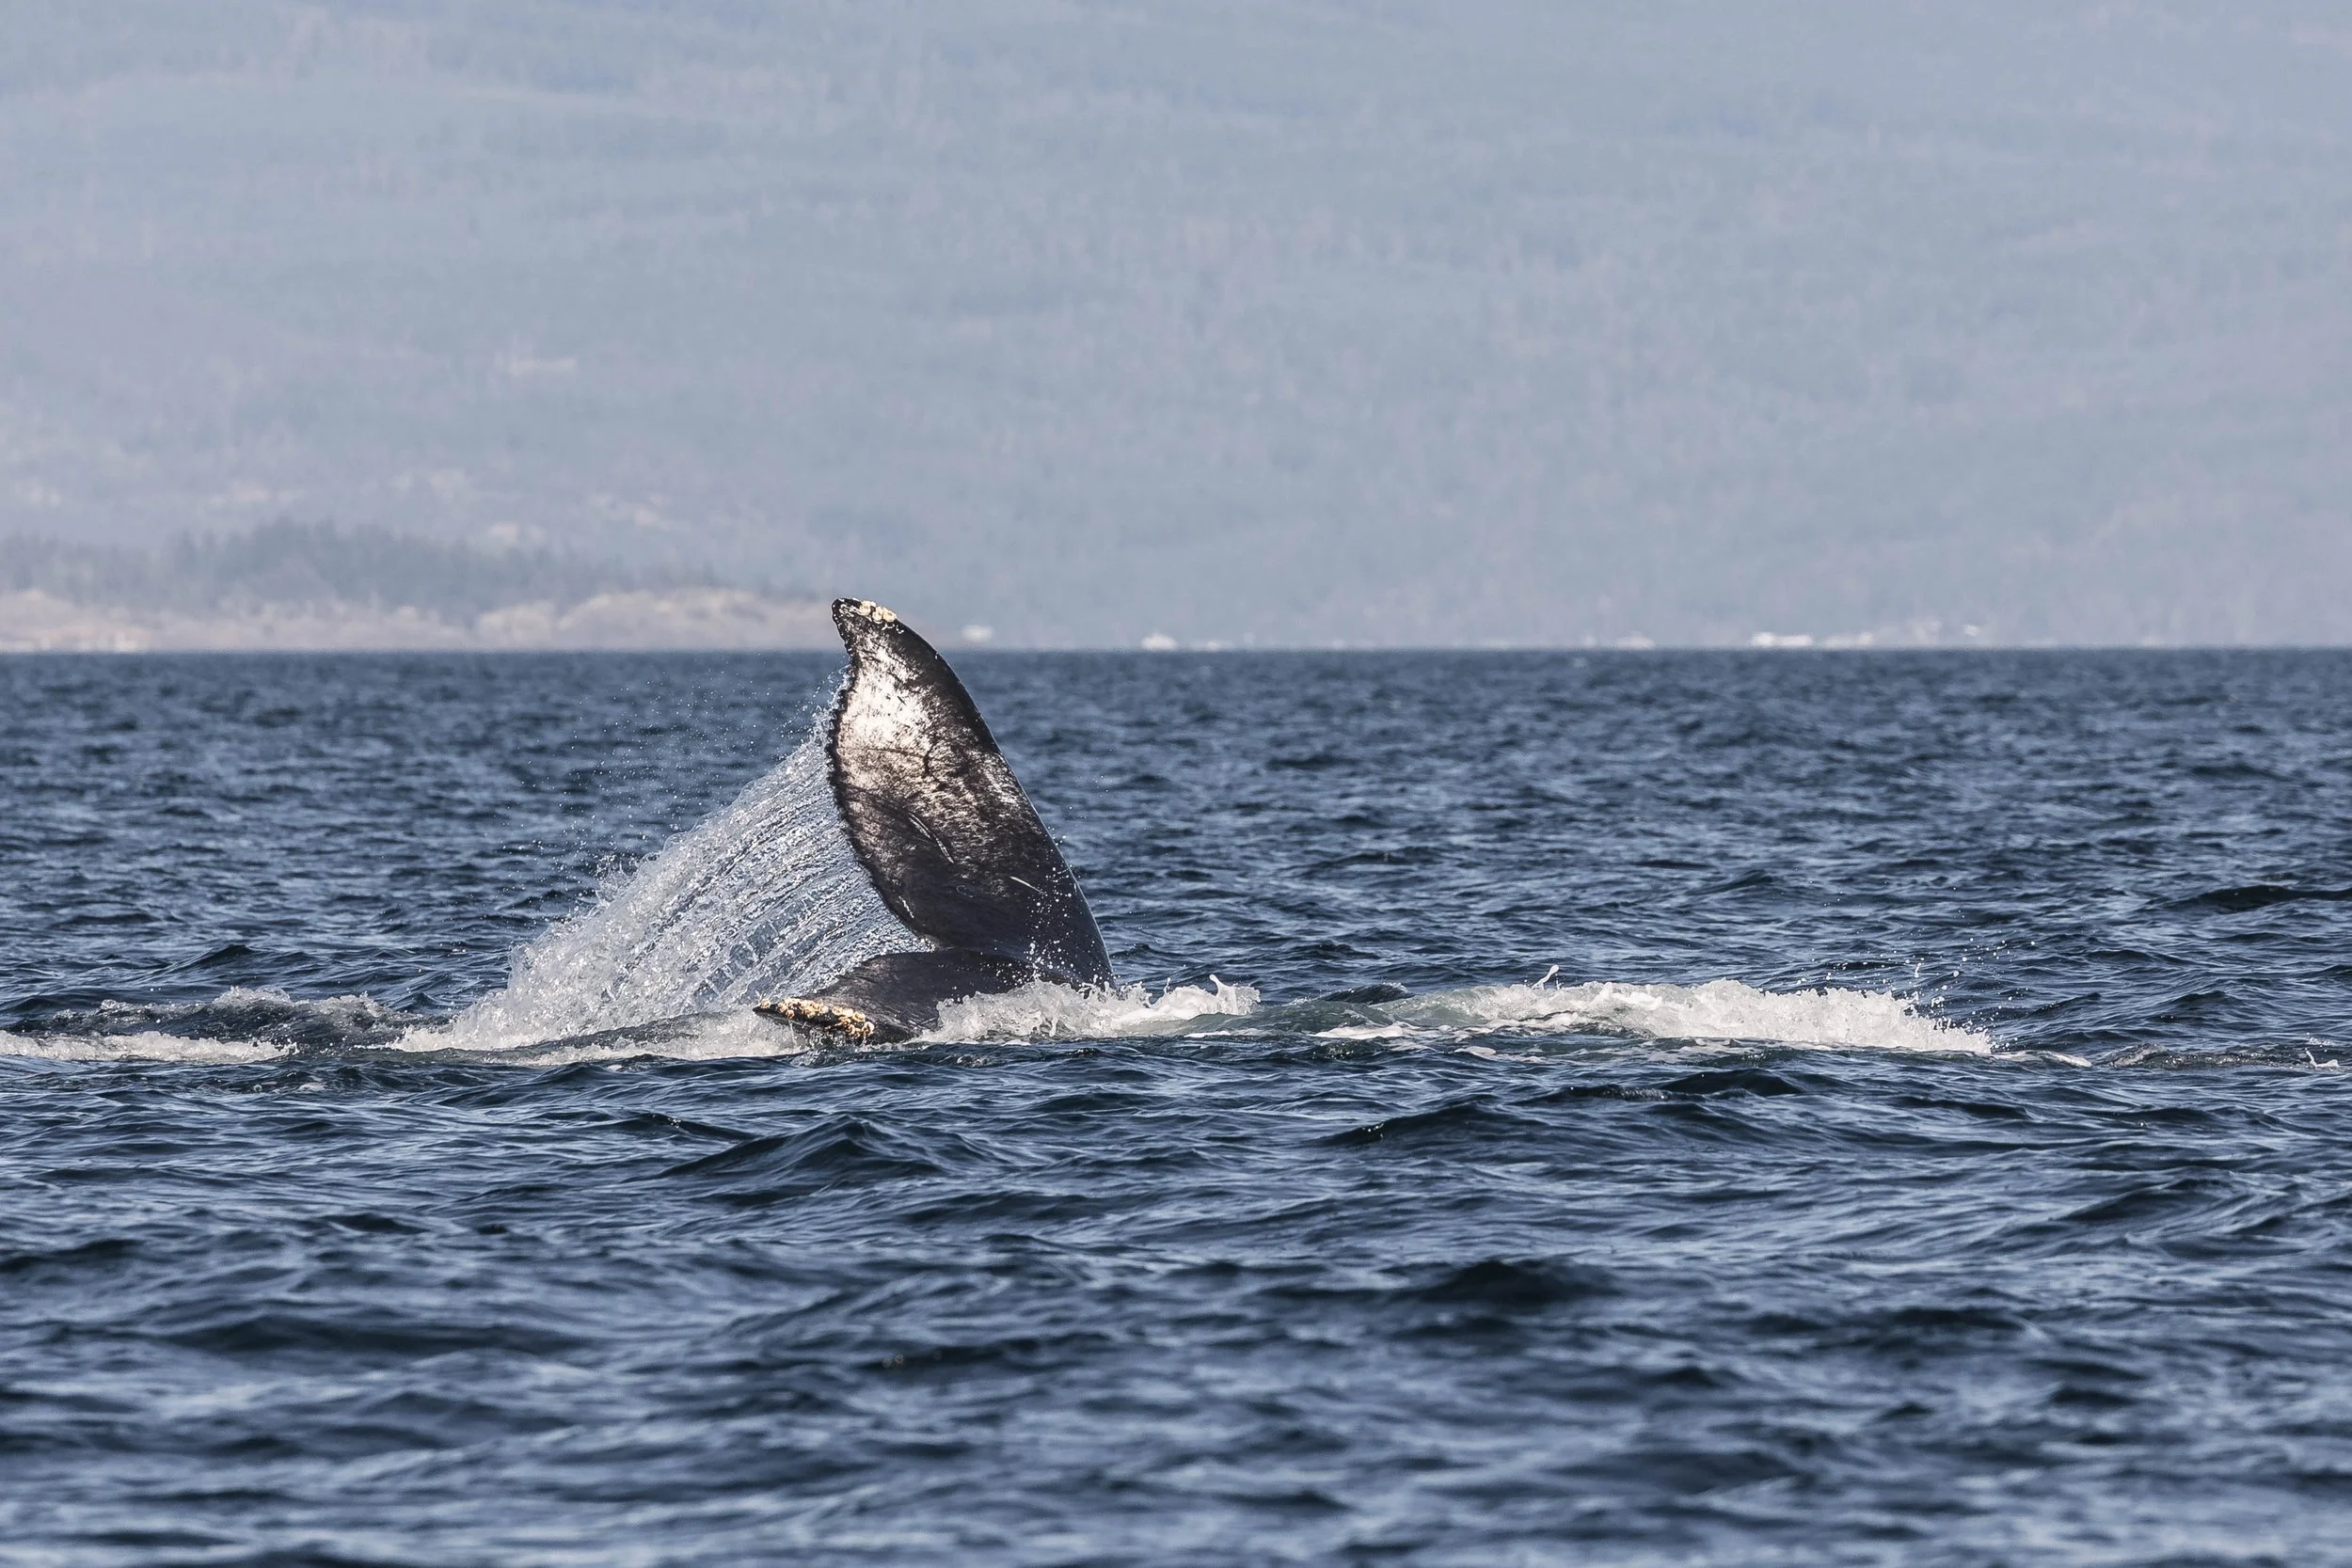
A lovely fluke waterfall from Poptart as she dives. Photo by Desarae Poier.

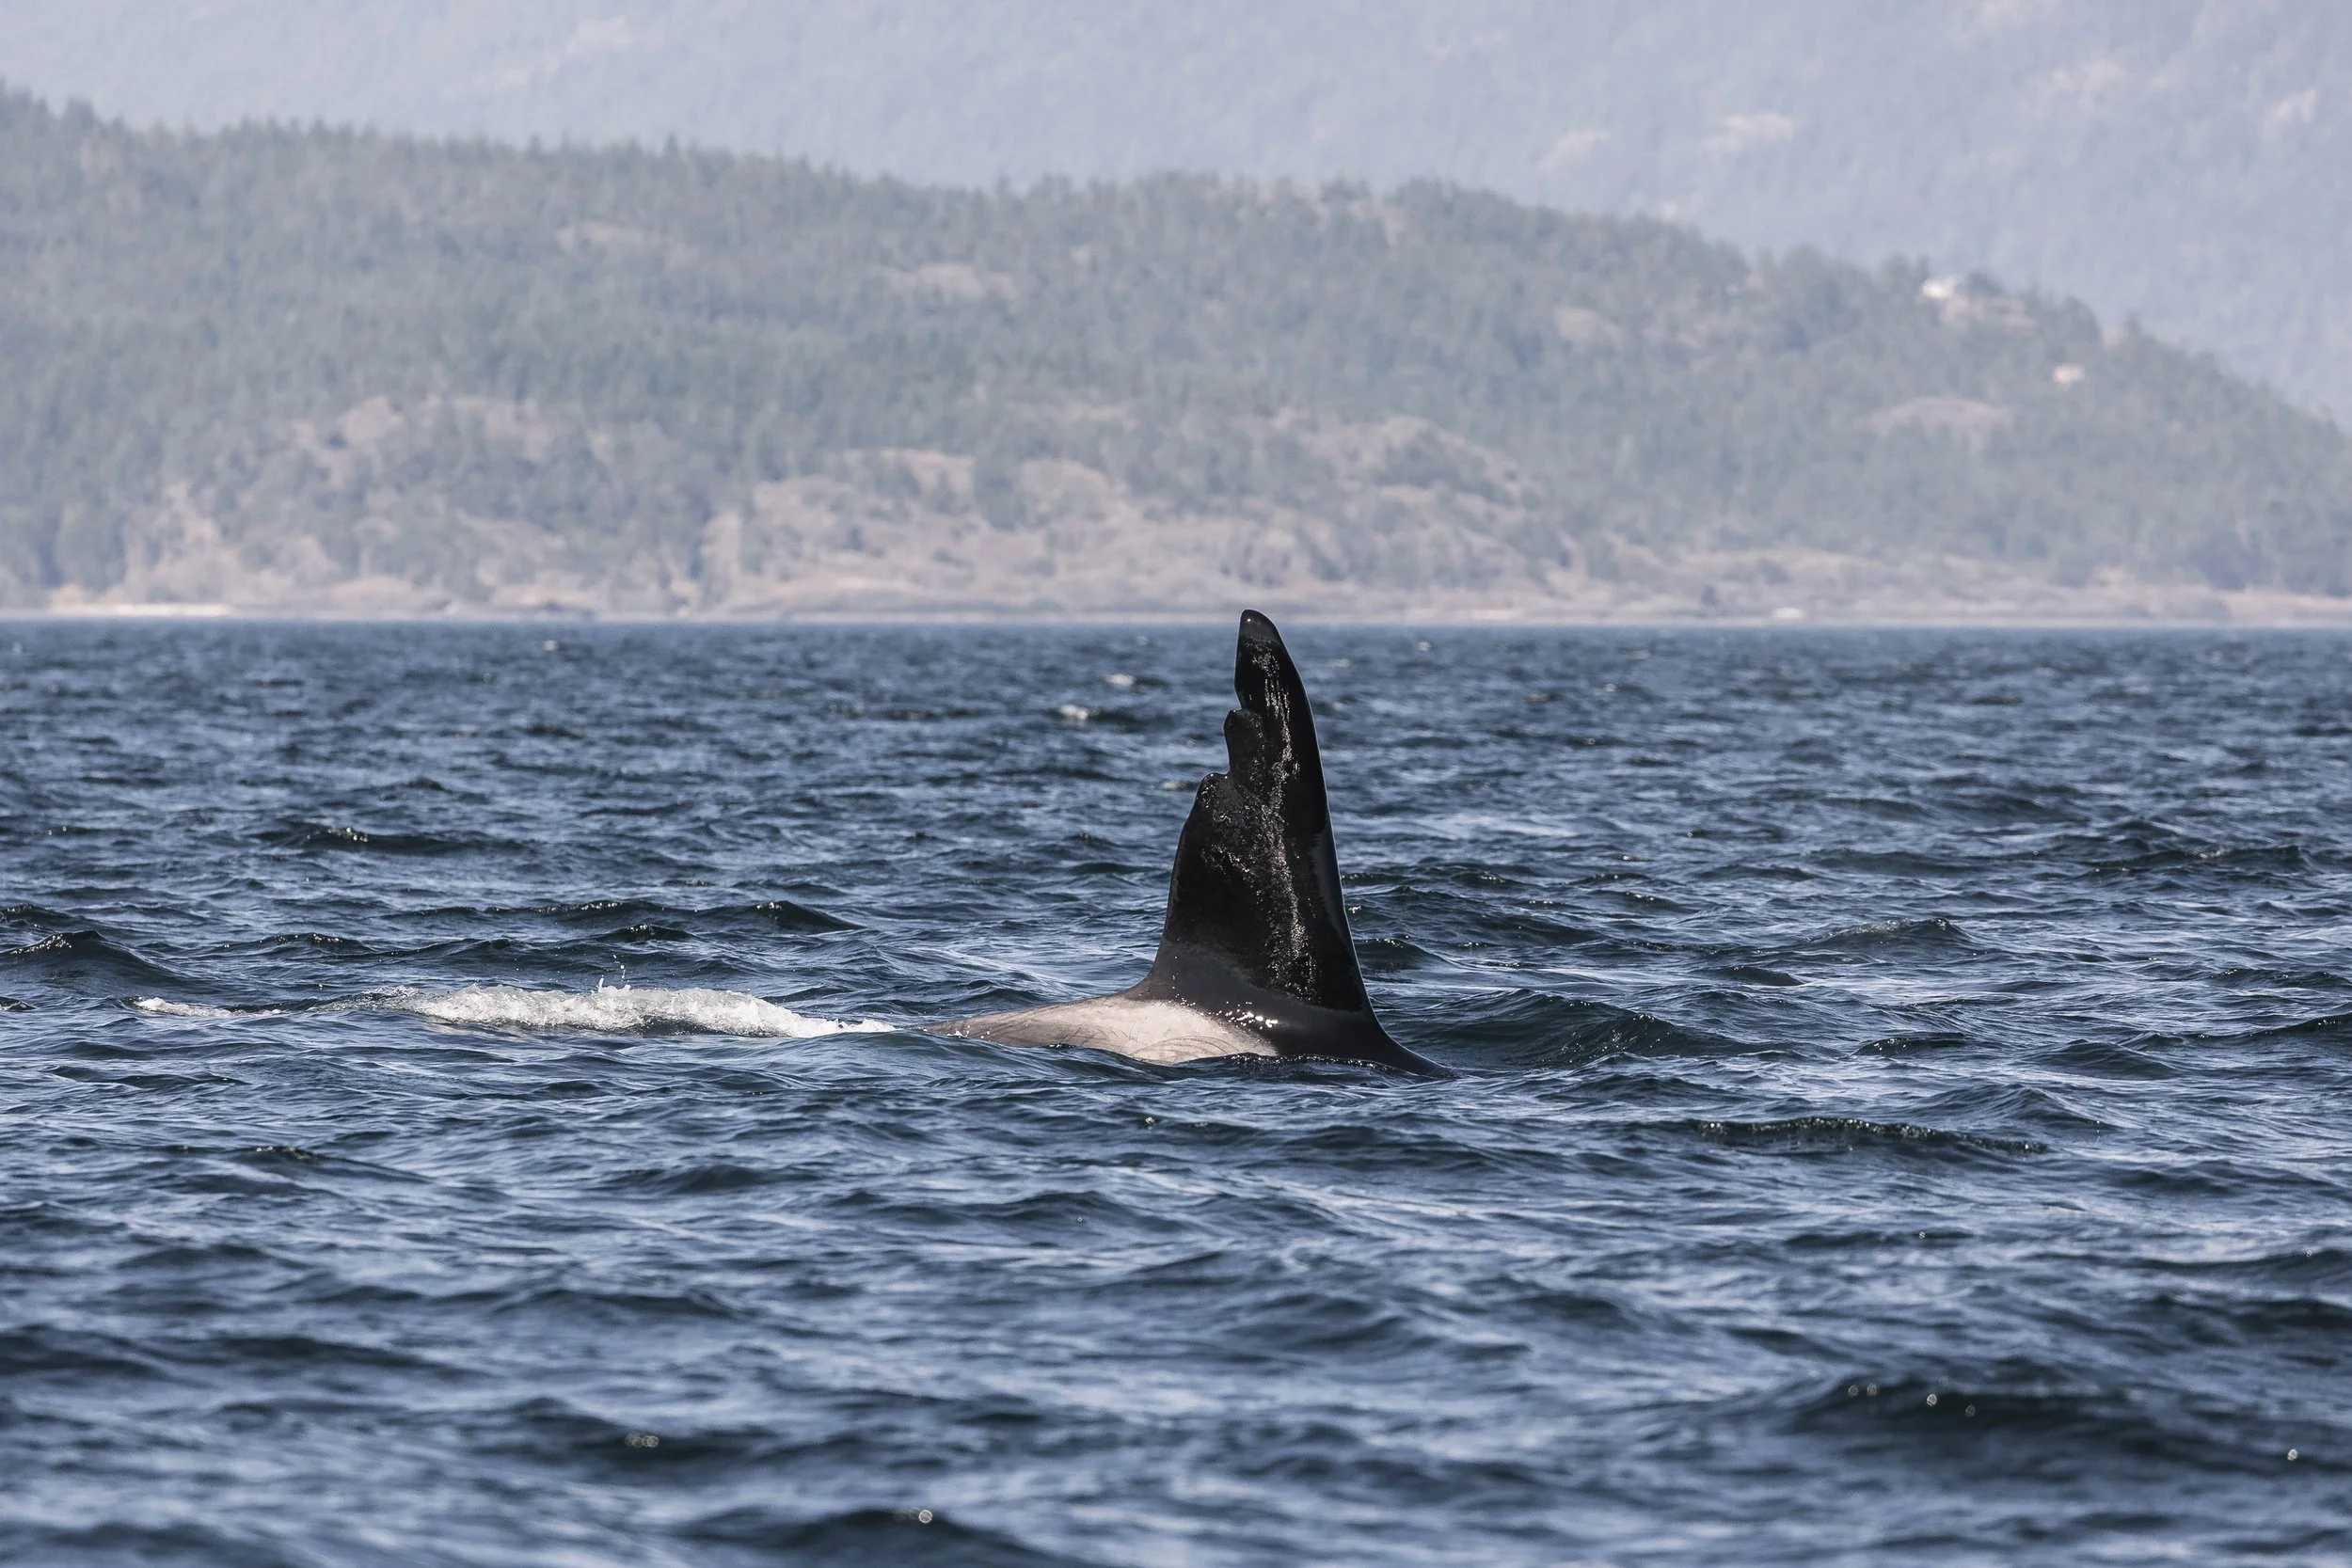
Watson’s dorsal fin as she surfaces. Photo by Desarae Poier.
Poptart and Arial surfacing together. Photo by Desarae Poier.
Watson lifting her tail to dive as Poptart surfaces just aheadof her. Photo by Desarae Poier.
A big arch from Arial as he dives. Photo by Desarae Poier.
T063 Chainsaw surfacing with a humpback just to his right. Photo by Desarae Poier.
Poptart’s tail in the air with one fo the orca on her right. You can really see the size difference here! Photo by Desarae Poier.
A great look at T063 Chainsaw as he surfaces. Photo by Desarae Poier.
T101B Lagoon surfacing, showing off his saddle patch. Photo by Hayleigh Hilbert.
One of the orca flicking their tail at the surface. Photo by Hayleigh Hilbert.
T063 Chinsaw surfacing with a tail in the air behind him. Photo by Hayleigh Hilbert.
Poptart fluking with Arial surfacing behind her. Photo by Hayleigh Hilbert.
Looks like T100C Laurel chasing Arial down! Photo by Hayleigh Hilbert.
One of the boys with their white underside visible beneath the surface. Photo by Hayleigh Hilbert.

From left to right we have T100C Laurel, T065 Whidbey II, T100 Hutchins, and T100F Estrella! Photo by Hayleigh Hilbert.
T100C Laurel surfacing with T036A1A Drift and T100 Reef. Photo by Hayleigh Hilbert.
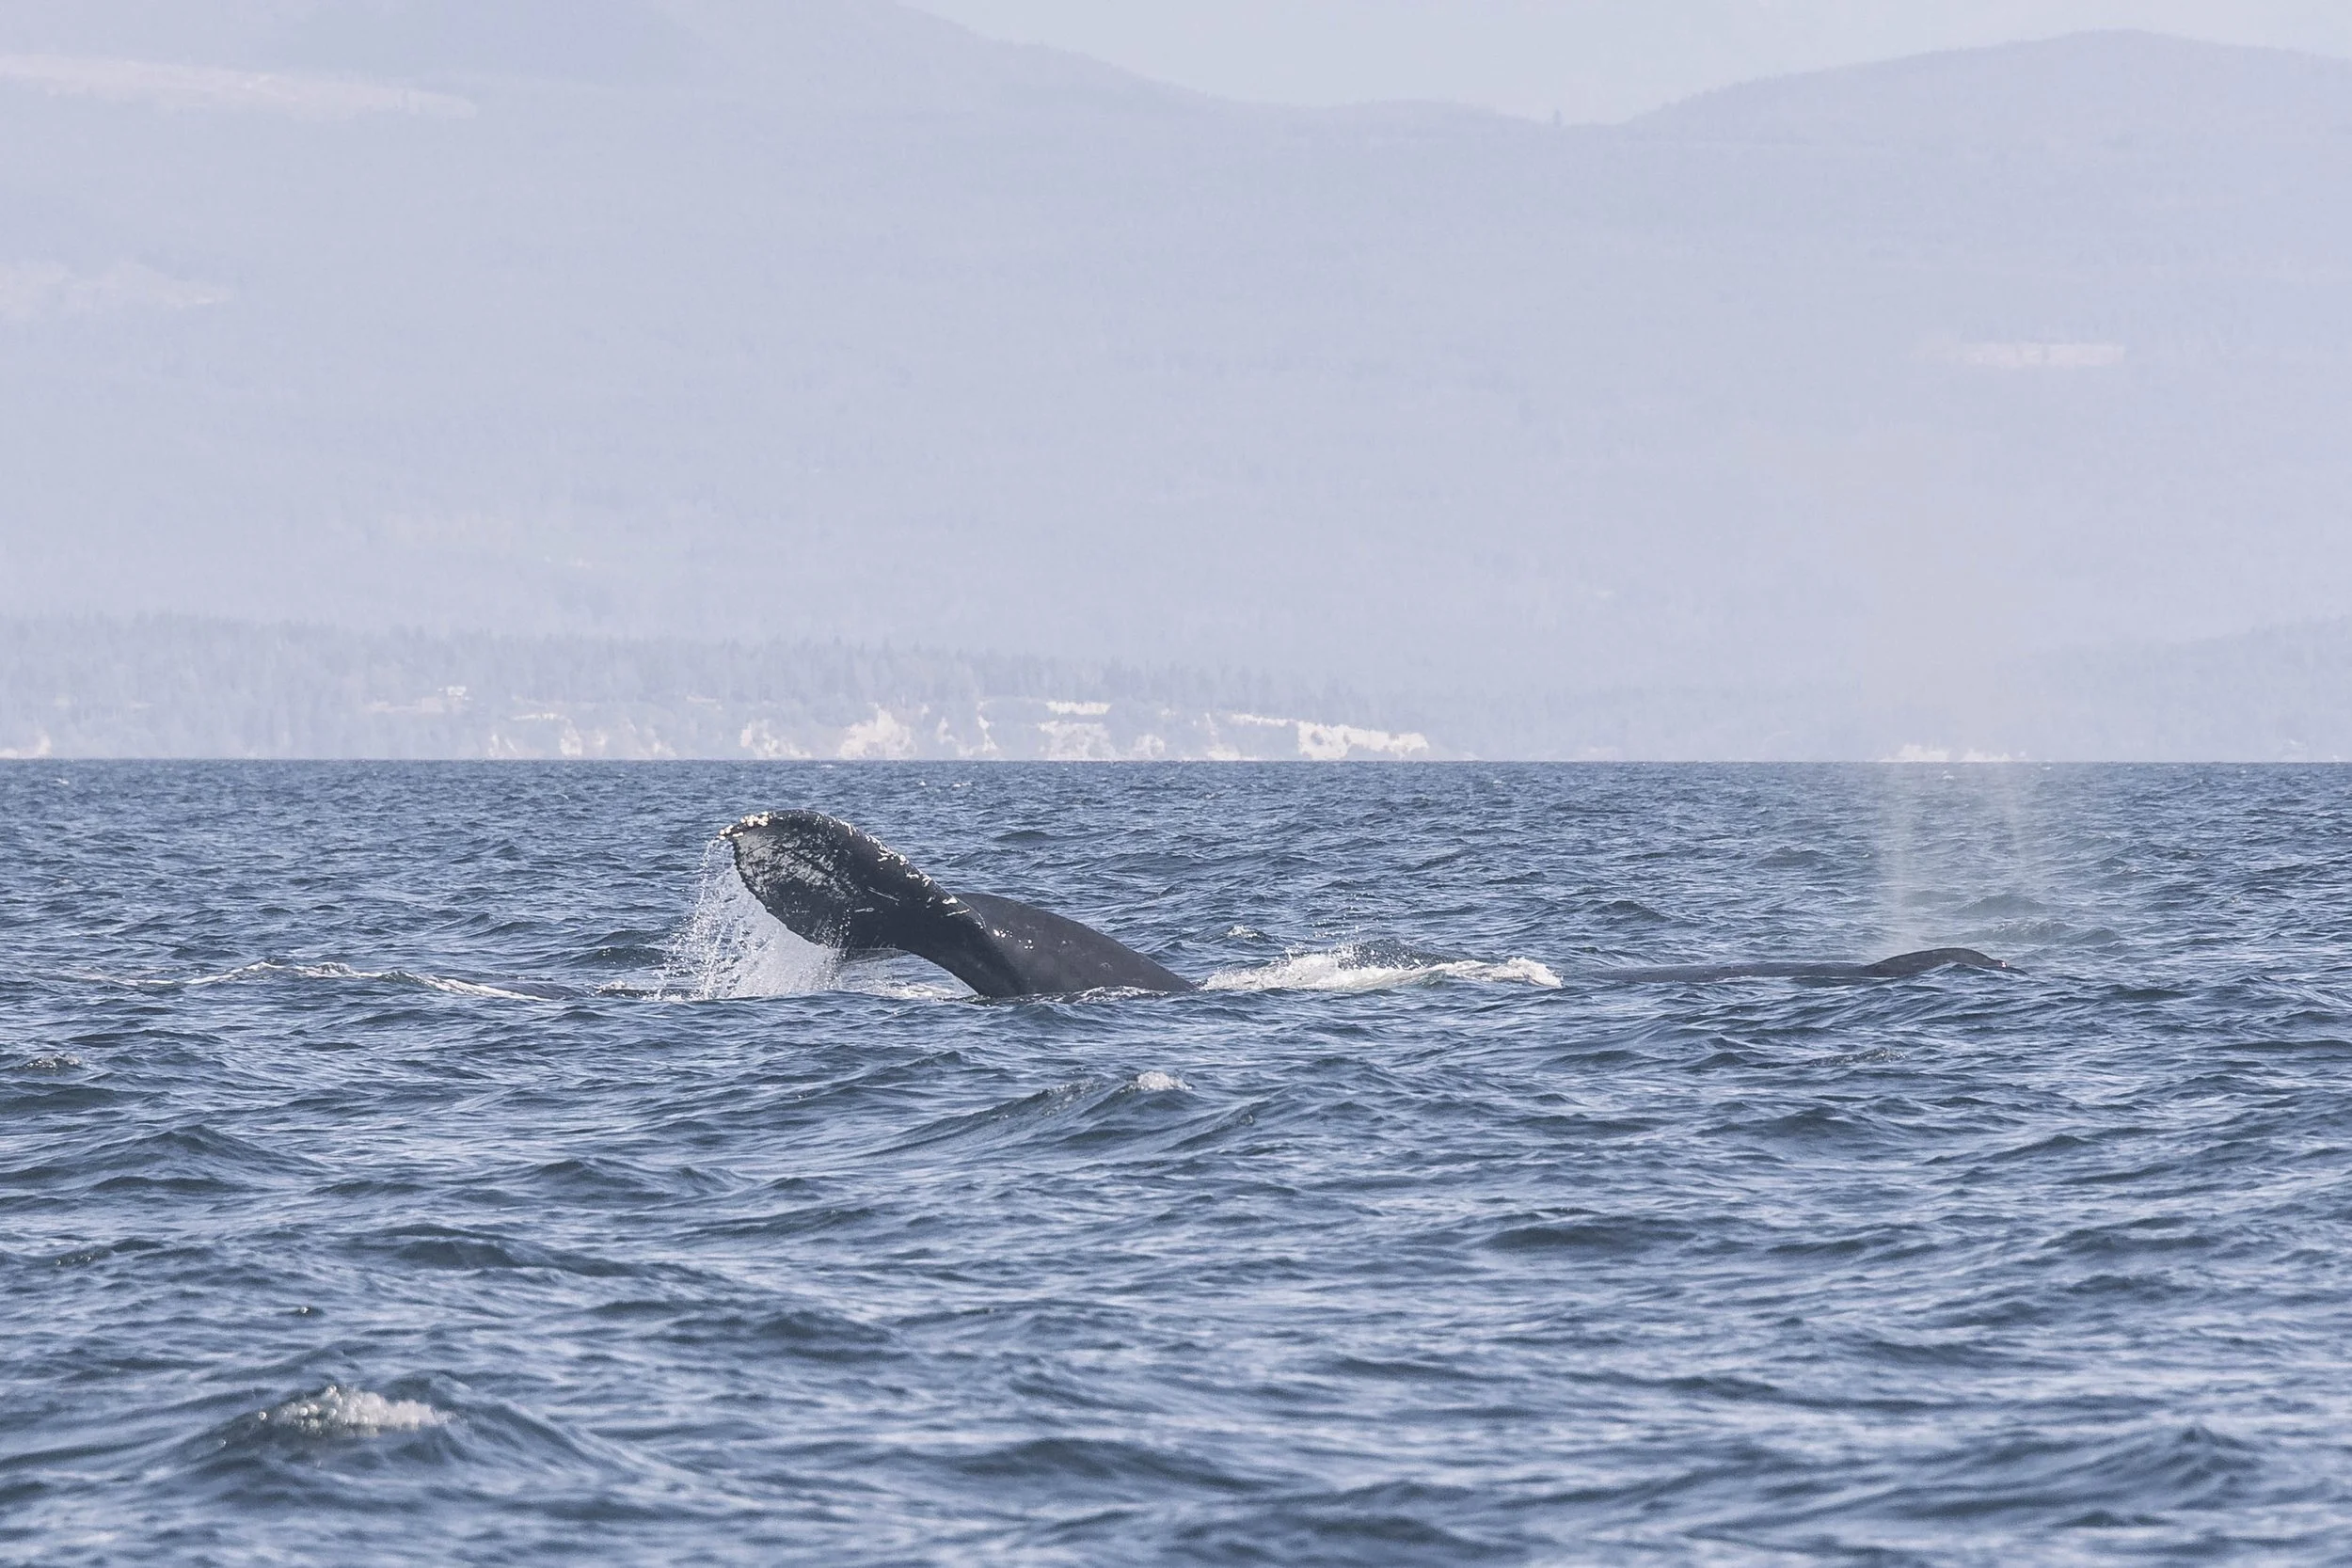
Fader and Wiggins
Wiggins’ dorsal fin as he surfaces. Photo by Desarae Poier.

Fader’s tail sideways with the buoy on the left. Photo by Desarae Poier.
Wiggins flicking his tail upsidedown. Photo by Desarae Poier.

Wiggins swimming on their side. Photo by Desarae Poier.
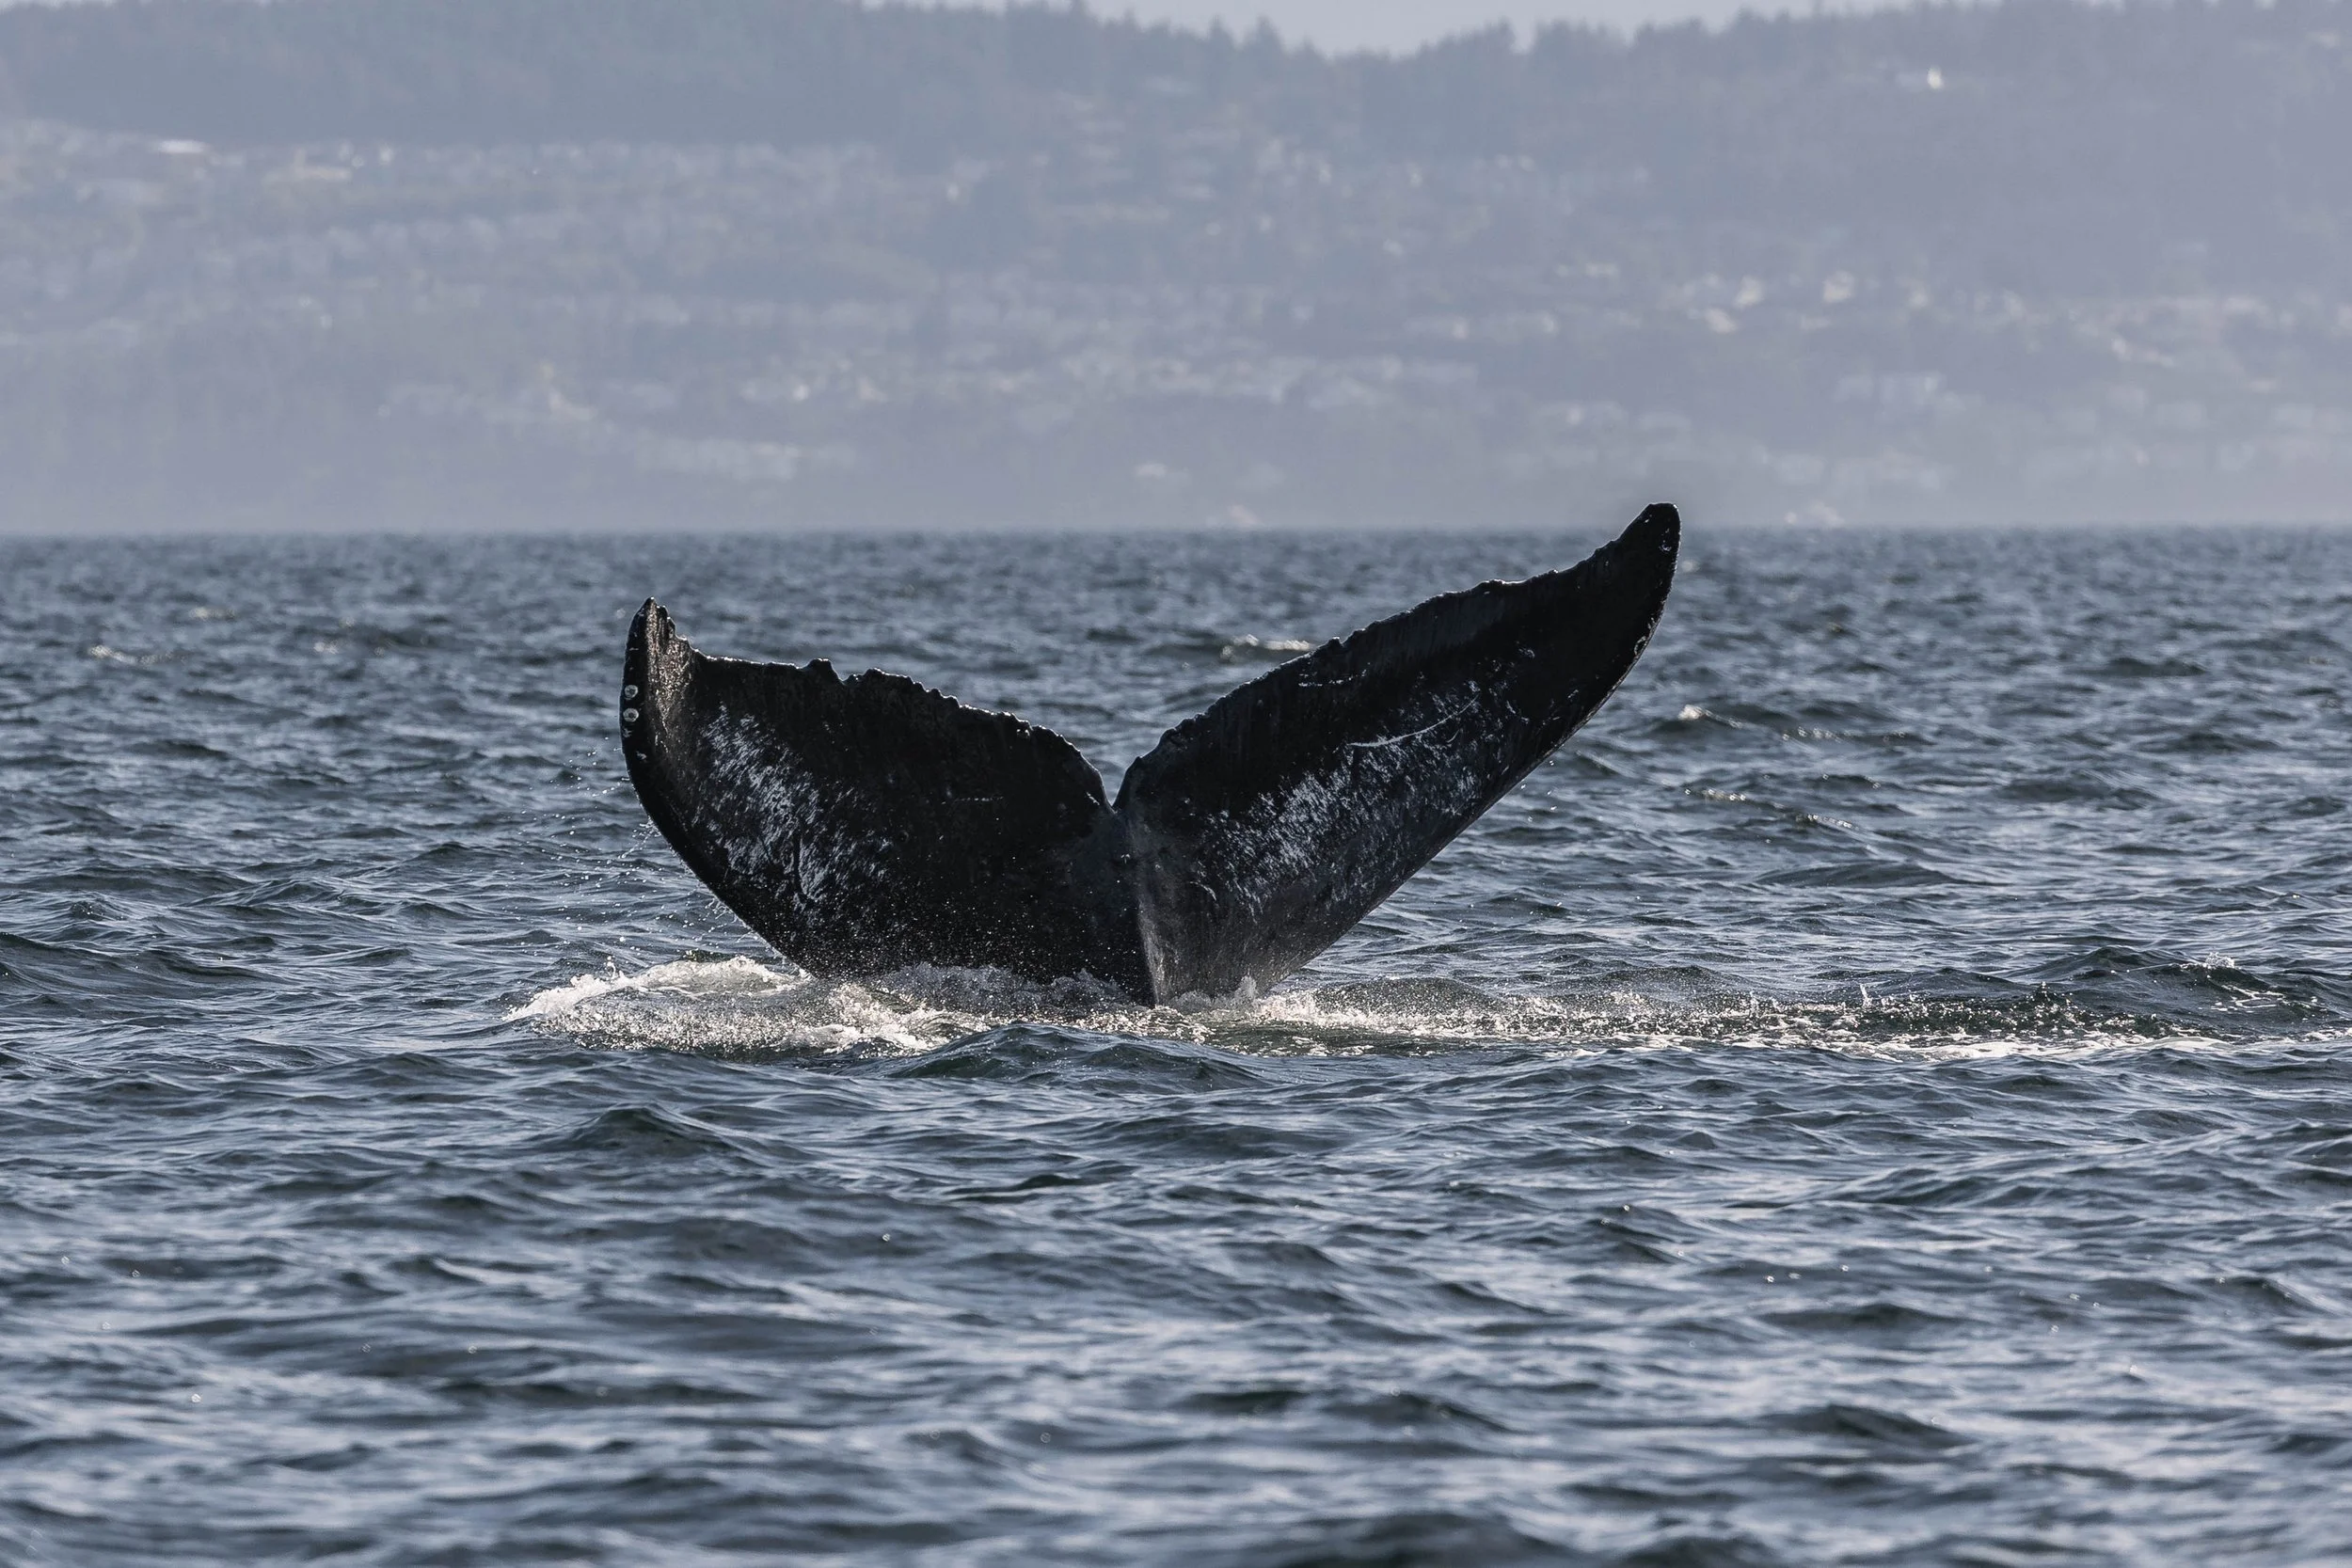
The underside of Fader’s tail flukes. Photo by Desarae Poier.

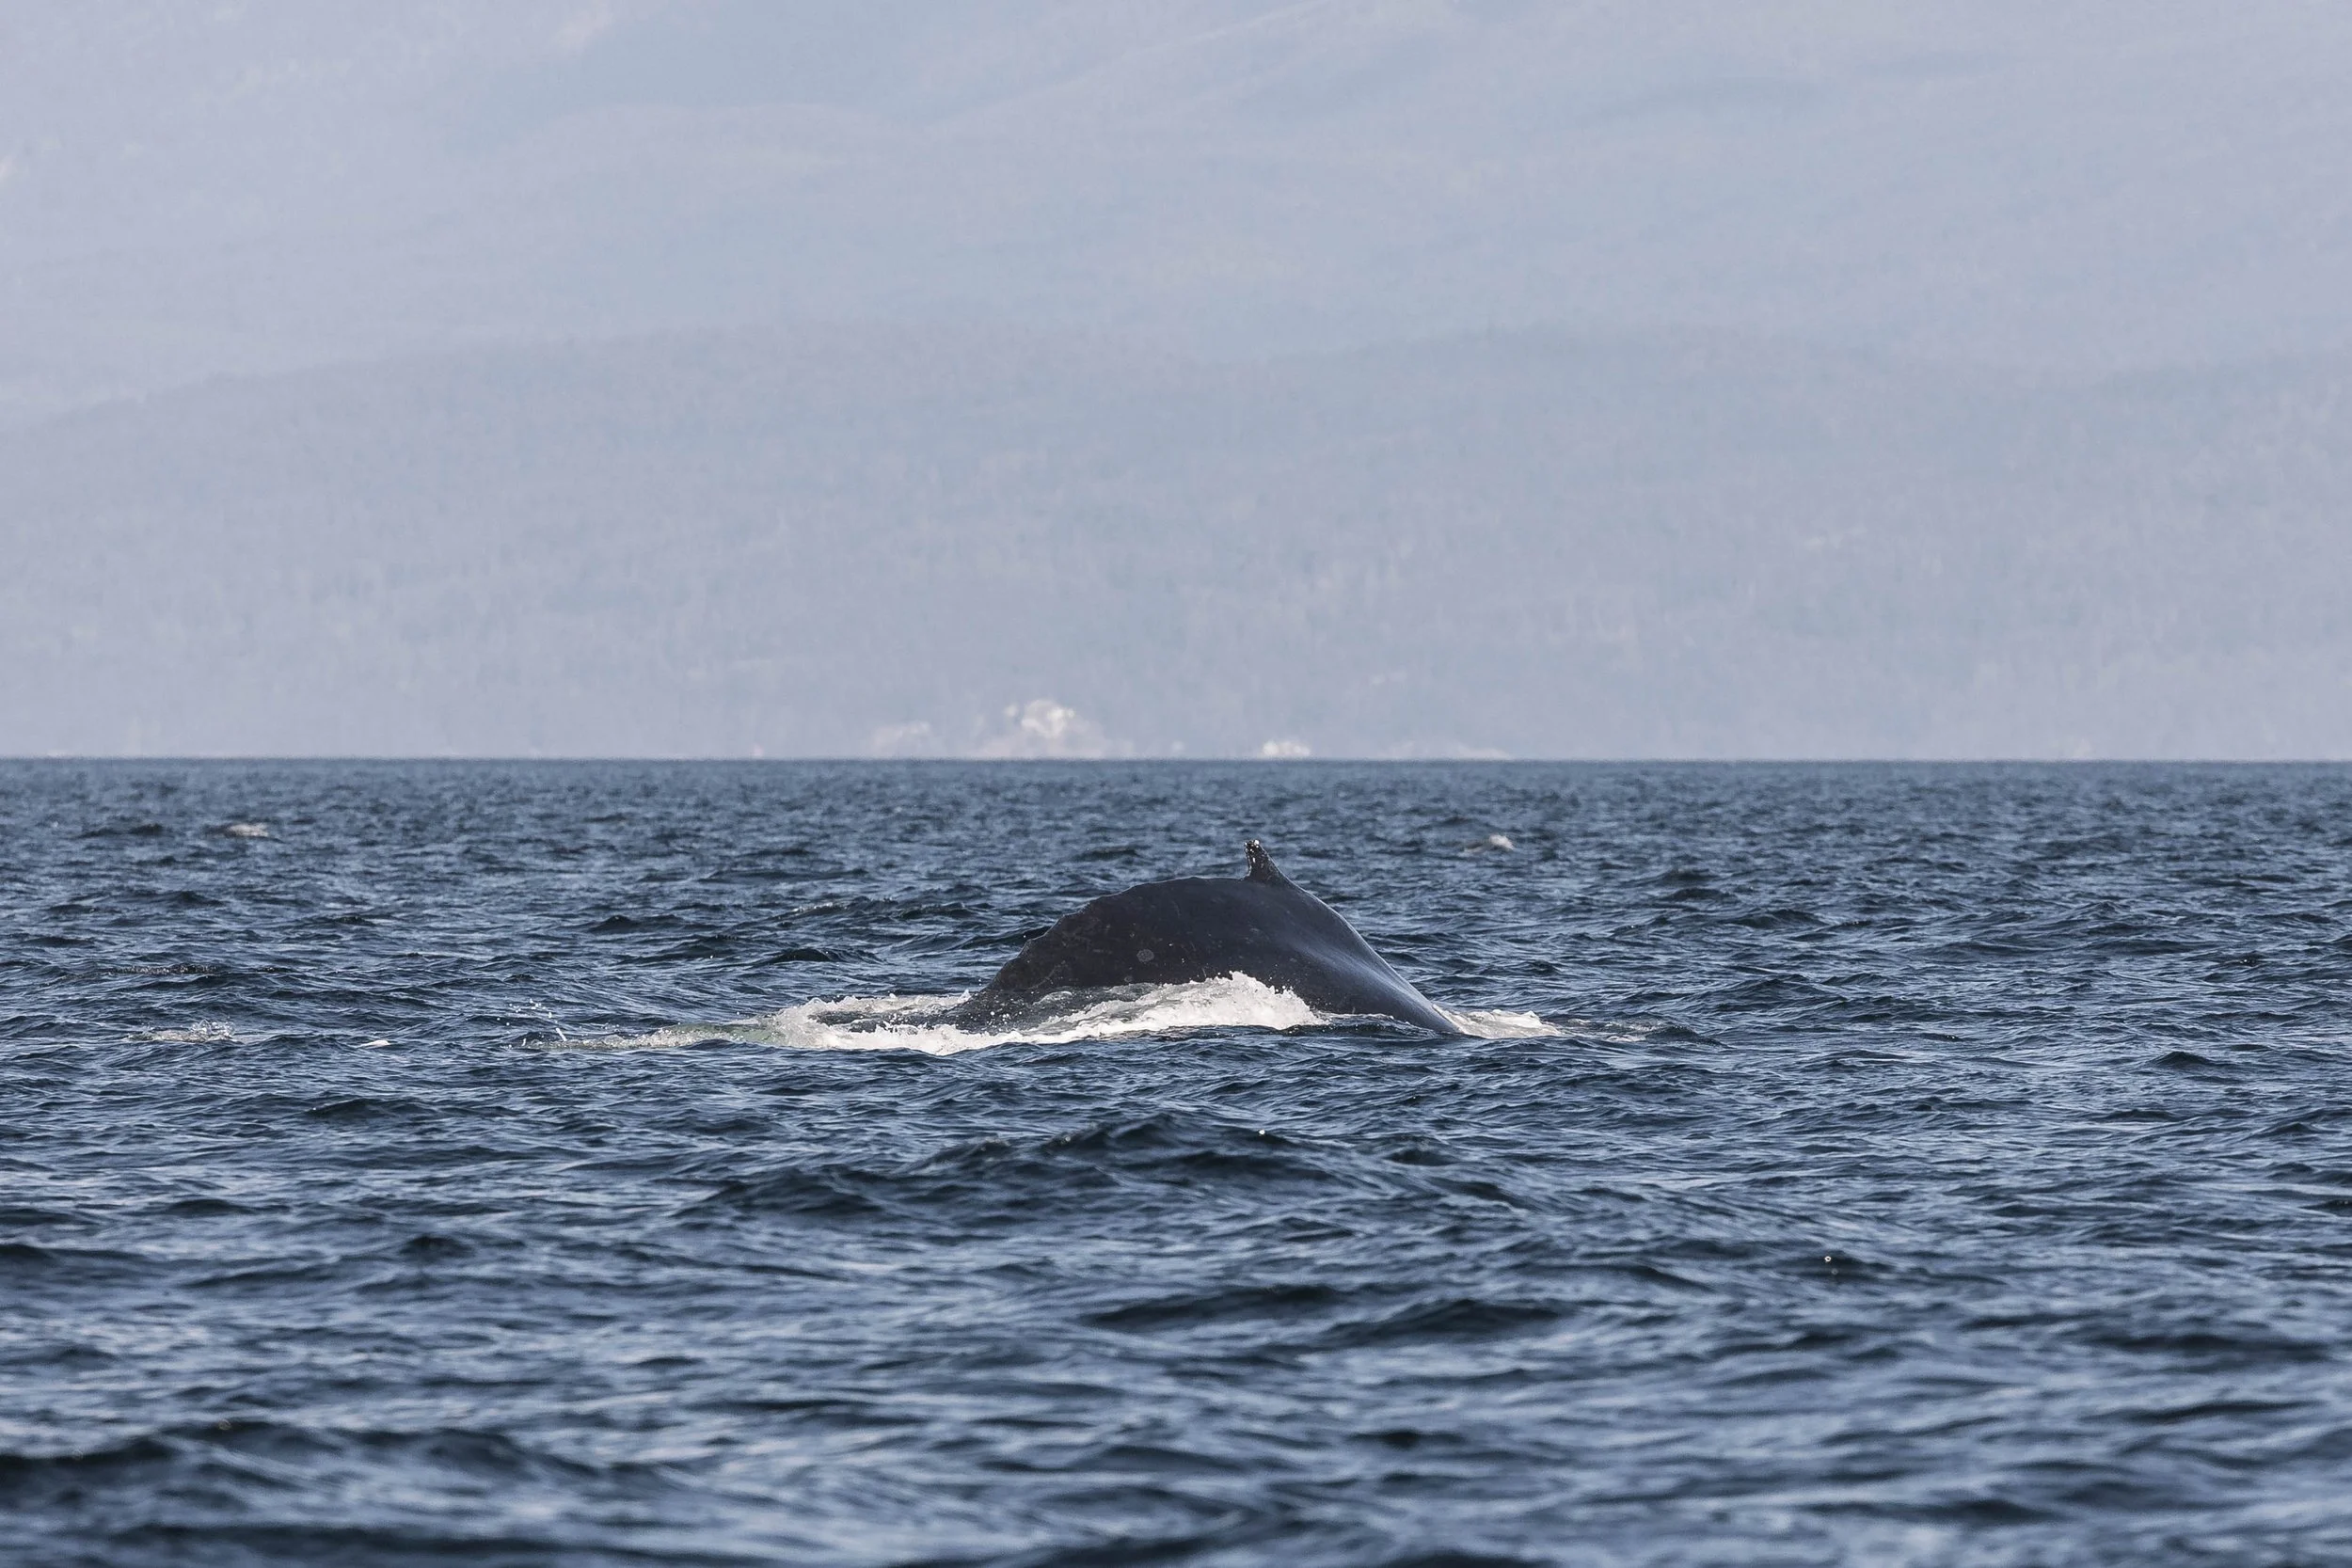
A fluke waterfall from Fader as he travelled. Photo by Desarae Poier.

This distinct pattern is how we identify the whales! Photo by Desarae Poier.
Wiggins’ going for a dive. You can spot some scarring on his peduncle, perhaps a previous entanglement? Photo by Desarae Poier.

Fader travelling with the Buoy trailing behind. Photo by Hayleigh Hilbert.

You can see the drag it would create as he travelled. Photo by Hayleigh Hilbert.
Wiggins surfacing. Photo by Hayleigh Hilbert.
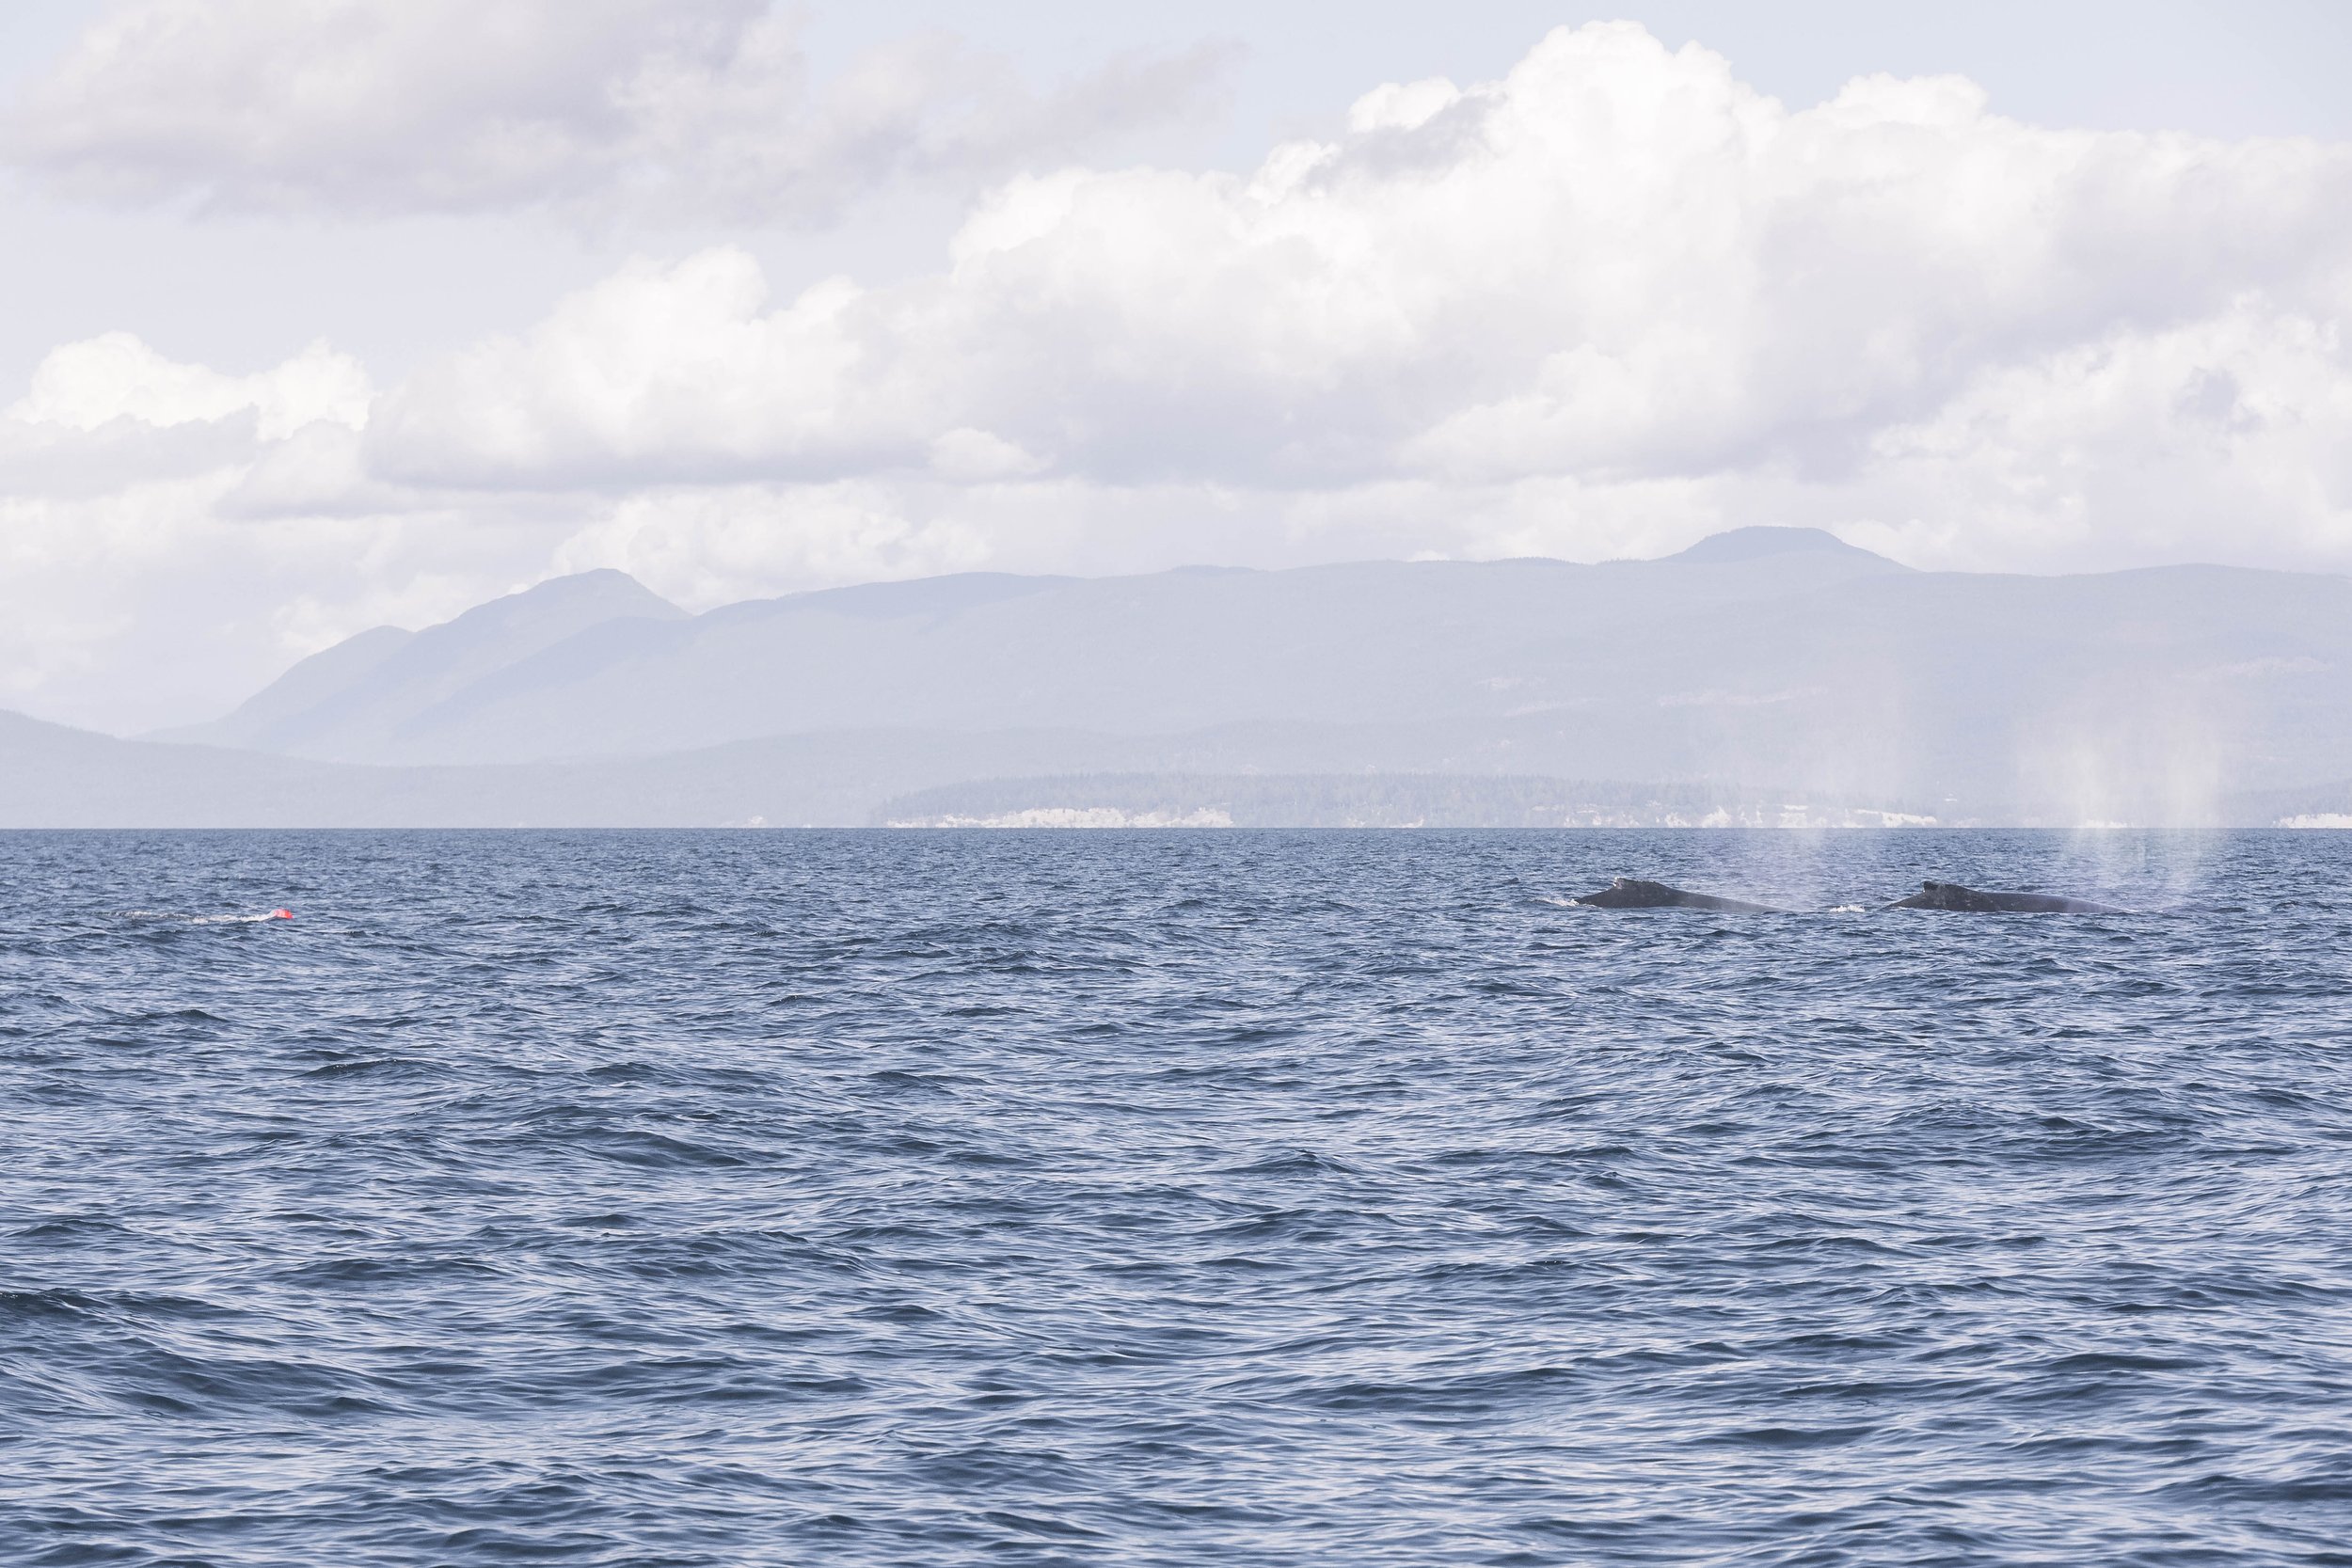
Wiggins (front) and Fader (back) travelling together with the buoy trailing behind. Photo by Hayleigh Hilbert.

Wiggins swimming on ther side beside Fader who has line visible across his rostrum. Photo by Hayleigh Hilbert.
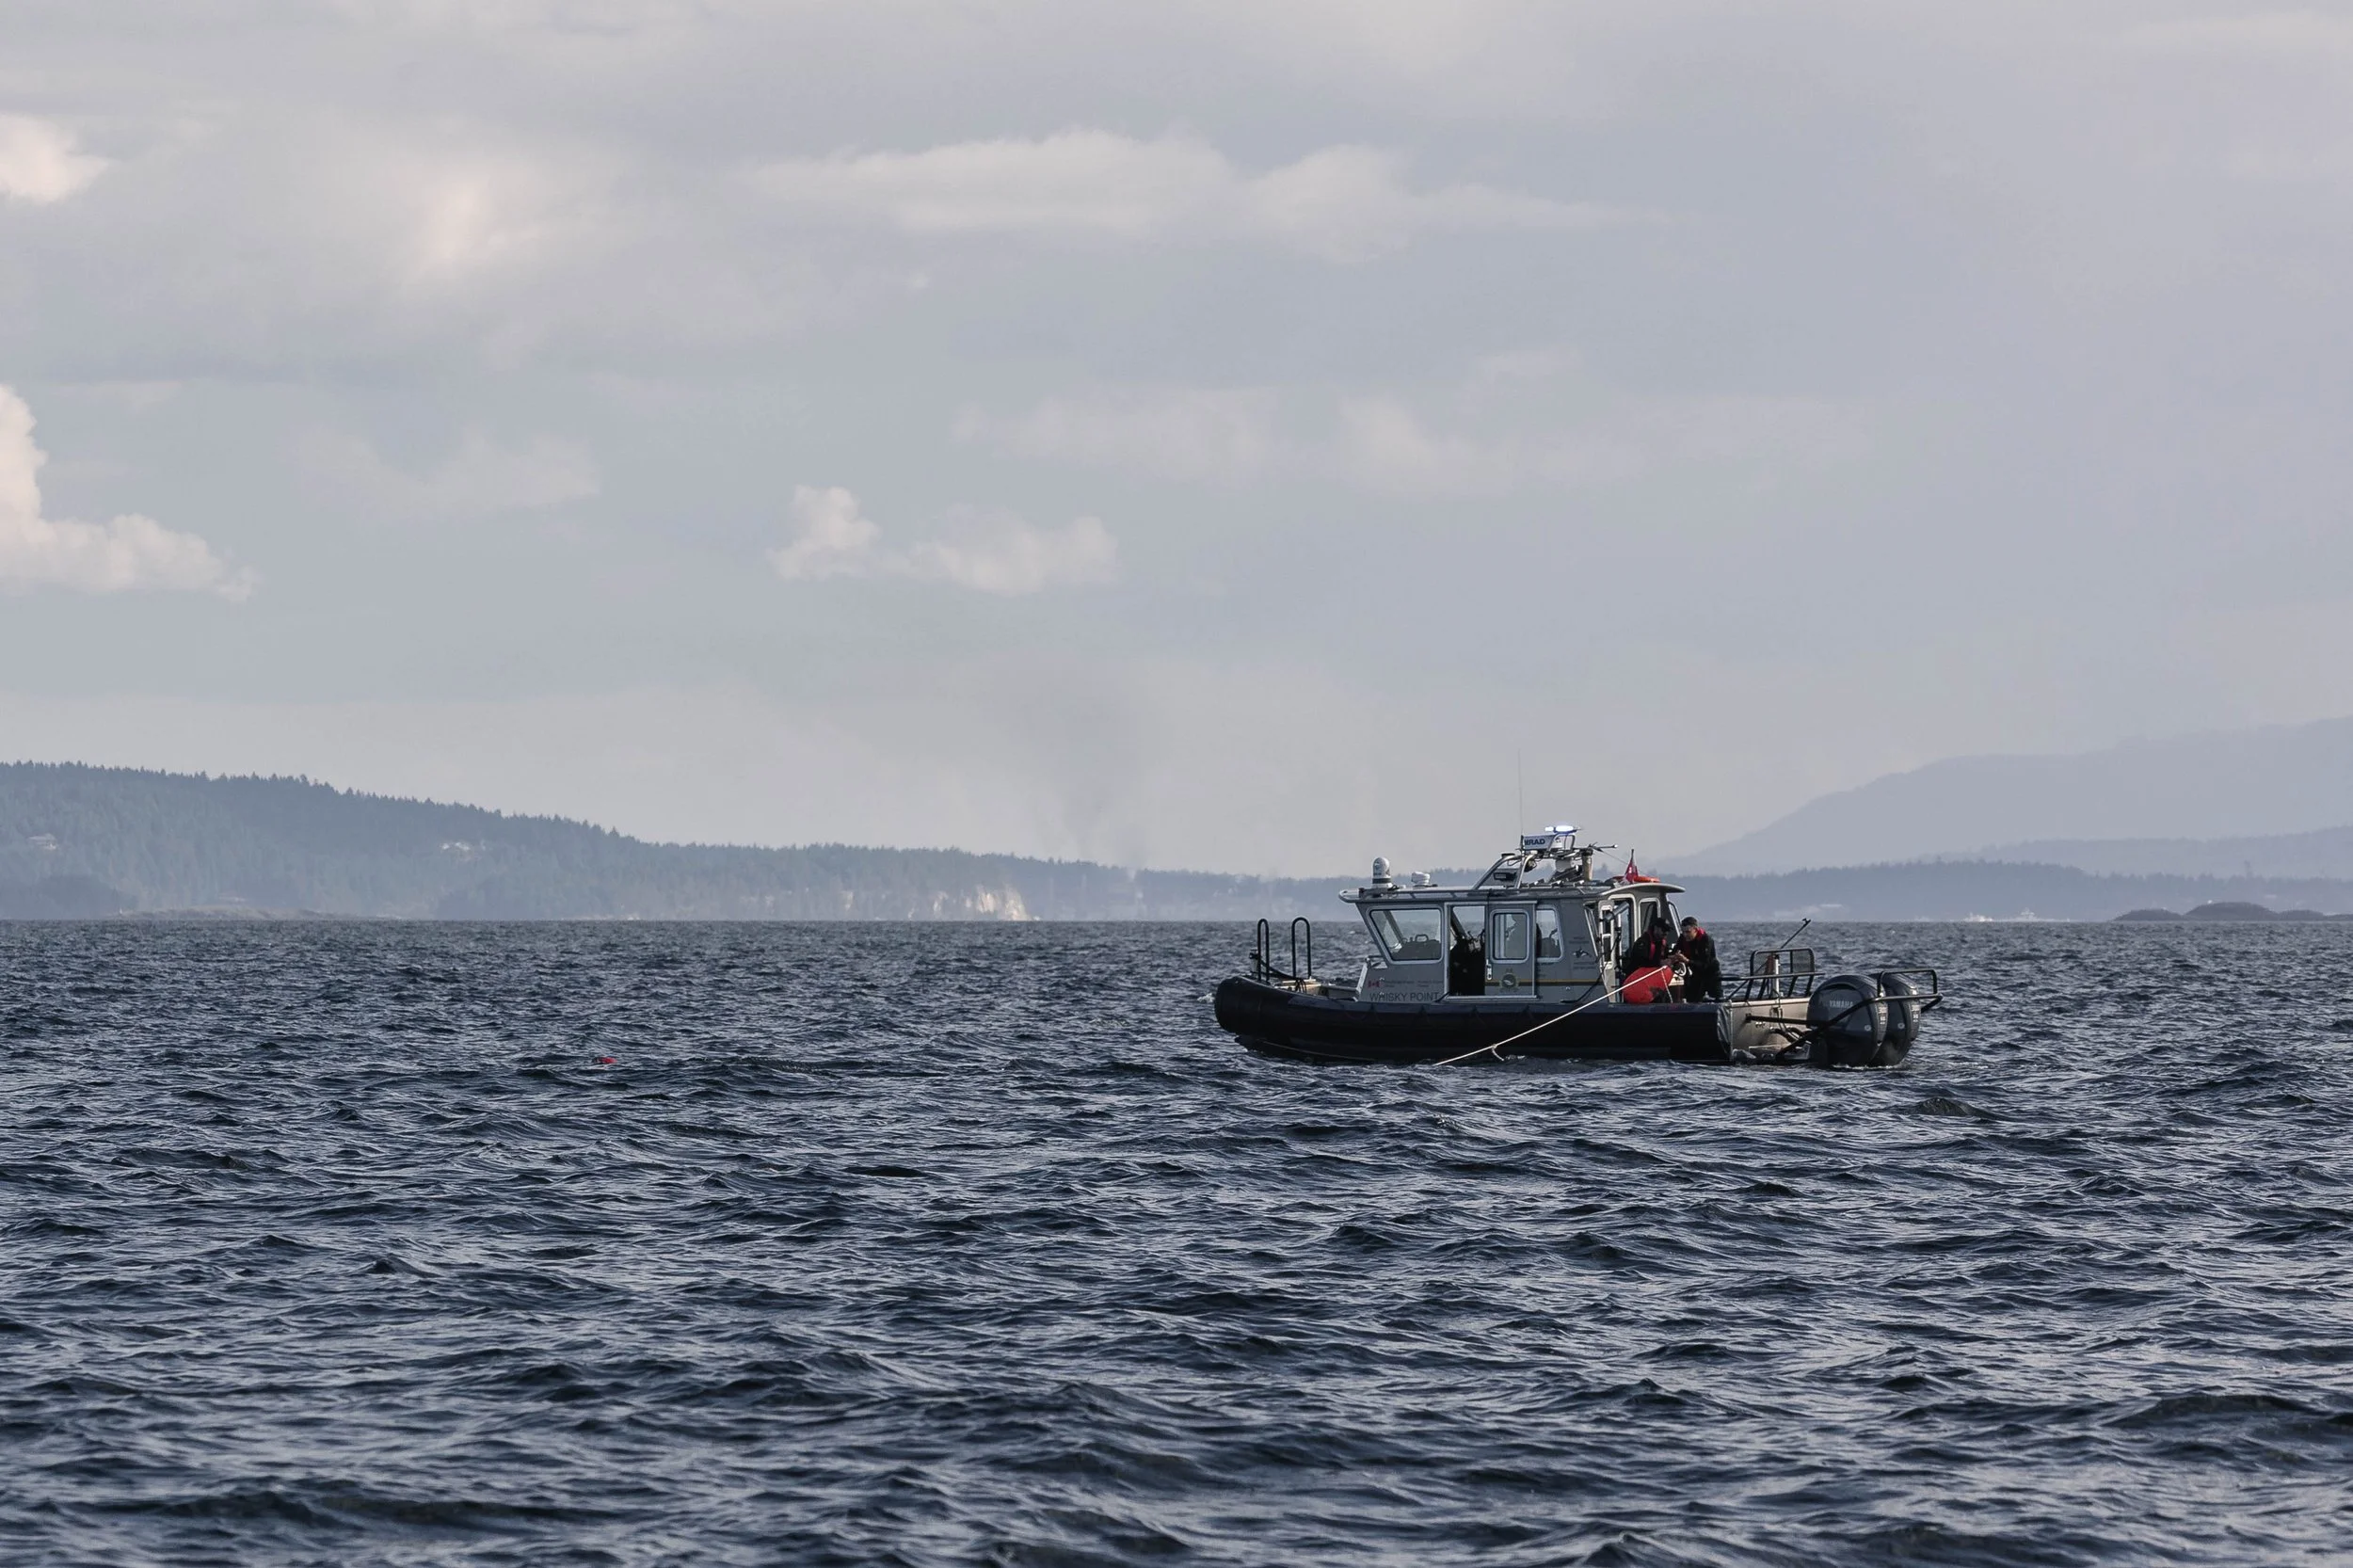
Fader’s Rescue
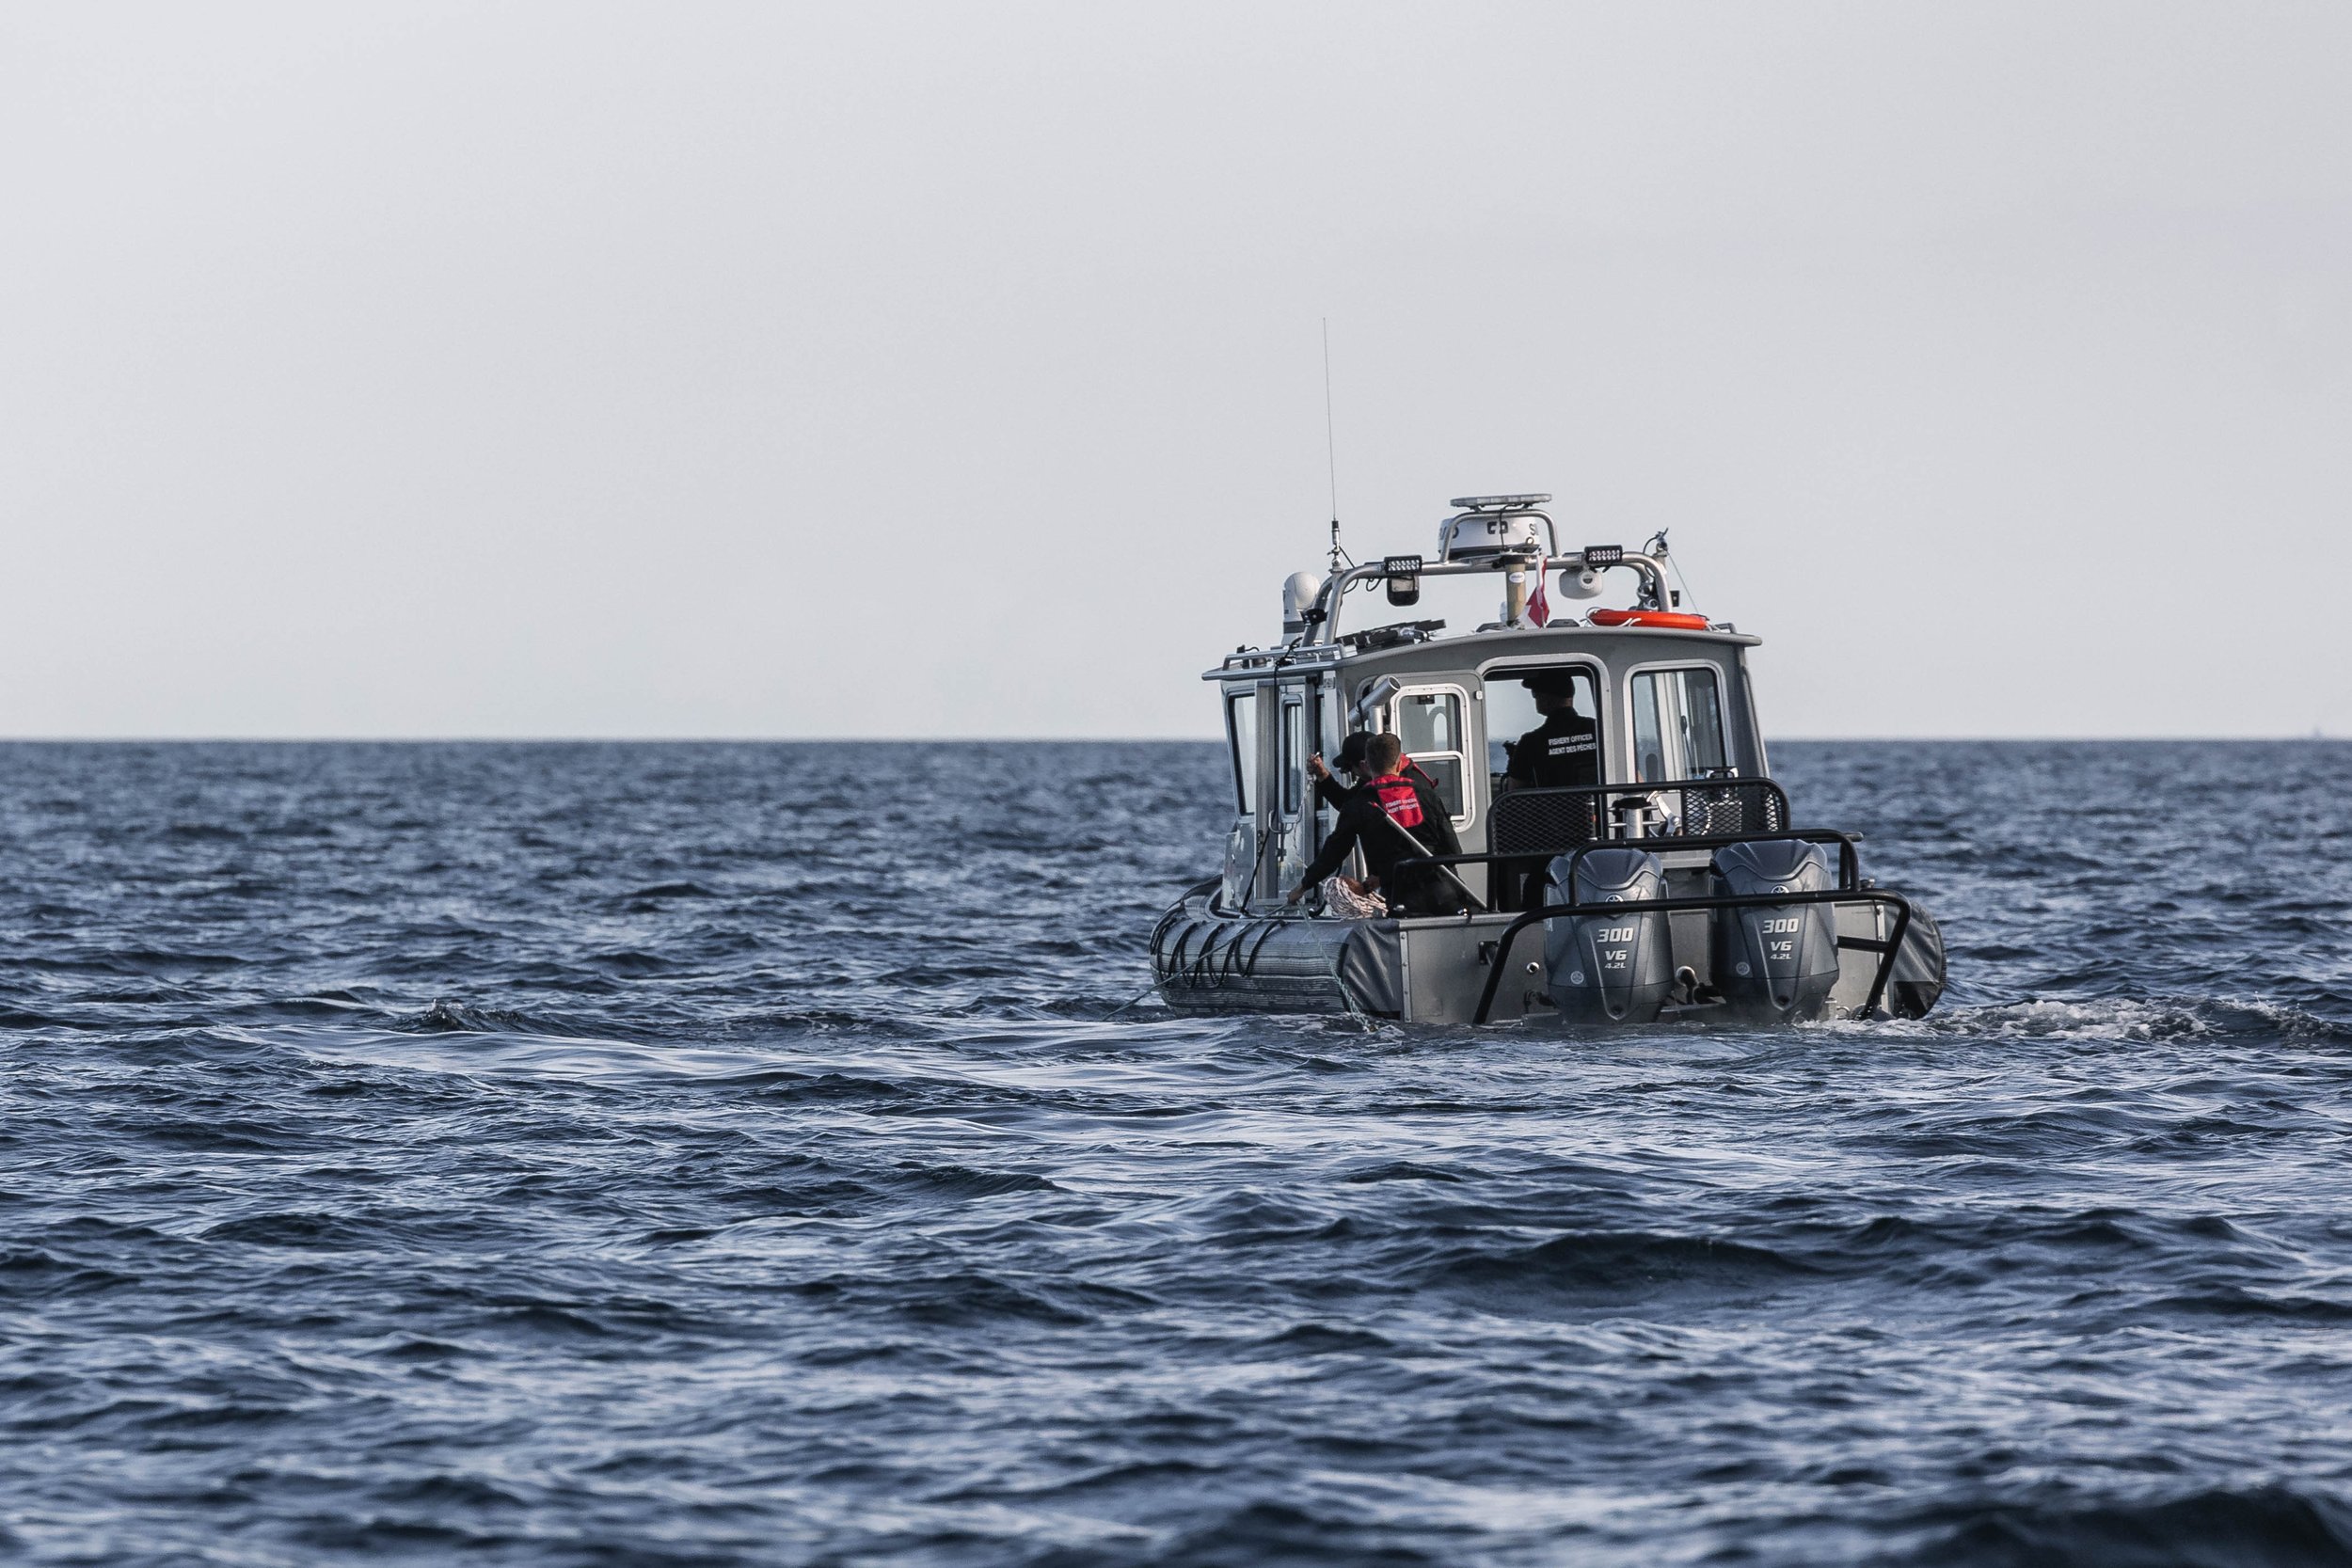
The DFO crew grabbing the line. Photo by Desarae Poier.
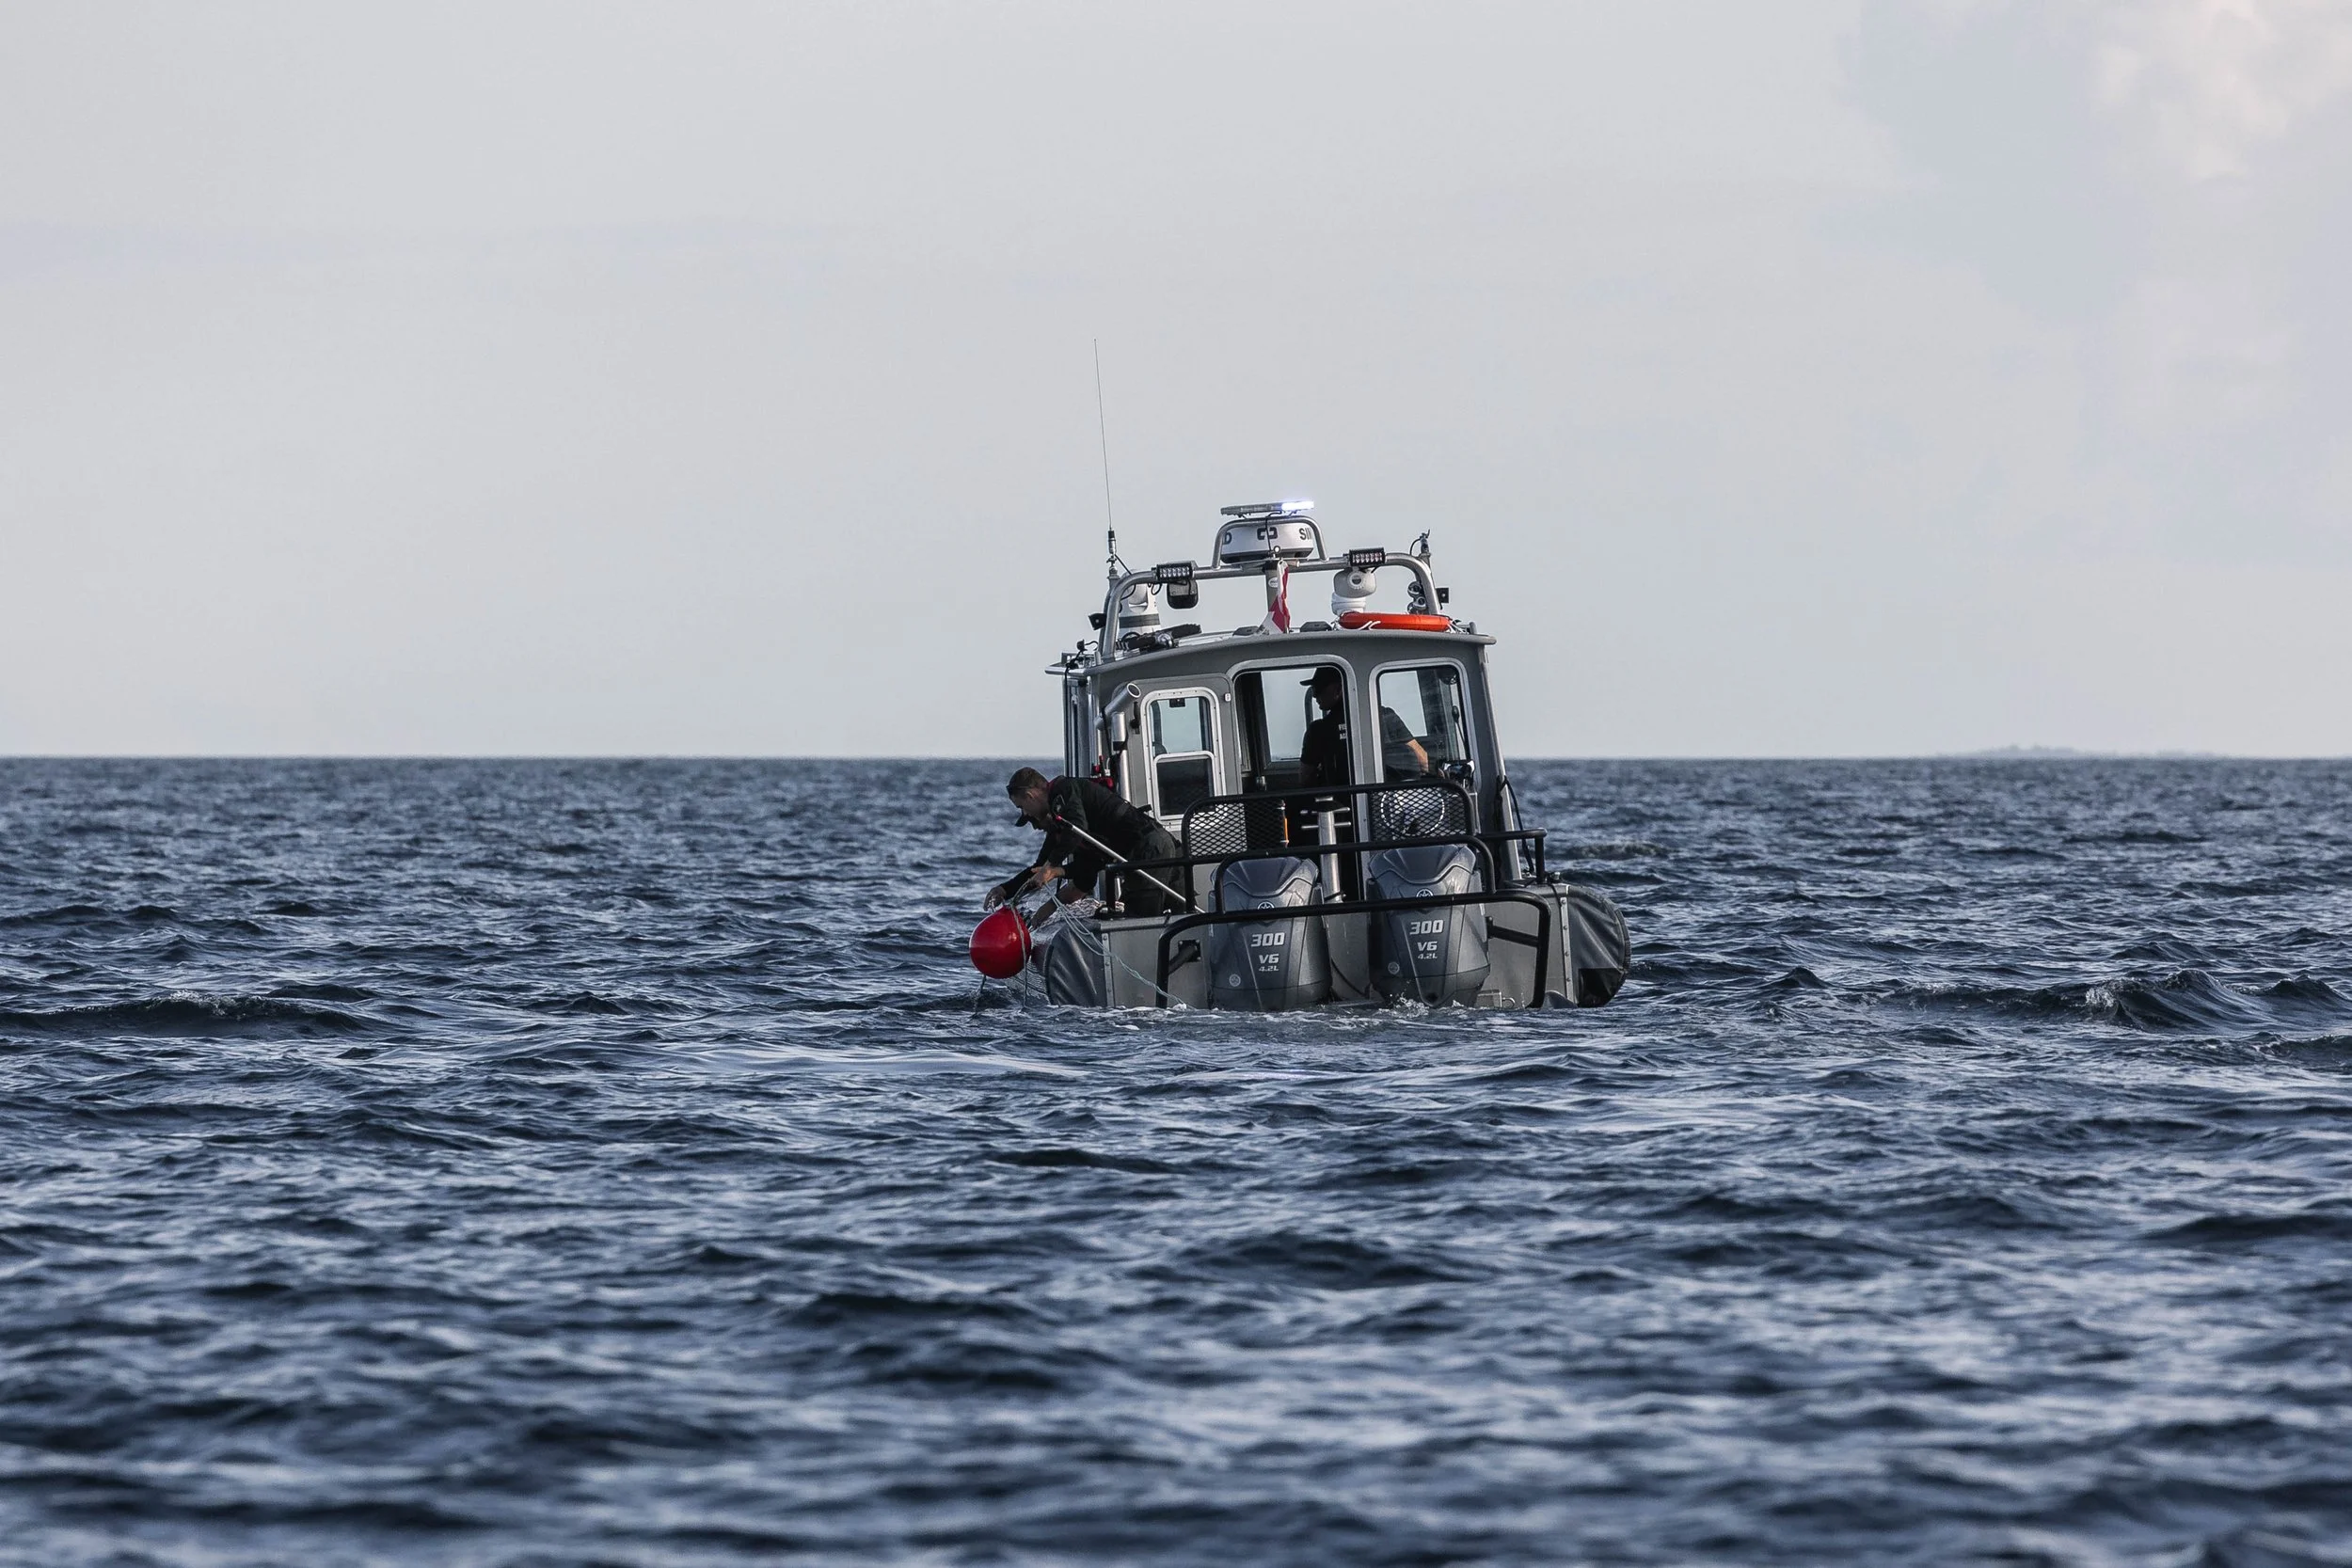
The crew assesing the line. Photo by Desarae Poier.
Crew attaching the Sattilite Tag to the line. Photo by Desarae Poier.

Photo by Tami Mullaly, taken from shore the day of the disentanglement